
| 1984 MURRAY STADIUM POWER MUSTANG II 20" MOWER And a bit of an introduction ninto my weird hobby of repairing/restoring/modifying vintage outdoor power equipment |
 Old lawn mowers and me go way back. So it's always been a bit of a habit of mine to grab any old junk, scrap, power mower I can find laying around off a street curb, and rebuild/repair/modify it. While to most people, my generation esepcially who never mows their own lawns, this seems highly ludicrious, even moreso since I don't even have a lawn to mow at the moment. But you see, something needs to take over where "model cars" left off, especially since restoring/repairing old lawn mowers now are cheaper than buying a 1/24 scale plastic model of an automobile you can't even use for anything.
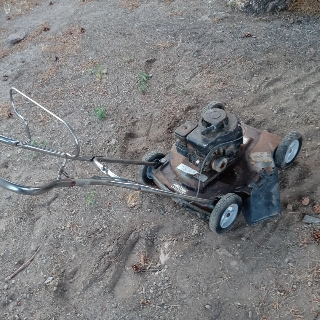
So it was the day we were taking delivery of my wife's new car from Carvana and I saw a handle sticking out of the dumping pile in the back corner of my apartment complex - which looked like a bunch of Uncle Pull-Tabs had been out there shooting the shit in disused furnature. After bringing the car home I decided, to get out of the house, to go observe what kind of lawn mower it was. Judging by the chrome handle, and it's odd shape, it eas definatley something from the very early 1980's - it had a dead-man control but had a shape suggesting that of a 1970's mower.
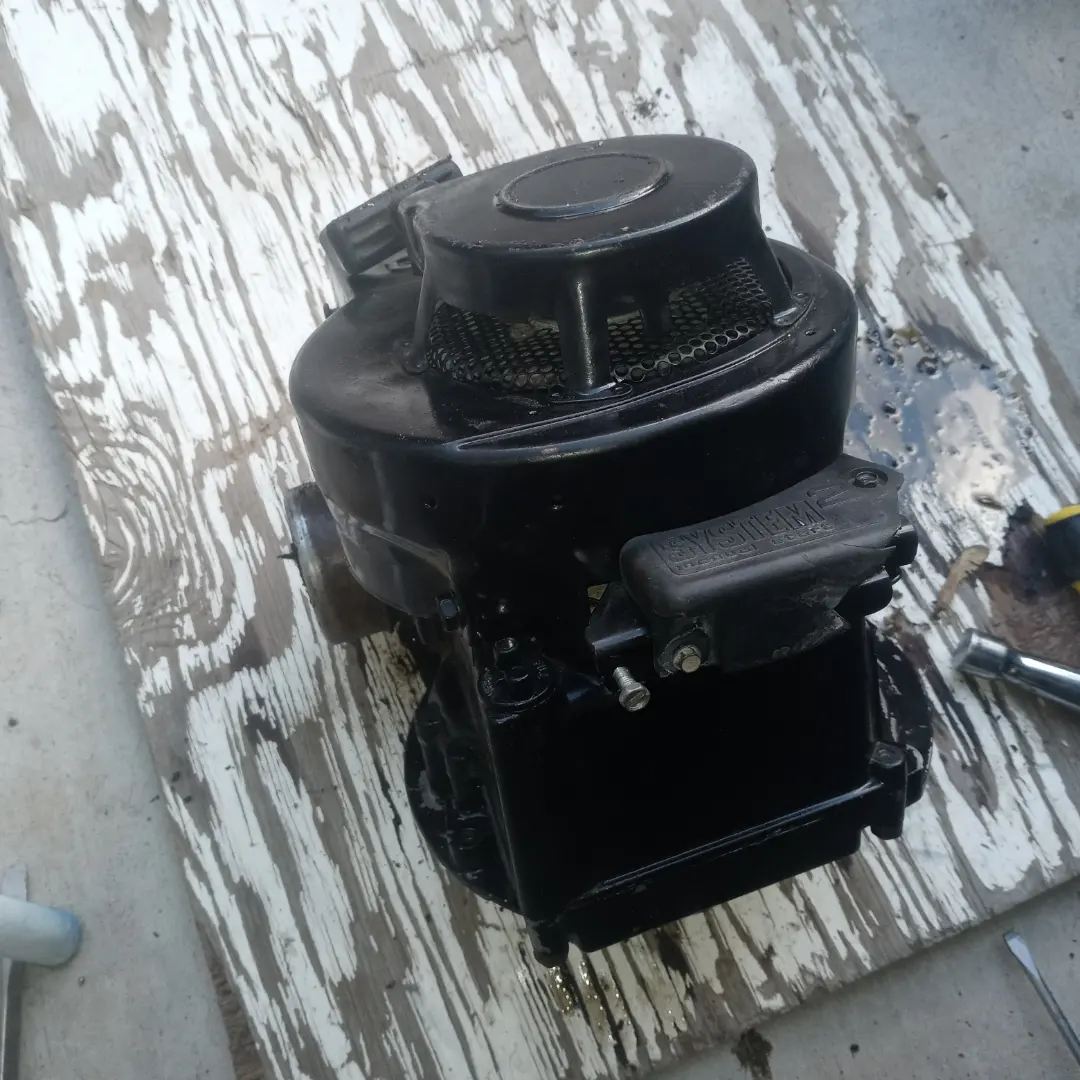
Whhen I first get an old mower, I try to find the model # and the engine model and year - which gives me a good idea on what year the mower was made, and a good idea of exactly what I'm dealing with, and if it's a parts frankenstein or not, or if it had a replaced engine. The engine was dated to be a 1984 Briggs & Stratton model 92502 - this would be 9 cubic inch (3.0-3.5HP), basic design series 2 (classic I believe), #'s 5-9 indicate a veritcal shaft engine (lawn mower style), plain bearing DU non-flange mount - as this is a non PTO equipped engine with the most basic lubrication system, and 2 means the classic ratchet rewind-starter we're still using today (8 would be the much loved "vertical pull" start that was popular during the Easy-Spin/early-Magnetron ignition period pre-1982). The date code put it as a Wisconsin (Racine) engine built in 1984. So the mower would be a 1984 at the newest - putting it at 38 years old (almost as old as me). The next part is the Model#, which I've completley decoded for MTD, but Murray is a little more tricky. Murray was originally a bicycle maker, and was called Murray Ohio Mfg company. Sometime in the mid-20th century they moved into lawn and garden equipment. Their mowers pre 1989 started with the model year digit, then a hyphen, then the deck width, and some kind of model series number I presume. The tag on this mower was literally f***ed, as nearly 40 years of exposure to the elements had faded and worn the numbers off the tag, to the point even what was stamped in could not even be easily read. What I'm guessing this mower is, is a 4-20xx(x) model. I think they went to 5 digits after the year instead of 4 in the 80's. And being an 84, this would make sense since it has the System 2 manual-start system (that plastic cover on the front of the engine the stop-bail connects to via cable), but it still has a Pre-82' Deck and Handle style. I did some digging and found out that Jack Nicklaus or Lee Travino - one of the NES golfing guys - were doing ads for Murray in the 1970's (though I doubt any groundskeeper would be using a Murray oon a golf course), and these ads showed mowers witht similar decks and handles - but "pre-compliance". I think I do vaguely remember a "Stadium Power" ad from around this time too for Murray, probably for this very machine. The Deck Style I've seen on older units including a red Murray in the exhaust modificationm guide on some DIY website, and more noticably, a "Green Acres" branded Murray from 1978 that we had at the horse stable my mom's horse was kept at as a kid. I think around 1986 or so is when Murray moved to the boxier decks with orange lettering most of us from my generation rememmber, which used opaque red paint and not candy-apple-red. Anyway, let's explain compliance and PRE-compliance. A "Pre-compliance" lawn mower is one built prior to 1982 that lacks any way of stopping the blade within 3 seconds when the operator releases the handle. These machines are identified as there is no "secondayr" handle bar you have to pull against the main handle bars to either start the machine (manual start) or engage the blades (Blade Brake Clutch system), the pull cord is usually on the engine itself, not mounted to the handle, and the deck will sometimes have a piece of skateboard style grip-tape on the non-discharge, flat side to put your foot on when starting the engine. Today, outside of Lawn-Boy and Toro, which are quite collectable, these machines are quite difficult to find as most of them have been scrapped by now both as they are extremely old, and by most people, considered quite dangerous to operate because the engine runs regardless of whether the user is holding the handle or not, and when the engine is running, so is the blade. In 1982, the Consumer Products Safety Commission - CPSC for short - made it MANDATORY that ALL walk-behind lawn mowers have some way of disabling the blades within 3 seconds of the user releasing the handle. There are two methods by which this is done: Manual-Start or Blade Brake/Clutch. The manual start system is the most economical, and most common. Basically, when you start the engine, the operator pulls a "engine stop bail", a smaller secondary handle, to the reguglar handle bars, and then pulls the cord to start the engine. When the user releases the handle bar, the handle opens, releasing a cable, that presses a spring loated normally-off switch on the engine cutting spark, while simultaniously releasing a brake of some kind against the flywheel to reduce the time to stop the engine to a time within the 3 second limit. 90% of what was sold from 1982 till today has this feature, and it's standard at this point pretty much. The Blade Brake/Clutch system - as the name implies - puts the Blade on a brake/clutch system, sort of like a combination of the brakes and clutch in your car. When teh handle is released, a brake secures the blade still while the engine and crankshaft are free to spin withotu the blade being engaged. When thehandle is pulled, the brake releases from teh blade, and inverts into a "Clutch" that grabs the crankshaft and the blades, engaging the blade to the crankshaft, and spinning it - so that when the handle is released, the "clutch" disengages and the "brake" function comes back and stops the blade within 3 seconds. Obviously this is a more complicated, and thusly more expensive assembly, hence why you don't see it too often anymore. But the beauty of it is if you need to move an obstacle - you don't have to restart the engine - you just tshut off the blades like a riding mower and move whateveryou need to move, and continue on. However, there is a chance this could have also not been as popular because it does allow unsafe behavior on other machines without (clearing clogs with the engine running, refueling when the engine running) which means someone who is only used to a Blade Brake mower might cut their hand off on a pre-compliance machine or start a fire with one by pouring gasoline onto the running engine (anyone who has refuled a Briggs Classic can attest how awkward getting gas into that tiny tank with a giant 2 gallon fuel can can be). So those may also contribute to the scarcity of a Blade Brake/Clutch system in modern times. After the intial inspection of the aesthetic physicals of the machine, we move on to how likely it is to be a runner, just like any gasoline powered machine you "find". Basically three primary, universal things: does the engine turn, does it have compression, and does it have spark? Without any of those things, you won't have a running engine, and it could deem whether this project will be cheap and easy, or if it's going to be, at best, you avoid it, or at worst, you decide to throw a chinese HArbor Freight engine on it. "does It Turn" is the FIRST question to ask. This rule applies to anything with an internal combustion engine, as it relies on rotational movement to carry out whatever action it's intended to do. In this case, spin a blade in circles at high speed to cut grass. The first thing to do before this test is disconnect the spark plug - because you don't know what state the mower is in. It could be in a "running" state and maybe was tossed because of governor/speed issues, which can be very dangerous. An over-speeding lawn mower can toss it's blade out from underneath as a piece of possibly large metal shrapnel. So ALWAYS disconnect the spark plug before testing an unknown mower for turning and compression. The Turn/Compression test is killing 2 birds with one stone - If you pull the cord, and the engine won't turn, it might be seized. If you pull the cord, and the engine turns with heavy resistance, it could have been starved of lubricant, or a starter problem, and might be worth looking into. IF you pull the cord and hear a "plomp plomp plomp" noise, and there's resistance only through part ofthe pull - congrats, you have compression and an engine that turns, time to check for spark. But if you pull it, there is no resistance, and/or you hear clanking noises or turning is not consistant, you could have a seized engine with a broken connecting rod to the piston - at that point, she's likely toast unless you are hep on small engine repairs (like I am). This mower turned with compression - it felt and sounded like a good Briggs classic should - so I knew it was healthy, but the recoil start did not go back in on it's own - but more on that later. The next is the spark test. To do this is easy, remove the spark plug, plug the spark plug wire in, then hold the spark plug to the blower housing of the engine, pull the cord, and WATCH - you should see a tiny little spark in tthe "Gap" of the spark plug, if it has that, and compression, and it turns - congrats - you have a working engine. At this point, your worst issue might be a carburator. This is where I'm at with this mower engine wise. Typically the most hardy engines seem to be these 4-stroke Briggs engines. So here's a quick explanation of 4-stroke, and 2-stroke. A 2-stroke engine, such as those found on string trimmers, hedge clippers, chainsaws, and some lawn mowers (Lawn-Boy, and stuff run by a Tecumseh TVXL series engine usually, or that weird version of the Briggs Max the Snapper from Honey I Shrunk the Kids had) - means that it uses 2 complete revolutions to work. There's an "intake stroke" and an "exhaust stroke".
The benefit of a 2-stroke engine is it has a much simpler design, less power loss from having to drive a pair of valves + a camshaft, and a lubrication system, and it gets it's lubrication from a "premix" - mixing the oil and gas together in a specific ratio usually listed on the gas cap. The disadvantage iis the operator needs to be awarer that they NEED to add oil to the gasoline (premix), and in the right ratio as it either will cause the engine to stave for lubrication, damaging and possibly ruining the engine, or will too much oil will cause the engine to smoke and generate more pollution. That's another downside to the 2-stroke is pollution. Usually when you start an old Lawn-Boy or Tecumseh TVXL powered mower - it will smoke a little bit at first as the oil heats up and starts lubricating the motor. They also smoke quite a bit because they do burn some oil, all the time. A 4-stroke engine is like those found on most Briggs & Stratton, Tecumseh, and other powered lawn and garden equipment, as well as the engine found in your ICE car or plug-in-hybrid. It has 4 strokes to complete a "cycle" - intake, compression, combustion, exhaust. Basically, the carburator mixes fuel and air, then the intake valve opens, the fuel/air mixture enters into the piston chamber and is compressed, combustion occurs when the spark is generated to the spark plug and causes the compressed mixxture to explode (combustion), then pushing the cylinder down, opening the exhast valve, sending exhaust out of the muffler - and the cycle repeats. 4-strokes require a separate oil supply - just like your car - and the gasoline also remains separate. So just like your car, when it empties, you just pour PURE gas into the gas tank without any oil, and you check the oil level using a dipstick, or on some really early Briggs engines, just by opening the filler hole and making sure it has oil in it. This Murray has a 4-stroke engine. 4-stroke engine exmaples include Briggs Vertical Pull, Briggs Classic, Briggs Max, Briggs Quantum (both versions), Briggs Quattro, Briggs Vanguard, Briggs OHV, Tecumseh, and the rebranded Tecumseh's known as "Eager-1" built for Sears Craftsman machines. These engines run cleaner, are quieter, but can develop some of the same issues a car engine can because it has a lubrication system, valvetrain, and a more complex overall mechanical setup. So at that point, here's where I stood. Here we have a late-model 70's style hardware equipped post-compliance Murray lawn mower with what basically can be called a "Briggs & STratton Classic" engine. It's 20" cut, it has compression, spark, and an engine that turns properly. Only issues are rust, 2 missing wheels, a rusty blade at risk of becoming shrapnel if it's started due to rusting apart on the sides. Overally, all it will need is new wheels, some paint, and given a previous owner only gave it about 4" of pull cord when properly mounted, a new pull cord (and I'll put an original Briggs-style handle on it too). That totals out to about $30 in parts, less if I choose cheap, generaic replacements.
Tread really does not matter. Lawn-Boy's classiclaly had no tread, the diamond-tread was the most popular on almost everything, "Waffle Tread" was an MTD thing for the front or all fours in the 70's and early 80s. THe only tread that will matter, is when you have a direct-PTO-drive lawn mower with the large bar that drops onto the wheels for self-propulsion - then you need the horizontal tread "Drive wheels" which only come in 8". Wheels come in 2 types - Ball Bearing and Molded PVC. Molded PVC wheels are the cheapest, and the most common. Ball Bearing wheels have a pair of ball bearings the wheel rides on to make it smoother to move, but they add weight. Sometimes PVC wheels come with ball bearings, but most of the time they don't. As for me, I did some pricing out on wheels and found some diamond-tread 8" gray PVC wheels from Harbor Freight were the best bet at $6 apiece. I found Harbour Freight had the best deals around since most other places were averaging $9-15 apliece for wheels while Harbour Freight as $5-10. Which brings me to the next part of the problem with working on old machines like this - RUSTY BOLTS. This was the first time I had some REAL trouble with rusty bolts. FIrst off, the front two wheels needed brand new wheel bolts because the original bolts broke when I was attempting to unbolt them from the front of the mower. So I had to go buy 2 new Arnold replacement wheel bolts for about $4. But the killer was the engine mountingn bolts. A Briggs & Stratton engine typically uses three bolts on the bottom of the deck to install, two near the front, and one in the back under the Carburator. The big problem with this is they are STEEL bolts in an ALUMINUM crankcase. So the bolts tend to corrode and rust in place. This causes them to be very prone to being stuck, and lead to a bunch of experiments I'm still currently carrying out as I started this writing. The first thing I tried was to grab the last bit of the bolt with vice grips, then turn them out. They were very stuck in there and I could not get a good grip on them. I tried vice grips as well, that did not work either. Just not enough "grab". The next attempt was to use a left-handed drill bit or easy-out to remove. I started by drilling in with a right handed drill bit and then tried using various bits, easy outs, and whatnot, to extract the bolts from the TOP of the chassis. This did not at all work. the bolts are just too tight. The next try will involve carbide bits, PB Blaster, and some patience. Basically, use penatrating spray to eat away at the galled up threads, then drill a hole through the bolt in progressively larger sizes while lubing them. Once the hole is large enough, I can use my easy-outs or better yet, I can just saw through the rest of the bolt on one side, and then pry the bolt free from the sides - making it just fall out. I'm going to try and preserve the threads, but if I can't, I can always use some jam nuts and just bolt through to the bottom of the deck with jam-nuts/washers on both the bolt and nut ends to make sure the engine stays still. Likely I would do this by running the bolts through the bottom, that way then, at worst, if they rust ini place and I decide to replace the engine, or do a electric conversion, I can just unbolt from the fairly clean top of the engine, and then have three "studs" for the motor to mount to. 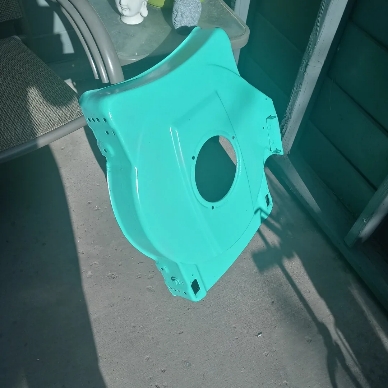
Meanwhile, the deck is recieving a brand new paint job. I'm starting with flat foam green rustoleum as the base coat, then masking it off and painting the remainder something close to the original metallic blue color with some special graphics work. This is in keeping with the "Mustang" branding, as Fender Mustangs came in Metallic Blue with a racing stripe (Fender Competition Mustang - like the guitar Kurt Cobain had in the Smells Like Teen Spirit video), and Ford Mustangs came with racing stripes, such as Carol Shelby's various racing Mustangs from the 60's. So that's what I'm going for is a hot-rodded Mustang-type design. I was also thinking of adopting some deck graphics similar to what MTD and AYP were using for some of their stuff at the time. The flat paint will give it a look similar to silkscreened deck graphics, but with bbetter durability. After that, I'm putting a bunch of clearcoat over the top of the deck and polishing it up. Once the metalwork is done and painting is a little further along, I have two parts to order off e-bay - an original Briggs & Stratton pull cord w/ 72" of #2 rope, and a generic orange/black throttle lever to replace the broken aftermarket one the previous owner installed - and will allow it to replace a bent bolt that holds the stop-bar retainer piece to the handle at the same time. I will fabricate my own mounting clip for the throttle control that will hold it securely allowing me to control the throttle from the handle. Then I will buy a new 20" blade from somewhere and install that. Possibly the biggest PITA of this whole project are those bloody engine bolts. Basically, worst scenario ever, steel engine bolts on the bottom of a surface-rusted deck bolted into an aluminum Briggs 9 series engine mounting holes. Did they gall up in there? Is it corrosion and rust? Well, I've been trying a LOT of different things to get those f*@#ing bolts out (or what's left of them as the heads sheared off).
At this point, what I'm thinking I might have to do is put the engine on 2 boards, and just drill those bolts out from the top, slowly, then break them loose with the easy outs and a spanner. Another idea I have is to use my coping saw with a metal blade and cut the drilled-through bolt on one side, and then CURL it in on itself to break it free from the threads, and then drop it out. Last resort will be just drilling the whole bolt out, then replacing the threaded bolts with bolts going through the deck and the block, held on by nuts and lock washers on both sides to prevent movement and assure the bolts don't loosen under vibration. 7/8/2022 - The new oil-sump/oil-pan for the engine has been ordered. About a month ago I hacksawed the aluminum bolt holes when trying enough PB Blaster to kill an entire nest of hornets and found out I was not going to get those bolts out of those enginee block holes even if I had an impact wrench. The aluminum was so galled up and corroded, and the bolts were so rusted getting them out was an impossiblity, actually, even with 1/4th of the threads left the bolts STILL would not come out of the block. So now, up until when I caught COVID (god what a hellhole that was), I was soaking the blade adapter in PB Blaster so I can remove that (need a gear puller). What I'm going to do is remove the blade adapter, then replace the entire oil sump with a used one from another 92502 engine. While that's going on, I'll probably walk to Lowes and get some metallic blue paint and start the repaint of the deck to the "fender Mustang" motif. But before I do that, I'm going to need to use masking tape. I'm thinking of a pretty elaborate, almost show-car like scheme that mixes the MTD/Monkey Wards "Vacuum Action Close Trim" decals of the 1970's, with racing stripes at the front and back. After that's all laid out (which will look inverse given the tape I'm using), I'll rattle can it metallic blue, remove the masking tape, then re-coat in high gloss clearcoat and do some polishing so it looks nice and shiny. By then I should also have the engine done and the new sump installed so I can rattlecan the rest of the blue on it.
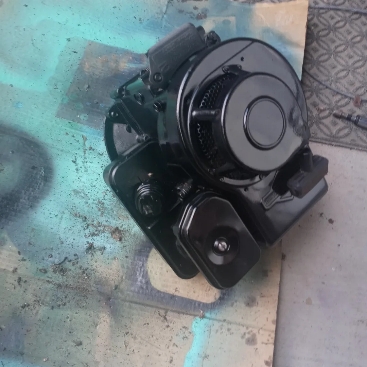
The blade adapter was also sanded, the key cleaned up, and it all presses snugly back together now like factory new. Nice. This is why I enjoy doing this stuff. Also, the 92502 Sump I got off of e-bay is in factory new condition almost so it won't need much paint to pretty er' up a bit.
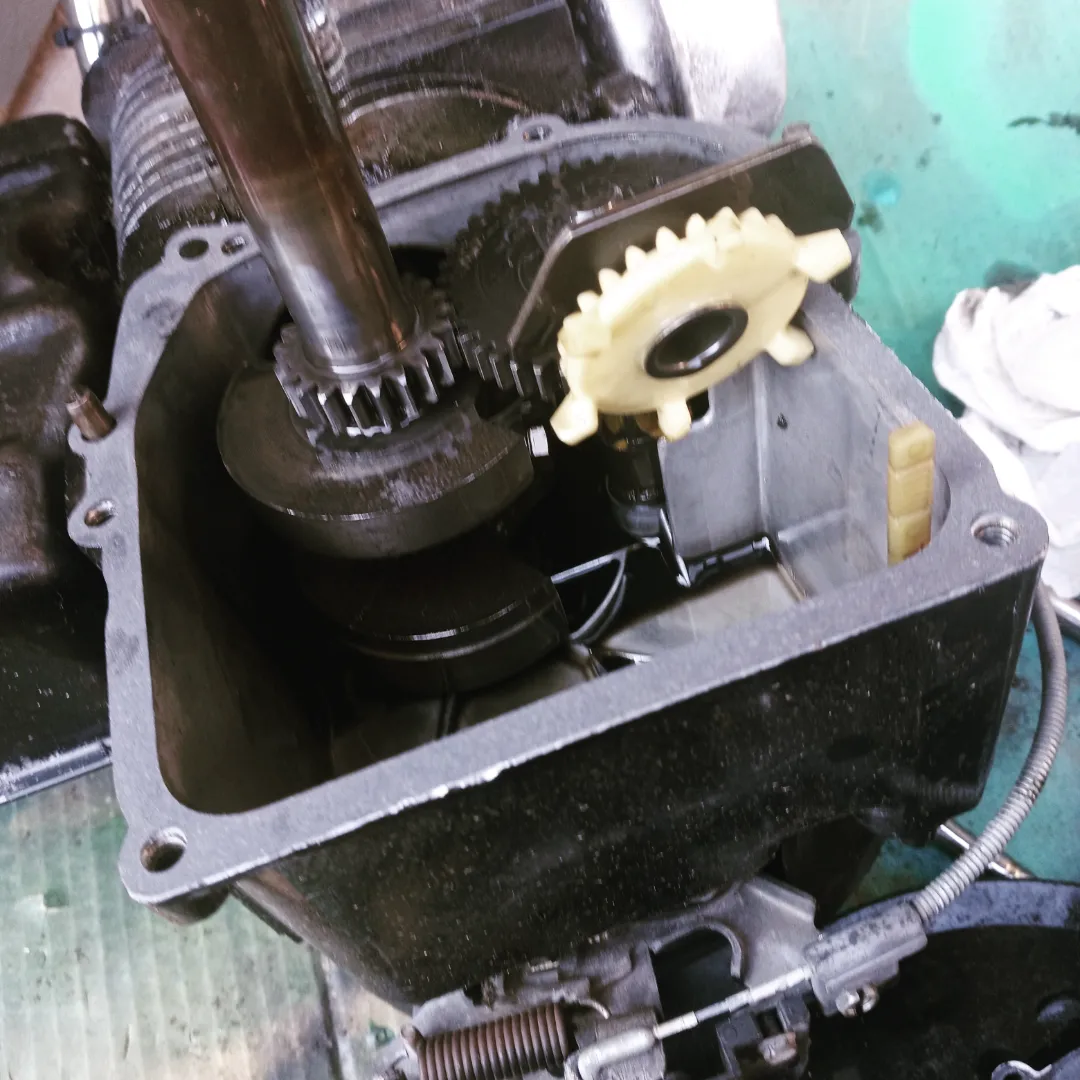
So here's how a Classic with the widdle Vacujet carb goes together. The short end of the linkage with the loop goes through the governor blade like one of your wife's earrings with the curlycue attachment in lieu of the little rubber lined things that go onto a straight pin. The governor is the earlobe, the little hook is the earring - think of it like that. The other end that is shaped like a straightened out "Z" goes into the choke lever - that little hand shaped thing on top of the carburator - and the spring is supposed to be free to move on it's own without rubbing on anything. Reinstalling the gas tank was easy (as usual), as was the bolts. So now the engine is back in one piece. I realized too late though I forgot to put a gasket on the oil sump, so I might need to revisit that at some point, though I have heard of Brigg's going the mile with no/bad gaskets before. But of course I'll do this right - OCD runs in my family apparently. Probably won't be worth a post since it's so easy to do. That said, I think I'm going to forego to the metallic blue paint and keep this one Turquoise. With the gray wheels and the black engine, with chrome handlebars, I really like the look. Maybe I should make new decals - "CreepingNet Lunatic Power Jag-Stang 20", LOL. totally fitting because only a lunatic like myself would pull a lawn mower from a junk pile whilstt living in an Apartment, and then restore it with no lawn to mow. 8/22/2022 - F@#* I Forgot the GasketIt all goes sideways from here. Deck got oil and dirt on it, rattle canned in clearcoat. The thing still looks cool, but I really should have taken time to flatten out the metal more - maybe that's something I'll do in the future. Found out that the oil was now dripping out of the crankcase because I forgot the @$% gasket! Anyway, not like it really matters - just means I can extend this page should I ever manage to get on a property where I can get a proper spray booth. Of course, a lot of my issues were because it was 104 outside, and I have not felt well in months since I got over and recovered from COVID-19 in June, and add onto it oodles of stress and having not slept well (I had to get up for work at 4am because f$cking Micro$oft Windows update took down some vital shit - good $$ though). I have about 2/3rds of the CDC's symptoms for "Long Covid" and it F*#@ing sucks a$$! Look, if you are working on a project and not hurling enough swear words to make a sailor blush - you're not doing it right! I've begun to notice as I approach the age of 40, that the more I cuss, the better things turn out. That said the bolts I used are PERFECT. They screw right in, perfectly threaded, and nice and tight. I used Grade 8 3/8x1.5" bolts with a bit coarser thread, and used the original deck lock washers. That B&S 92502 is nicely planted to that mower deck. I got the bottom handlebars on too again - on this mower it's a PAIN to pull off because one side is longer than the other. It looks like whoever had this last loved it enough (or at least was so desparate to keep it going) to drill holes in the deck and add $12 in mild steel for more support for the handle bars and a new rear safety flap (which looks cool and mad-max-ish). The top handlebars....however, had bent bolts that were rusted and f***ed so much with the threads that I'm just going to go to Hobo Freight and buy a bulk pack of smaller screws/bolts/nuts for everything. That way I can put this mower together to be a brick s$%*house. I have "built" 2-3 lawn mowers in my life ala EVH Frankenstrat guitar, and all of them were excellent machines in execution. For some reason, the Frankenmowers are always "Murrays". This one is going to be my magnum opus. The only way it could be better is with down-tuned Lawn-Boy D-series engine on it - steel deck + D-series at 2800RPM = cut through rebar and plumb stumps like a beast without cracking the deck! God I miss my old Lawn-Boy 8125 4-square hot-rod. One heck of a voracious omnivore that thing was. Well....true opus would be a Lawn-Boy D-Series, + the Transmission, and a set of those ball bearing MTD wheels with the striped hubcaps from the mid-70's-late-80's - all "gear" tread of course so I can plow through western sagebrush up the side of a desert mountain like it's nothing with a setup like that. 09/03/2022 - Nearing Completion
I chucked the old blade, it was a laceration hazard with the rust that ate through it and left 2 little wing-tips on each side, ready to shoot off at 4000RPM while I'm tearing through some tall grass once I get some property. So no blade. I also touched up the engine block a bit with rattle can black. I also did black detail paint on some of the metal assemblies like the "C" clip for the stop bail, the pullcord mount on the handle, and the "shocks" for the handle bar the previous owner created (I also hand painted the bolts with a Sharpie black enamel pen). So now the whole thing looks like a Factory Turquoise lawn mower with black and gray acoutrimonts and a chrome handle. It looks pretty cool - kind of vintage/modern combo - very my style. Of course, I'm finding it hard to resist pulling on the cord every once in awhile, compression is still good, engine is still lubed, kicks back very little considering there's no blade on it (Lawn mowers REQUIRE A blade installed for a pre-load on the engine to prevent kicking back). No weird noises, clunks, or whatnot from the valvetrain, however, little surprise considering the entire engine was clean enough to eat off of (except the oil) when I pulled the oil pan. So overall, I'm a tad excited to see this mean ol' 3.5 run, since it's just a sound and an engine with a overall quality vibe you just don't get from modern mower engines. Also, those old 3.5s with the Vacu-Jet carbs were REALLY easy on gas....I'm talking I could do a 1/4 acre on one tank, and they ran really clean when properly adjusted. I just need to get the gasket on and I'll consider the Engine 100% ready to go. So all that's left is the "details". I need to fabricate a new "toe guard" for the back. Look, I know it's silly considering that's a CPSC thing, but I like my rebuilds to be 100% in compliance with the year when they were made. Ditto the chute deflector which somehow I lost the pin for the spring....so I'll get or fabricate a new one. I'm also replacing the pullcord and handle with official Briggs & Stratton part# 5054 - a N.O.S. one from the 80's so it matches like when the Murray was new. Then the cherry on top is a 1984 CPSC sticker, a Deck "Caution Keep Hands and Feet Away" replacement sticker, and I'm putting a FORD Mustang decal on the front of it - the Mustang horse with the Red/White/Blue. Since it is a 1965 Mustang color, and it's a 84' Mustang (technically), might as well carry on the Mustang theme. I'm also replacing the throttle lever with a orange handle unit from E-bay, and a proper clip, so that I can adjust the throttle - and save on gas. 6-2001Ax58 9/8/2022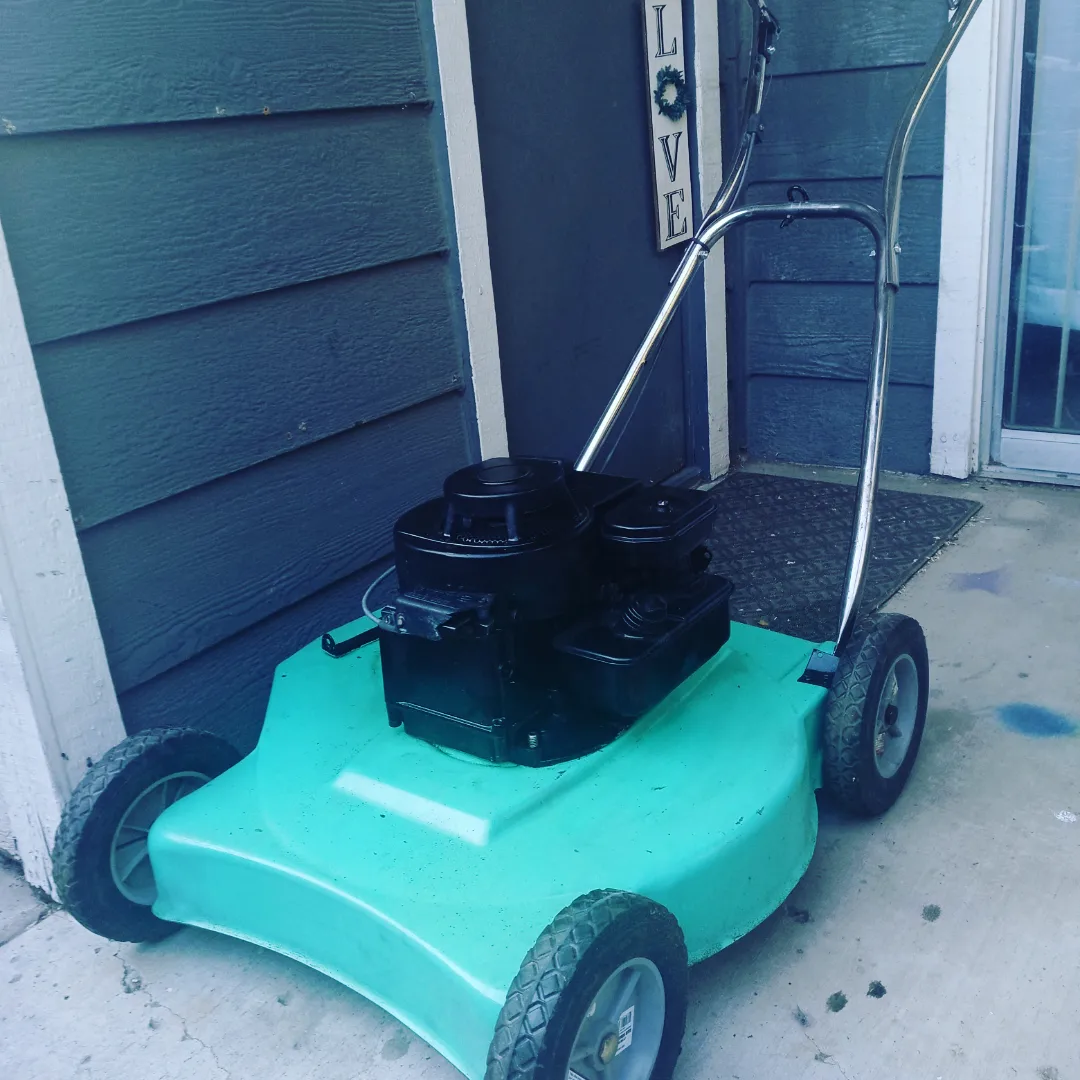
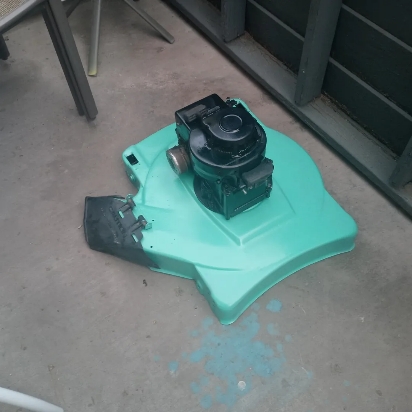
 Replaced that bloody gasket, this thing is looking rather nice now, nice stance. Kind of cool to see a Lawn Mower with a NCR/AT&T Laptop Color Scheme, LOL Finally felt okay-ish enough to put the oil-pan gasket on, so now I can officially say that the engine is good to go other than oil change, air filter, and a new blade. So now I don't get a grid-of-streaks of SAE B&S Motor oil down the deck when I tilt the mower anymore. Nice fix for $7.99. I can't believe I forgot this bit. Mext Items to Get
So for around $60 total est., I restored a free lawn mower that would cost me $152.99 at Wal-Mart brand new in 2022, and the new version would be built to a lower standard, have a crappier, thinner deck, more unreliable and cantankerous Briggs & Stratton engine with a plastic carburator that breaks every few years, and no throttle - so it can't "sip" gas when needed (yeah Millennials, my 1984 Murray is more "green" than your brand new 6.5HP Intek 4wd Self Propelled Maintainance nightmare - because I can drop the engine to low-idle and tear through the light stuff while the mower takes 1/4ml of gasoline per hour). While on this one, the handle is solid, the deck is THICK and HARD, with only mild surface rust, the old Briggs 92502 engine is the classic, bulletproof engine that made Briggs & Stratton a household name with a Pulsa-Jet automatic choke carb that you just tilt the thing and it's one-pull every time. 05/12/2023: It's Been Awhile So I might actually be getting the gumption to finish this project up soon, and there's a good reason why. I might end up in a rental house with a lawn - this means, I have a perfectly good reason to have a lawn mower. All that is left to get it going is a blade, some new oil, and I think I may have a tincture enough gasoline to actually do a test start in the Apartment parking lot before we move. I'm going to see a house this weekend. Hopefully it'll work out. |
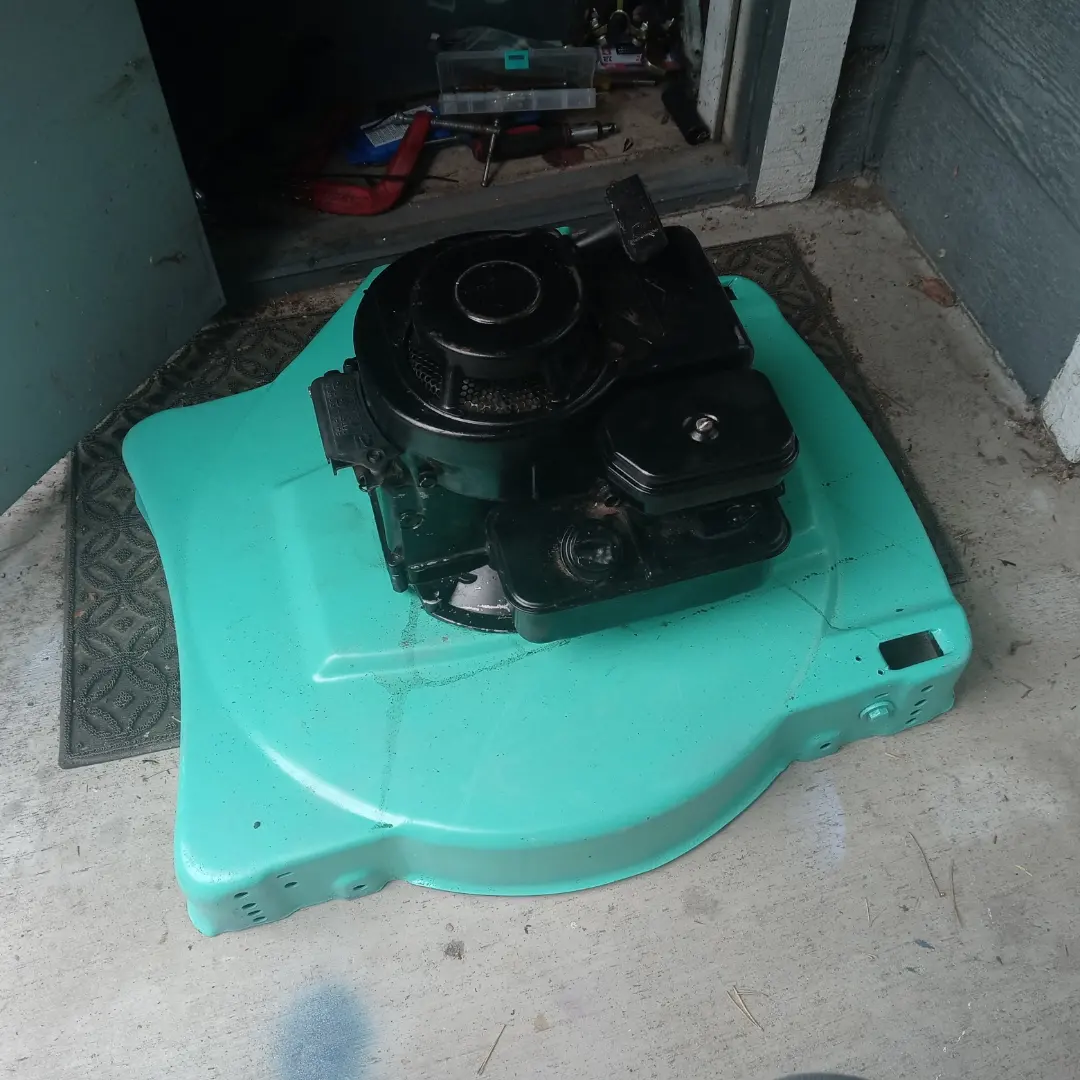
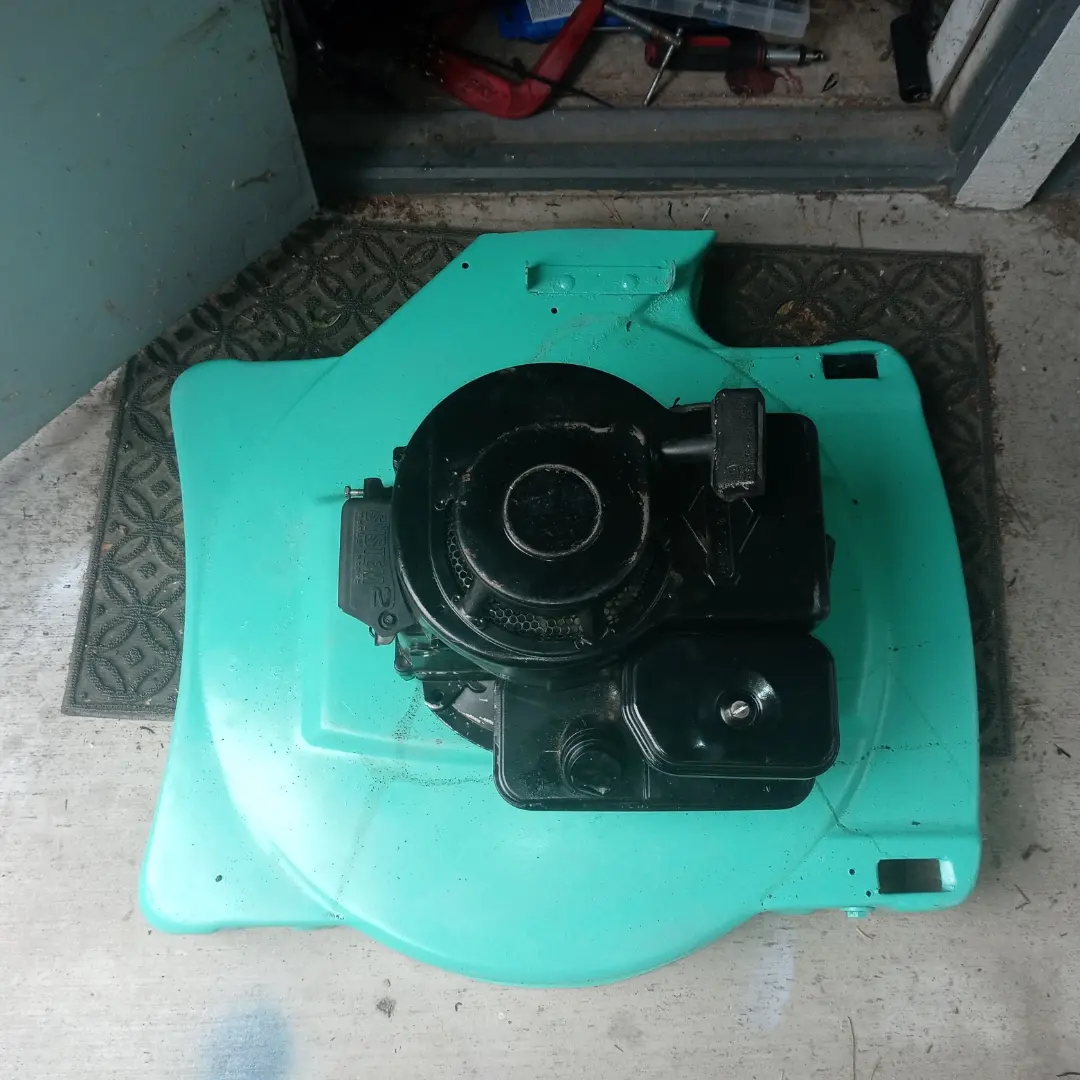
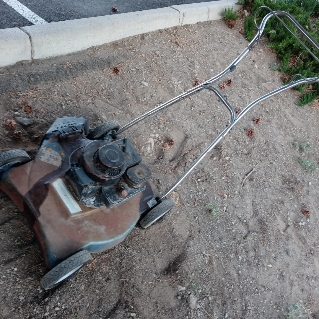
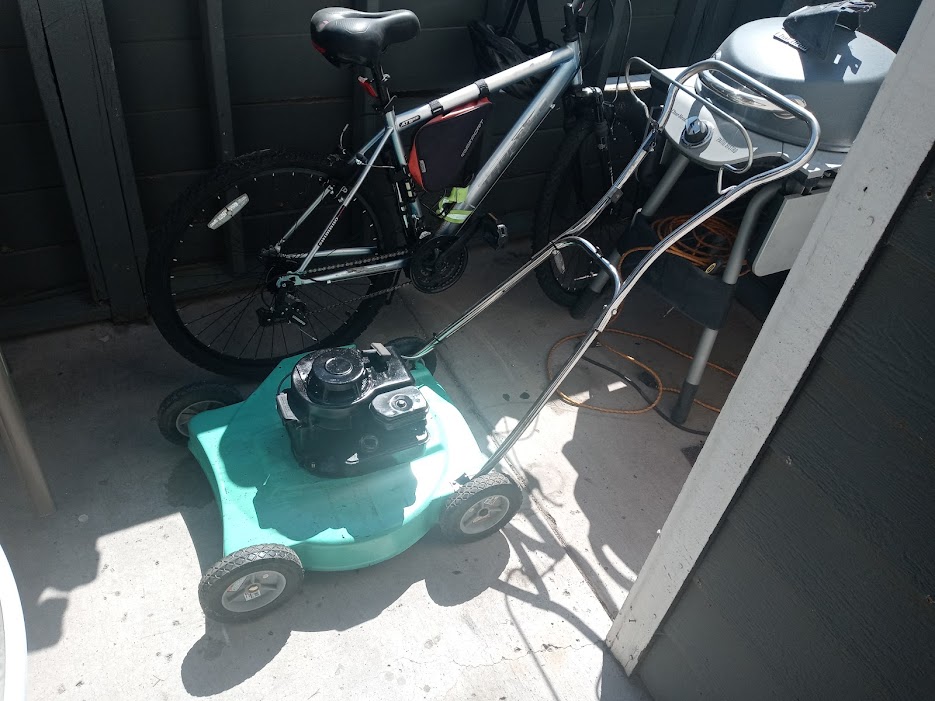
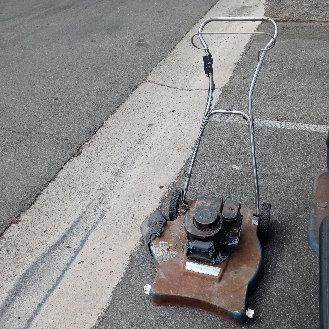 So I came over and pulled it out, what we had here was a Murray "Stadium Power Mustang II" lawn mower. Despite being a Murray, it was metallic blue, Murrays are usually red and very conservative with naming and badging - usually just saying "Murray 20" or "Murray 22" not something that sounds like a car name. The two front wheels were broken, they were 8" wheels, very odd for a 20" lawn mower (usually 20" have 7" wheels, 6" in some cases), and it had a Briggs & Stratton - what would later be referred to as the "classic" engine - with recoil start, a Choke-a-matic carb and foam filter element. It was obvious the pull cord had been replaced, and the previous owner had done a bunch of metal-work to the chassis. It also had a lot of rust - not too rurprising, as this mower was at least 37 years old. So I wheeled it home.
 Now let's talk wheels. Most vintage lawn mowers came with one wheel size, all the way around (the exceptions being Lawn-Boy, Snapper, and some Toro machines - usually). The smallest wheel size - 6", was usually reserved for 18" and 19" cut machines, which are hard-to-find deck widths. Among the last of these were the Sycamore 19', last made around 1989, and the Southland/Vulcan 18" which was made up until 1997. So that rules those out. 7" wheels would be the most apropriate because that's what most 20" mowers sold with standard, including the classic 20" cut 3.x HP Murray like this one, but this one had 8" wheels on it (!!). Then there's 8" wheels which were used mostly on 21" and 22" mowers, usually 22", or self-propelled machines. Bigger sizes were sometimes used in the back like 9" or 10". Lawn Boy's usually had 6" in the front and 8" in the back. Snapper 7" in front and 10" in back. MTD made some self-propelled mowers with 8" wheels all around that look deceptively smaller because they had "drive tread" in back and "waffle" tread in front.
 8/8/2022 - During the weekend before this I ordered up a set of 3 gear pullers from Amazon.com, which I got a $30 gift card from my old co-worker Laurie as she lost her phone at work and I came over on Saturday to help her out in finding it (thanks). Anyway, they came in the following mondayof August 8th, so after work, against better judgement, just before laundry day no less, I decided it was a great time to pull that blade adapter from the mower.
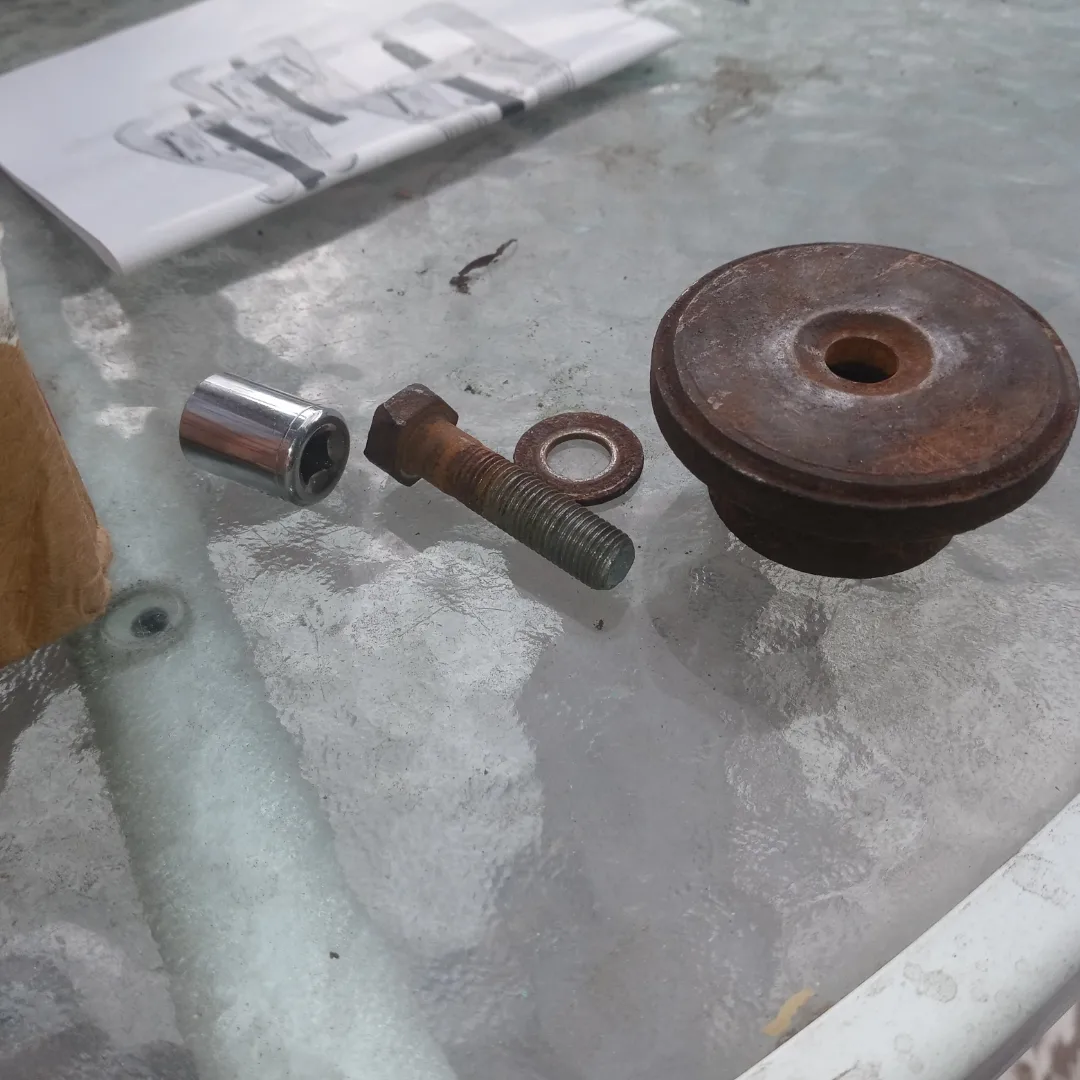 Just letting you know, this is not my first time to the gear-puller-blade-adapter rodeo. I cut my teeth with a family friend - Larry, when I was about 12 or so, we had to do this to our old and prior-to-cantankerous old 1984 Lawn-Boy 8125p that he kinda' showed me the ropes on (also the same Larry that gave me that Motherboard for Creeping Net 1). So I spent about 30 minutes carefully using the second smallest Gear Puller to pull that blade adapter off the rusty crankshaft, using a 1/4" drive socket wrench, and my super-long flathead (same one I use for knocking the brake slider pins out on the Explorer with) as a brace to lock the crankshaft still. It came off with zero drama and at about the 1/2 way point it started just sliding off comfortably enough to do the rest with my fingers...kind of insane considering this is a nearly 40 year old lawn mower.
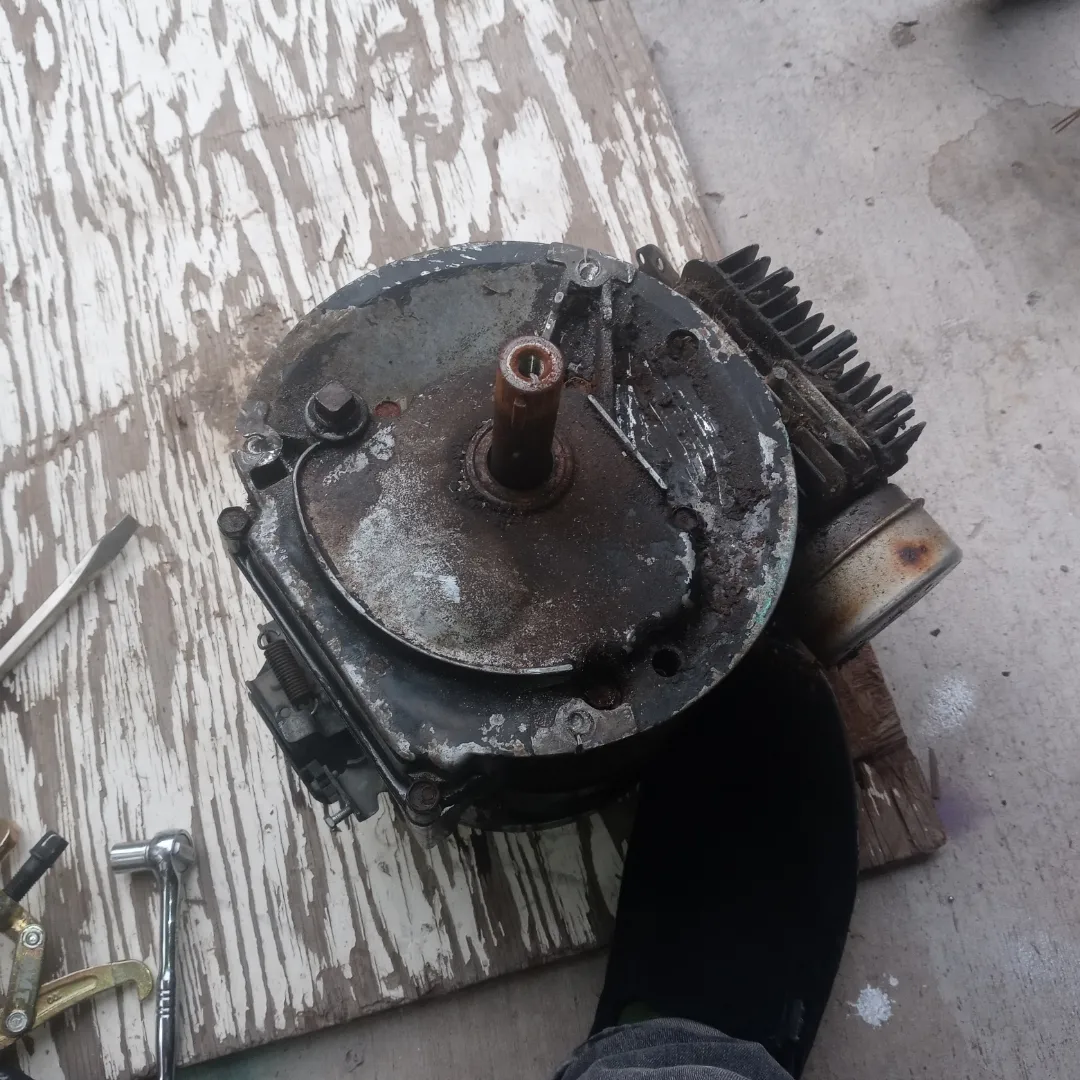
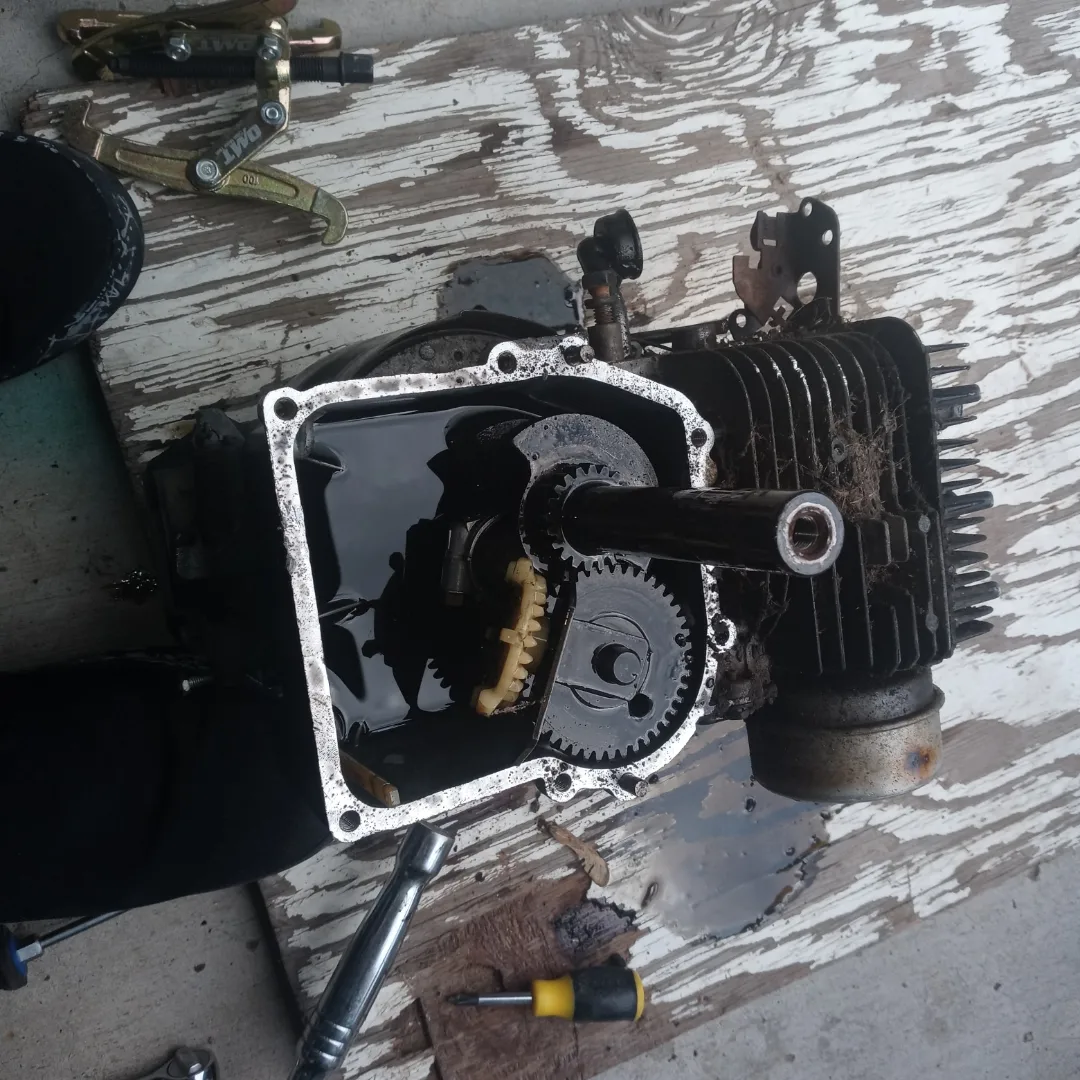 Once the crankshaft was off, I had to pull six bolts from the bottom of the engine, then found that I needed to sand the crankshaft to put the new one on without damaging the oil seals. So I closed er' back up and did a nice rundown of 800 grit and the bottom sump came right off. Turns out just about this entire mower is covered in just light surface rust. So she's got some years left. It also revealed that this thing does, indeed, need a pretty bad oil change. So some Briggs proper SAE wil be put in it once I'm done assembling the machine and have a lawn to test it out on.
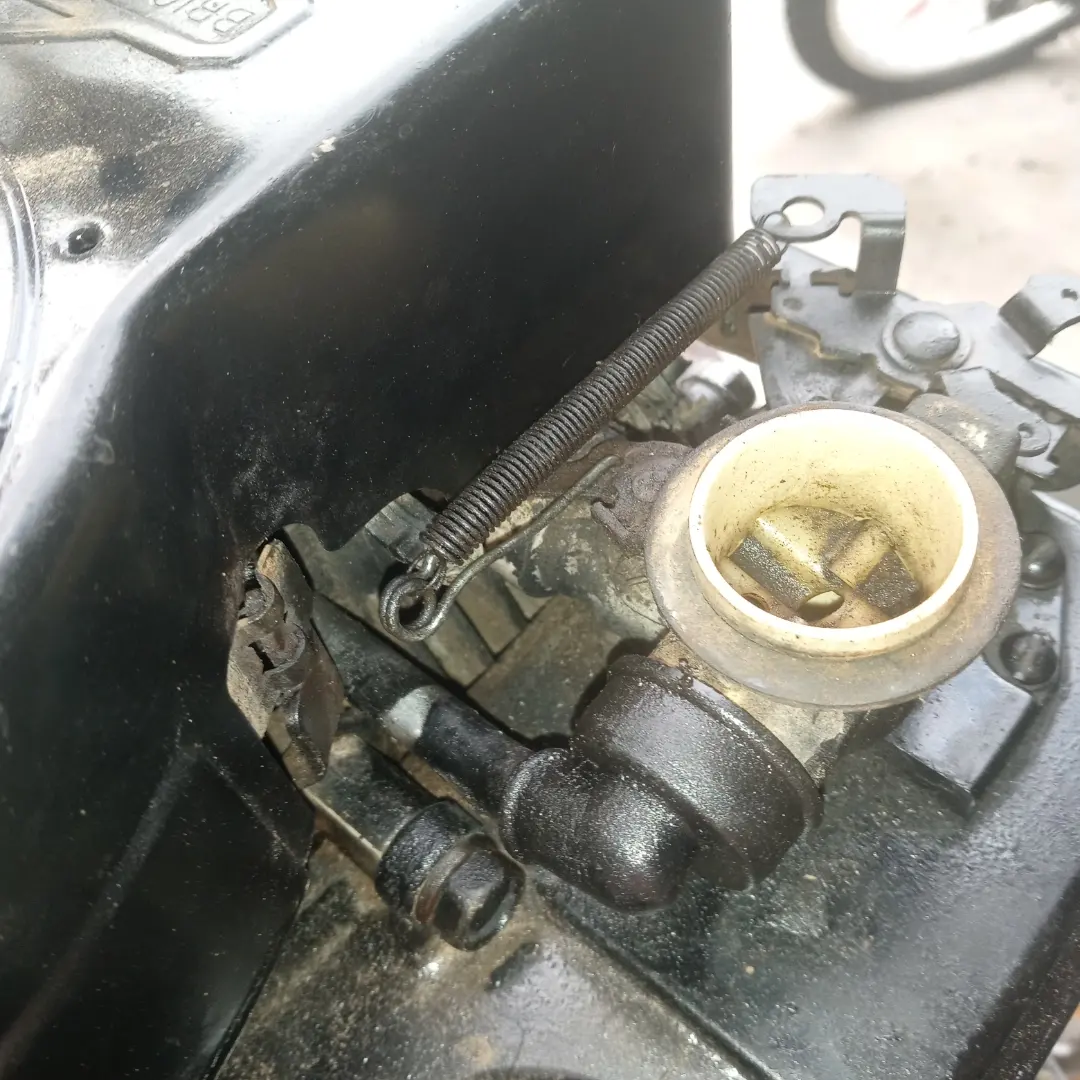 Possibly the biggest PITA was the Carburator linkage. See, I'm HARDCORE about my carb linkage being factory. I know a lot of people love to over-rev these old Briggs motors either to show off or try and chunk 4-foot high saplings with a 3.5HP 20" cut mower like this one, but the problem with doing that on a lawn mower is you might be missing your foot at some point as these things were never designed to whir a metal bar around past a certain speed, and that metal bar is not designed to do that kind of job. And honestly, as one whose been so stupid (same Lawn-Boy 8125p which took out revenge for my Southland 20" on the plumb stump that took out the few hour's old mower's crankshaft when I was 9), it was because that Lawn-Boy had LOW speed and HIGH torque that it could rip through a piece of re-bar or a plumb stump, not high speed low-torque. Remember, there's a reason that a V6 Mustang is used for Racing and a V6 Explorer is used for towing - That Explorer ain't winning any races, and that Mustang ain't towing any fishing boats! Same rule applies to anything else with an engine on it.
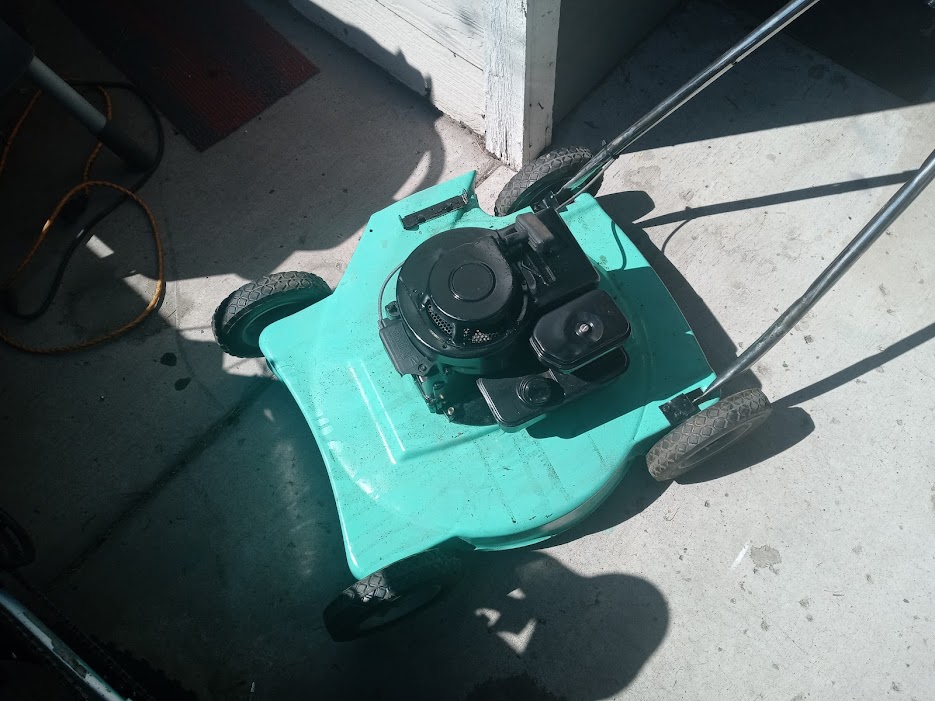 Honestly, Summer 2022 has been the utmost f***ery. I've still been coughing up phlegm since June and no end in sight....but I'm sick and tired of sitting on my ass in the house, even when we have a 105 degree heatwave outside. Anyway, the mower is nearing completion. I decided to keep it turquoise and put some clearcoat on it to protect it. I might be getting decals later, but we'll wait on that for now. Anyway, the TLDR is that the Murray now is (mostly) in one piece now. The engine has new grade 8 bolts holding it to the deck, the new wheels are back on, the decks got some rustoleum protection underneath, the handle is on, the stop bail is reconnected - we pretty much have a working lawn mower now.....that looks "nice" for the most part....but there are DETAILS now to work on.
 Installing the engine to the deck was easy enough and I lucked out and had the correct threads since I forgot to bring the bloody sump with me when I wanted to get bolts for it. However, I forgot to check the gasket and had already thrown out the old broken sump before seeing if I could salvage the original Gasket (which I dumpster dove for and then found it was broken anyway). That actually came in just as I was writing this up for the site - I paid $7.99 for a N.O.S. Briggs & Stratton gasket for 3.0HP-4HP engines (or Series 9/11 Engines basically as found on pretty much all power mowers from teh 60's-80's). The wheels are back on and nice and sturdy. The handle was a B**** to reinstall because of whoever upgraded the mounting hinge inside the deck left the bolt too long, but I like it that way, it means that handle ain't goin nowhere! It needed that gasket bad though, as oil started to seep out of the oil pan and onto the deck.