| THE DYNAMIC FENDER VIBRATO FOR HARD ROCK Aka. How I Setup My Mustang/Jag-Stang for Heavy Whammy Use, 2023 Edition |
|
This is an update to the ORIGINAL page which is found at Jag-Stang.com here. It looks like photobucket has given me back my photos too (nice).
Overview - The Dynamic Fender Vibrato, aka. the Fender Mustang Whammy, or Mustang Trem, is one of the most misunderstood and maligned vibrato units in guitar ever made, at least, to westerners (apparently Japan's Char B. did not get the memo, lol). I totally attribute this to the Mustang not being a premier guitar until Kurt Cobain became popular,, and then did that article in 1992 where he spoke lowly of the Mustang, saying the bridge was designed by a dork, and then people getting the whole question about using a whammy bar (on any guitar) right afterward with Kurt's answer "everyone knows Jimi Hendrix was the only guy who could keep one of those things in tune" mixed in nwith that - so then "Fender Mustang = Crappy, Small, Cheap, Inefficient guitar that won't stay in tune and has a bridge designed by a dork". And by extention, that's why you never saw anyone, at least in the west, using a Jag-Stang or Maverick/Custom - the other two guitars with this vibrato, in the same way. The truth is, it's actually a VERY good vibrato, even in the realm of Heavy Metal and Hard Rock, it's just highly misunderstood and shrouded in a big cloud of Celebrity Fanboyism. Look, I'm a fan of Kurt Cobain too, but you have to take a step back and think for yourself, I don't agree with him on vibratos and the Mustang. Of course, he could have just been talking shit to keep them cheap, which IS a good thing. But enough speculation.
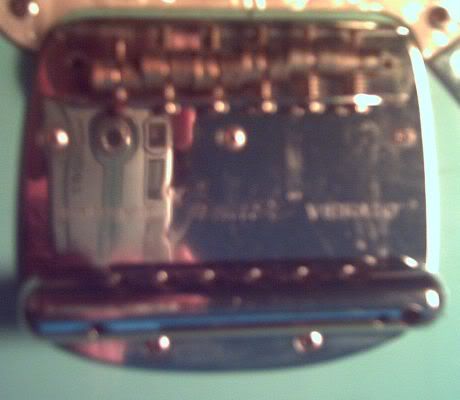
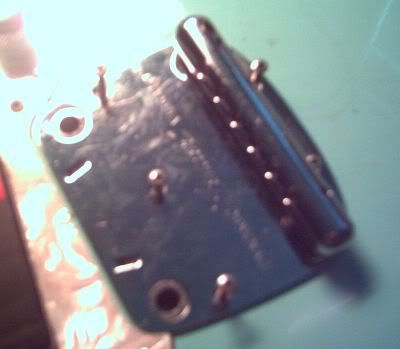
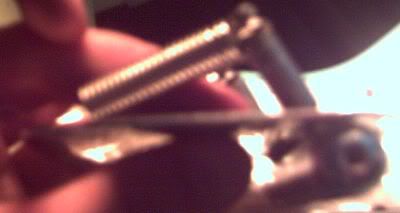
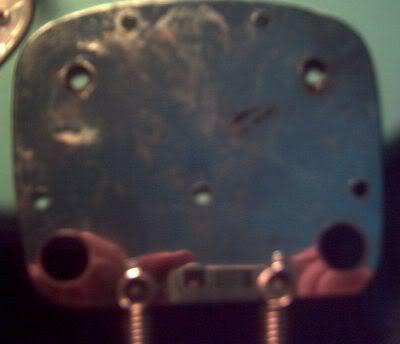
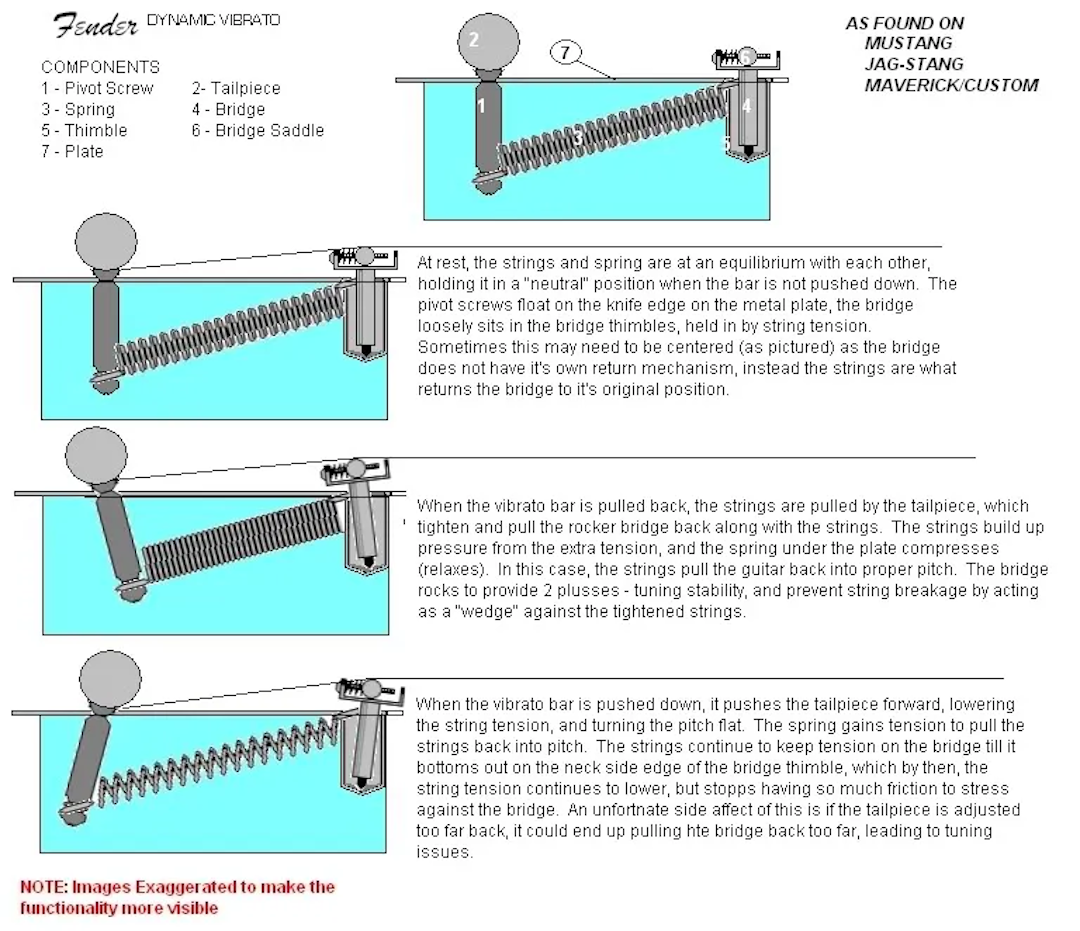
Dynamic Fender Vibrato History The Dynamic Fender Vibrato was released in 1964 1/2 as a part of the Fender Mustang student electric guitar. At that time, this was the only "student" model with a vibrato. At almost $300 in sixties money it was not a cheap guitar to buy, unlike what a lot of literature and books tell you. The Mustang became a very popular model with students and people with small hands, and eventually players of all walks of life. The Dynamic Fender Vibrato, in it's basic design, has remained largely unchanged for 50+ years, and is one of the most unchanged, and under-appreciated designs in the fender Catalog. The most variation you'll find comes with import vibratos. These original bridge units featured a steel bridge with steel legs, with 2 tiny 3mm allen key "gross action adjustment screws" located in rivet-heads on each sides of the bridge - it was the same basic assembly as the one found on the Fender Jaguar and Jazzmaster, just with different saddles. These were fixed height saddles pre-set to a 7.25" fretboard radius. The rivet heads around the action adjustment screws are also how you tell a true vintage American Fender part from a later import part. The bridge was held into 2 "thimbles" pressed into the body by string tension alone, and the bridge "rocked" with string movement from the vibrato, making it rather gentle on the strings when the vibrato was used. The tailpiece is a steel plate, with 5 inset screw holes, and 2 holes with a knife edge ground into them at the bottom. 2 Milled steel legs sit in these holes and screw into a tailpiece often referred to as the "Cigar Tube" - aso steel on these older units. A very small, vintage style, thread-less vibrato bar mounts on the hole on the treble side, and is held in place by a flat-head screw with a rubber tip on it, and the metal legs that go through teh plate, pivot on the knife edges, and pull on 2 1.5" long metal springs that hook onto the front of the plate via 2 stamped in mounts that are under the bridge. Spring tension is adjusted by switching between 2 notches in the legs, with the higher tension coming from moving the springs closer to the plate. The primary form of adjustment though is carried out via 2 holes in the tailpiece that raise or lower the tailpiece, increasing or decreasing the string breakover angle over the bridge, requirnig the springs to put fourth more force against the tailpiece to pull the legs back to counteract the string tension. In 2021 Fender released the American Performer series Mustang, and on that instrument featured a new vibrato unit that featured a detachable knife edge unit in it, this facilitated new routing to alloow the bar of metal to be set under the tailpiece. The Basic Design - How It Works The basic Dynamic Fender Vibrato design as it is understood to be is actually a 2 assembly setup consisting of a bridge that sits in a pair of thimbles in the wood, and a vibrato unit.
The Setup Guide I originally wrote this in 2006, and will be appending to it as I have the time/space to do it in. This is the same on that is at Jag-Stang, but might have some updates and changes. All the photos are on my old photobucket account (for now). I may later change them to be hosted here. 1.) The Bridge Design
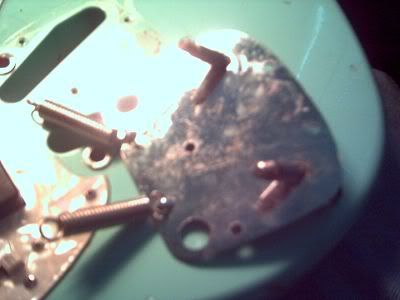
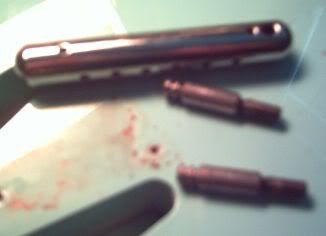
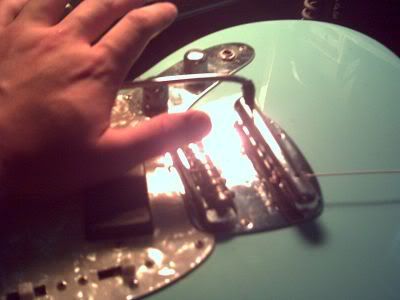
2.) Dissassembling this monster
The reason for lubing them up is to both protect from corrosion and other toxic elements from the metal. I'm probably the nastiest to their trem than anyone here. The other reason is friction, the less of it there is, the better the trem will stay in tune.
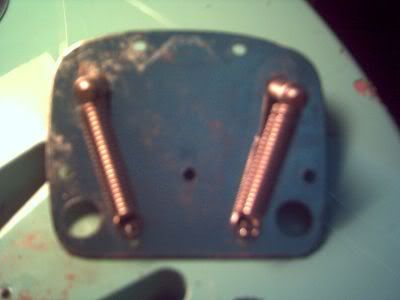
Then I take some 3M tape, a VERY small amount, about as small as you can get off the container, and wrap it around the action screws on the bridge, and point some tape at the tip to act as a wedge to get the screw into the bridge post with the tape on it. The tape get's cut up on the threads of the posts, and gums it's ways into the post holes, creating a good amount of gumminess to hold the screws in place, but still leave them adjustable.
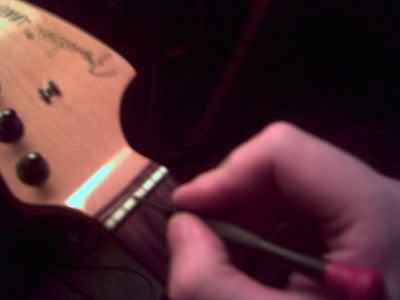
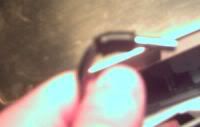
The strings are then tuned up to the pitch that I usually set the guitar at (concert pitch in my case, though some use different tunings). After tuning them the first few times, I pull the string up off the fretboard about a centimeter to stretch it out, and then retune it. What this does is stretches the metal out, this is part of how the guitar's tuning becomes stable. I do this about 2-3 times, I don't stretch them too much or then when I use the whammy bar, the metal will retract, and the strings will go sharp, which comes to the next part, the whammy bar itself....... 4.) Installing/fixing the Whammy Bar The whammy bar installs into the hole in the tailpiece nearest the volume/tone controls, and is held in by a grub screw. However, the pain in the arse about this thing, at least on the Jag-Stang (as I hear the old ones on vintage Mustangs have a rubber plunger to hold it in place), is that the screw tightened up against the bar wears a groove in the bar if you move it around, as well as wears the tip of the screw. I found a workaround to this using rubber plugs for car tire repair. I cut the small end off, insert it into the hole where the grub screw goes, then screw the screw in over the piece of rubber. The screw then holds the rubber against the bar, holding it in place, but not cutting a groove into it. This works really well so far as I've been doing it. Nice part is the bar can be moved out of the way when not in use, but no metal damage occurs.
Now more string stretching....... The key to stretching strings to work with a non-locking system like this is not to stretch them fully like you would on a hard-tail, but have them stretched out just enough to not go flat, but not so stretched out that you do a bar dive, and they go sharp from the metal particles pulling back together under the release in tension. So after stretching out the strings, now it's time to do a few bar dives to allow the metal to contract back onto itself, in the end leaving the guitar able to do a full bar dive and come back up to pitch. It's basically physics at work. As for upward pulls, because the strings are stretched out enough, it should be fine, but playing the strings in a little is not a bad idea. The stem of the trem bar should also be about 85-75 degrees back from the vertical. 48 is too much, and 90 tends to bring out tuning problems when using the bar both ways, especially when the strings are stretched out. Anyway, this is what I go through to get this thing to stay in tune, overkill, it is, but it does not need it every time, only once every few years or more. These photos were taken after my Jag-Stang had not had this done for almost 5-6 years of the 7-8 years it's been with me. The string stretching is the only thing I really do every time. And no, I did not go through the trouble of measuring this stuff. I may be exact, but I'm not THAT obsessive compulsive. I just have good eyes for making measurements.More on STrings That I've Used, and Still Use Fender Bullet 350XL .009-.040 Stainless Steel - These were some of my favorite strings Fender ever made. They sit between the Paradigms and the regular 250XLs I used before in longevity, usually getting about 6-8 months out of a set even with heavy playing. I used these while in Lithium, and continued to use them up until about 2006 when Fender discontinued these strings. The Bullet End offers an advantage of not just looking cool, almost like six little teeth added to the tailbar, but also giving literally NOTHING to stick or that will need special guidance while restringing to make sure there's Zero chance of a hangup at the bridge end. While they were designed for the inertial block in a Strat vibrato, they worked AMAZING on all Offset guitars with trem units. Fender Bullet 250XL .009-.042 - These were the second best and what I used from about 2005-2011 when Fender stopped making them as reliable. These were not stainless so they lasted about 6 months maximum for me. They offered a little less dive-bomb range on the low E but still more than adequate enough for most of my needs. This problem seemed to be negated using a vintage Mustang vibrato however. They stayed in tune perfectly. You mostly saw me using these in Smokin' 66' and Ancient Tongues. I started having problems with newer sets around 2011, as well as just having a hard time finding these with the bullet end anymore, so I moved back to my old standby. Ernie Ball Super Slinky .009-.042 - These work, they're effective, they play a little faster than the Fender's do because the Fenders have higher tension. That said, the drop rate is a little slower due to the "super slinky" nature of the strings. They also last nearly as long as the 250XLs did, but not nearly as durable. The nice part is unlike the Fender strings I don't have an extra piece of wire sticking out the end of the wound strings. Ernie Ball Super Slinky .008-.038 - I decided to try these on a whim and I really like how they react with the vibrato. You get a more extended range out of it, and they are VERY light to play with. The only thing lighter would be a set of Billy Gibbons Mexican Peso Lottery Brand .007s (which I STILL have yet to try out). It really makes the guitar super easy to play, but they also don't last as well as the .009's because less material/mass, and I can be a HARD player. Ernie Ball Paradigm Super Slinky .009-.042 - I moved to these after seeing the advertisements with Kirk Hammett, Steve Vai, and Joe Satriani abusing the heck out of their guitars, some of the guys going as far as breaking thei whammy on tehir Floyd Rose whammies in half before a string broke. These are the longest lasting, but they suffer the same reduced drop rate that the Super Slinky's do. However, they will sound brighter the longest and take some incredible abuse before they go bad. About that New Fender Performer Series Mustang Trem The Dynamic Fender Vibrato has been SORELY ignored by the *booteek* (and generally hipster oriented) vibrato makers like Mastery and Descendant. The only aftermarket version of this unit I've seen, is the new "Performer Series" version. I have not gotten to play a guitar with one yet, but I have gotten to see some gut shots. The new design has some changes that I think are an improvement, and some changes I think are a major drawback to what I plan to do. Firstly, immediatley visible is the addition of a "stop" of sorts on the legs on top of the plate. This totally defeats what I do with the vibrato. And I get it, nobody is doing what I'm doing with a Mustang trem, and nobody really has since Char and Todd Rundgren in the late 1970's/early 1980's. One of the greatest characteristics of the original, is the range and it's balance between control and super-warbly madness. It's like a stratocaster trem that you can land on the pitches with really well. But the legs "block" this capability. I suppose these limiters are to do one of two things - prevent the unit from going out of "center of pitch" by blocking the extremeness of the wiggle stick's capabilities without, or to prevent the pivots from sliding around. The latter of which I've never had an issue with so I question it's possibilities. The new replaceable Knife Edge is a really solid improvement. What this means is instead of replacing the whole cosmetic plate on the guitar, instead you can remove and sharpen the knife edge, or just replace it entirely. This is an idea I've had long before Fender made this product, and was something I actually pulled from the old Floyd Rose II locking tremolos from the 80's found on budget Kramer guitars. The O.G. Floyd II had removable knife edges on the vibrato that allowed you to replace them by pulling them out with a pair of needle nose pliars, and then sliding 2 m ore knife edge inserts in. Cool idea. While I commend addressing the loosening bar issue, this was not a problem on original Fender Mustangs though, as the flat-head grub screw (vintage=flat head, modern=hex) had a rubber tip on it that would jam the bar in place and provide the exact same functionality for less manufacturing cost. The only reason this is a problem is the Japanese guitars don't have this feature, nor do the Chinese Squier models, nor the import standalone vibratos - Fender Branded or not - that you find on E-bay. I got around this on my Jag-Stang and my Music Master by using chopped up bits of rubber tire plug to jam the bar in, since I never take it off anyway. Please note, however, I have not played an Americna performer Mustang yet, and the Jag-Stang I got to play in 2023 did not have this vibrato on it (it had the regular Mexican version which works great TBH). But I have my reservations due to the design of the legs on the vibrato.Twisted Trem Experiments and Ideas The first idea I've been playing with on the Mustang trem is modifying the "legs". My Jag-Stang has a pair of legs I hacksawed off and put in a 1966 Vibrato plate with an import tailbar during the last decade. The 1966 tremolo plate lead me to a theory that the original Fender Mustang had a faster fall-rate due to the knife edges being a few hairs closer to the bridge than on a reissue Japanese guitar. However, this proved to be a wrong assessment as distance does not affect fall rate. I like the replaceable knife edge idea of the Fender Performer, but this would require a special custom route...unless there was a way of modifying the legs of the tremolo to work. If I were to design an aftermarket Mustang trem, I would not want to make people have to route, modify, or cut up their Stangs to put the vibrato in it. I would want it to be a literal drop-in replacement. Also, the tailplates on their own are VERY heavy duty to begin with, and even when bent, stay in tune really good. So for alternative methods of pivot - this gives 3 options... The first option would be to have the pivot/legs become part of the tailpiece (cigar tube as many call it). Then threaded inserts for hte "Legs" made of heavy stainless steel or hardened steel would be used for adjusting spring tension. This would also eliminate the problem with too little breakover angle for some people using light strings. This also could allow for a wider area of adjustment for the spring tension, allowing a VERY wide dive-bomb even with .011-.014 gauge string sets. The second option would be the easiest, make the holes for the pivot bigger, and then open up the back side to allow the top bevel of stock Mustang trem legs come up THROUGH the tailplate. That means when you push the bar down to the pickguard, the back of the legs come up through the tailplate for that last 1/2" or more of travel. A third idea eliminates 2 key features of the Mustang Vibrato, making it more like a Washburn Wonderbar. Instead you'd have a torsion bar spring inside the cigar tube, tension adjusted via a keeper (or two) on each side, and the strings would go OVER the tube, under a guide roller, and then over the bridge. Spring tension would be adjusted via hex screws on each side, and range would be determined by the string gauge and the cut of the spring. It would also make the majority of the mechanism on the TOP of the guitar. And would make it easier to impliement extended features like a potential transposing capability. I've been playing around more recently with an idea of a Transposing Dynamic Vibrato. How Transposing/Calibrated whammies work such as the Steinberger Trans Trem and Washburn Wonderbar, is the fall rate is adjusted using a special cam that the ball end of the string attaches to. On the Wonderbar, the cams are adjusted up and down with a grub screw like a Stratocaster bridge saddle, raising the cam increases the fall rate, and lowering the cam decreases it. On a Steinberger, the same principle applies, however, Steinberger's cam design is different from washburns in that it does not require the use of a secondary set of rollers to pull the string down after it's raised up on the cam-end - by insted, embedding the cam INTO The tailpiece. To achieve this with a user-swappable "Cigar Tube" replacement, without redesigning the whole device, would be awesome. My idea kind of works on the principle that Semie Moseley tried on one of his Mosrite vibrato units where the strings are raised and lowered through/under the tailpiece, except Semie's design was not adjustable like the Steinberger or Wonderbar units were. One idea I had was to setup the "Cam" as a rounded piece of metal that could be raised and lowered in front of the cigar tube where the strings pass through, maybe even to a point that the adjustment would be as wide as, or wider, than that found on any of the aforementioned units. Another idea I had was to create some form of "D-Tuna" type device for this as well, in the form of a thumb-lever that increases or decreases the string tension on the Low E string, maybe even anotehr unique tailpiece design, or even just a piece that could fit onto the pre-existing Mustang trem. |