
Deocupage Guitar #3 |
| This one all started when the wife started asking if I had any bodies she could decoupage. Somewhere in this questioning, it lead to us being at Lowes, and yet again, picking up some tablestock from Lowes to build a guitar with. She said "you're buying this" - $15 sheet of wood - mix of Cedar and Pine methinks...or spruce. Either way, nice minty smelling wood, so I can't complain.
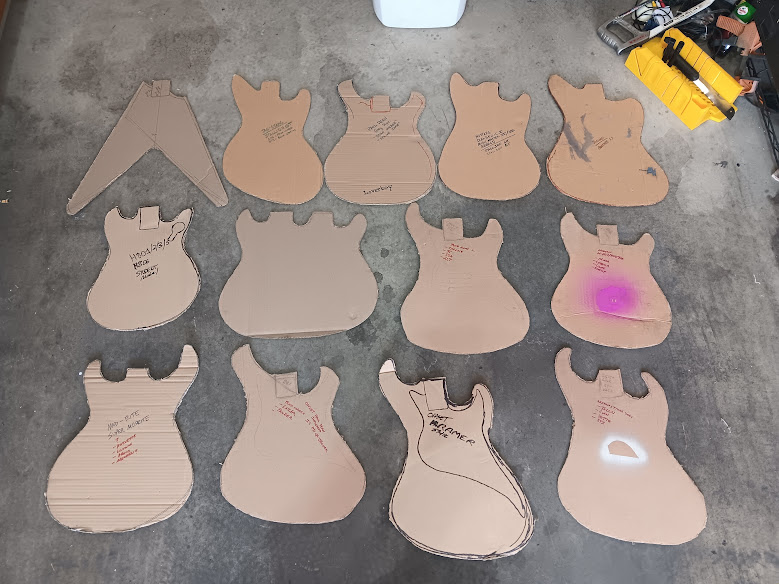
The trickiest part was deciding what body style to come up with: see below. From top to bottom, left to right, we have an original Flying-V type design, Jag-Stang/Stallion GT, Paul Dean/Dean Machine, Mustang/Stallion LX, Jaguar/Panther, H801/802/803/804/281x, H80x/281x Doubleneck, my own custom off-set strat thing, my own custom student model body, the Mad-Rite of course, another original that I consider my own "Jag-Stang" moment (I took the top half of a Paul Dean, offset-it 10 degrees, then put a Jaguar-bottom half on it), an attempt to take the Kramer strat body and offset it, and something that started off as an attempt to cross-breed a Fender Jaguar and a Ibanez Eagle bass - guess Krist and Kurt's got busy in the back of an equipment truck, lol.
So as we can see, I have a nice cache of bodies to work with. So that starts our first problem, what body style? I know I wanted to build something I already have. Because this one IS going to be For Sale. < 4/8/2024 - Body Decisions, Designs, layout, and body milling 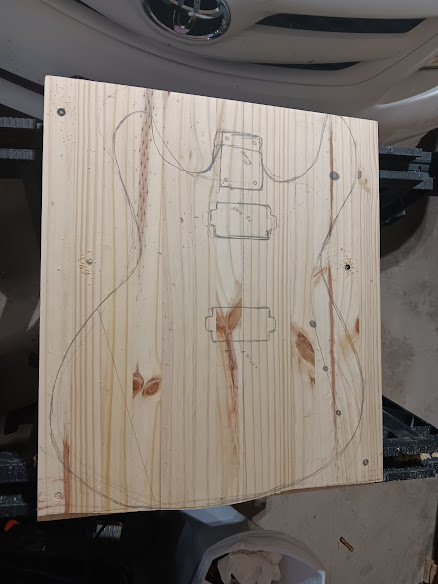  So let's talk about how to build a guitar body in 24-72 hours. Yes, I work that fast. So let's talk about how to build a guitar body in 24-72 hours. Yes, I work that fast.
The first decision was to go through all of the body shapes I just showed and listed and explain why/why not I chose to use such a body/bodies. So first was the new Flying V inspired design I have. I've not built that yet, but I used Gibson's dismensions as a guide. I wanted to cross pollinate a Fender with a Flying V here, and do something kinda' 60's kitsch meets 80's shred. Problem is, that body is way too wide. The board I had was 36"x16"x1/2" - more on using that type of board in a minute. A Flying V is about 19" wide, so that's just too much. The Stallion GT body - aka. Jag-Stang. Well...I intend to SELL this one, and I'm not sure what kind of arrangements Kurt's Estate has with Fender regarding this model, if any. I know others have copied it over seas, and I do call it the "Stallion GT" but that was my own name for such a guitar. Also, I already have a Jag-Stang body in the lineup under the sofa that I made, so there's no point in making another one yet. Paul Dean/Dean Machine - Look, I LOVE Paul's body design just as much as I do the Jag-Stang, but I don't know what his rights/patents/etc are on that guitar design either. And after all the commentary on Odyssey guitars about people ripping Paul off (Larrivee in particular, and Hondo apparently as well), I'd rather not add myself to that list. The one I'm building is for ME - as I should have made clear. So I dunno how okay he'd be with me making such a axe. I know Bullock guitars made one in 2014, not for sale, with his blessing as well. The Jaguar design has been copied a LOT in recent years, with Bilt, Fano, and multiple others, so it was in the running. The thing is, the LENGTH of the body is too long (over 18") so I would need some VERY strategic cutting to make sure we get the full body horn lenth available for that long bass-side horn. Also, I have a LOT of Jaguar/Jazzmaster based stuff now built: a Fender Jaguar, a Squier Jagmaster, a home built Jazzmaster, a Jazzmaster with a single humbucker and an EVH paintjob and a Kahler, another Jaguar on the way that's a KC Jaguar with a Floyd Rose basically (orange pickups), and while the Jaguar/Jazzmaster is my favorite body design in the #1 spot (the Jag-Stang and Paul Dean are #s 1.5), I'd rather just have ONE of those to focus on. The Eagle and 2 Kramer inspired designs would use too much wood to where I could not even compensate for the horns, and the student models except the doubleneck body, all used too LITTLE wood. See, I'm not a fan of wasting wood on guitars. I know Harmony really does not give a rats-ass about their "lost era" Asian guitar designs, as those are rendered as "trash" by most people. So I'm okay making my won booteek versions of those. This left 2, the one I call the "Stiletto" (for now at least), an oroginal-ish body design that takes elements of the Fender Jaguar and Paul Dean and mixes them up, and then the ol' Mad-Rite, my attempt to copy a Mosrite that lead to my own version of the shape. Seriously, this thing is like a cross between a Robin Raider, an Ibanez RG, and a Steinberger in the case of the 2017 original. Initially I planned to use the Stilleto body but decided not to since I already had a purple acrylic one (which I need to wash off with Acetone and do some acrylic refills during the summer when it's actually dry enough Ultimatley, the MadRite won out, because I did not have another one in the works, and I wanted at least one out there, plus, being a Mosrite-ish (it's not at all close to an Original Mosrite in dimensions nor shape TBH, it just looks like it) shaped guitar, it might sell faster for that reason. Pancake Construction - how to make a body in 24 hours - So how I started off is I took my board, measured it in half. In my case, length was 36" - 36 divided by 2 = 18, so I made marks across the board at 18" - split in half. Then I traced my shape on the board - cut the board in half, cutting along the bottom outline of the bottom, then matching as much of the board up with the upper half of the guitar as I could. Once I had the positioning of the 2nd board figured out, I took some Titebond II wood glue and some wood/drywall screws I had laying around. I put a thin layer of wood glue on the body's inside half, and then put the halves together, clamped, then Drilled holes in the board outside the body line, and let dry over night (about 24h).
It's often between here and there that I start doing more layout work - ie where the bridge goes, where the pickups are placed, control placement and routing. In this case, the MadRite II will have REAR routing, and no pickguard, 2 humbuckers, and a very Johnny Ramone style stop-tailpiece with Tune-O-Matic bridge. So the specifications for this is 25.5" Scale (Yinfente neck, paddle headstock, 22 frets, slim profile), 2 humbuckers, 1 volume, 1 tone, 3-way switch, Tune-O-Matic, and Stoptail. This determination was to give my wife as much real-estate to cover as possible with her decoupage work. I have everything pre-marked and layed out now....so the guitar should be a pretty easy build. So I use my drum sander to flatten the edges of the body (my jigsaw likes to canter things out on the bottom currently, mgiht need to take it apart again and readjust). This process is several "sessions" long, with me vacuuming up sawdust in between runs as I grind the edges to a nice, flat, 90 degree angle.
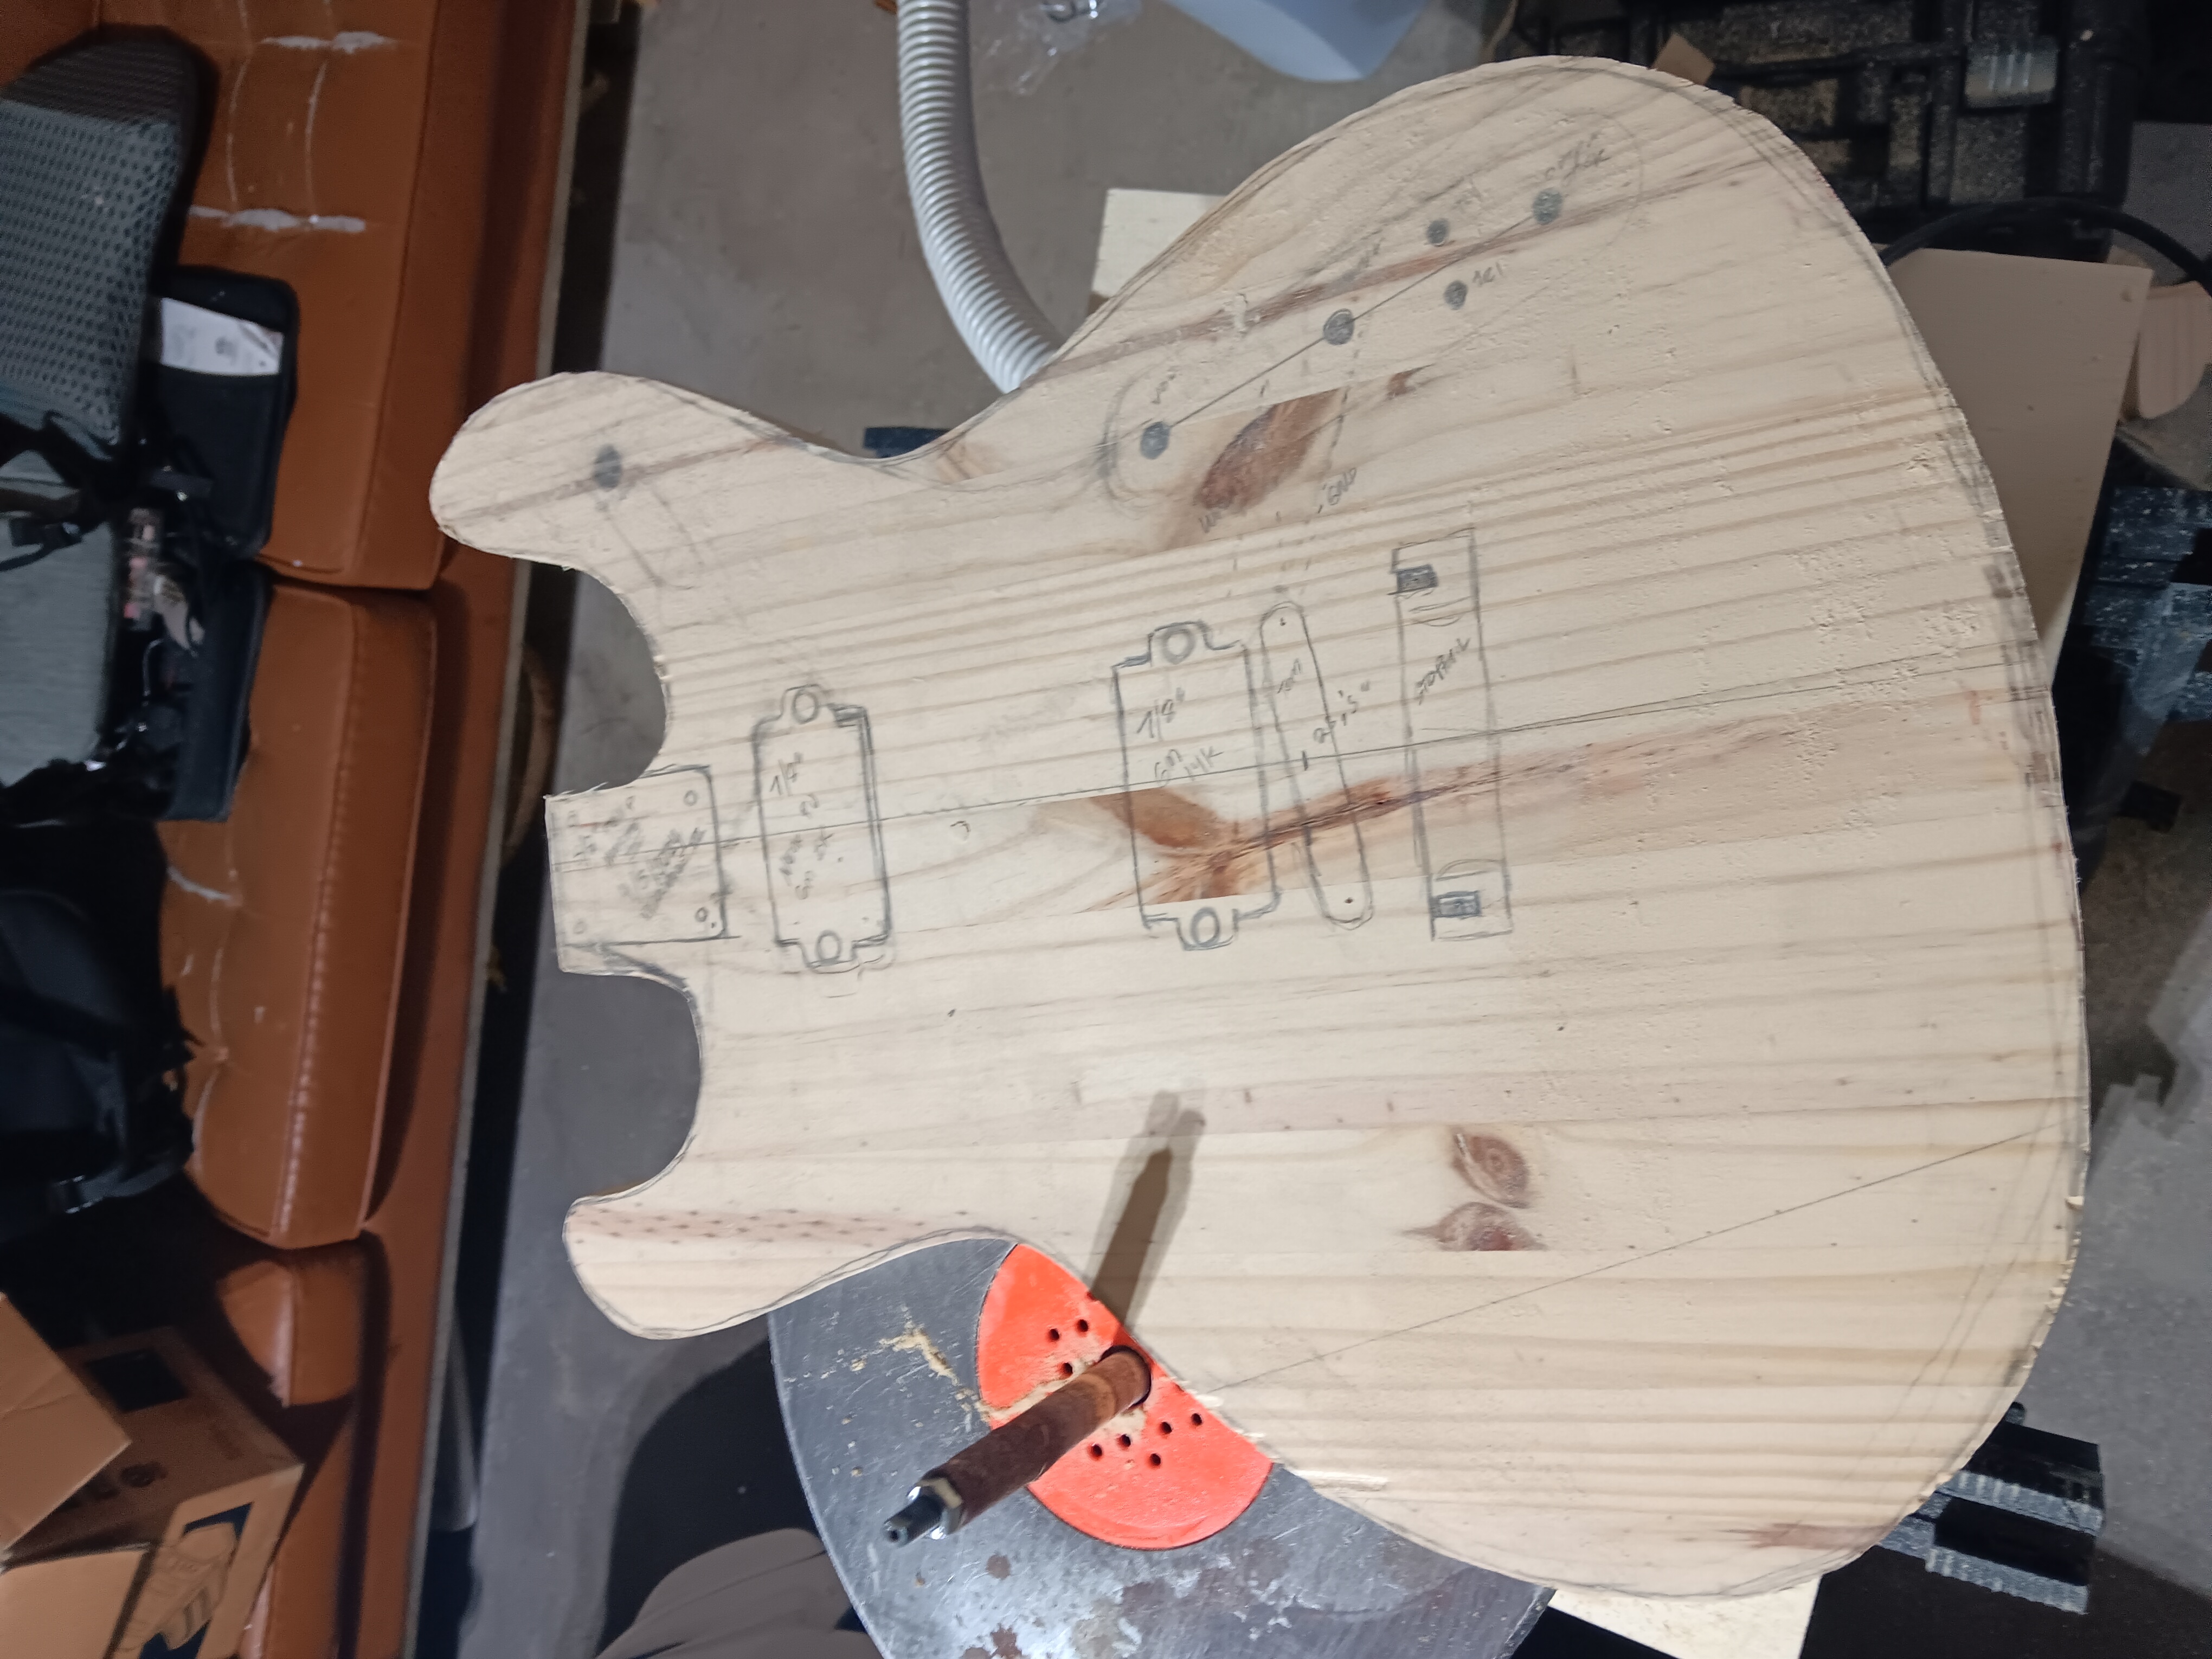
Once this tweak is done, the excess will be ground to match the rest of the body. Right before I did this, I did the belly contour in the back by roughing it out by cutting radially with a pull-saw (which I need to replace, mine is wearing out), then cutting sideways, then coming back with the drum sander, leveling things out as much as possible like I did the edges of the body, and then coming back with a palm sander or random orbit with 80grit and, finishing the shaping and smoothing of the belly contour. Fitting it to me, it's EXTREMELY comfortable, ie, the guitar feels like it almost "Dissappears". In high school, I did this with a bandsaw, I find this method a lot more safe, and I have a bit more control than I did with the bandsaw. After this, I will drill holes through the body for the 3-way switch, volume, tone, and output jack to locate the routing areas in back. To lessen work on the router, I'll use a spade bit to make wider holes for the pots and jack to the correct depths, and the switch. Then a long "Aircraft" bit is used to put the wiring holes to the cavities - with one through the neck pocket to the neck to-bridge cavity, then 2 more, one from the neck pickup to the pickup selector box, and one from the bridge pickup to the control cavity. Then I will - for decoupage guitars, use a black wood stain (which I have a shit ton of), to stain the body black after prepping, let it sit for 24-72 hours to cure, and then give to the wife to decoupage it. Where she will then layer on various media sources on the front of the guitar's top, cover in modge podge, which will protect the paper elements from streaking when I clearcoat the body in gloss clearcoat and polish up to 4000 grit (I plan to make this my first fully pro-looking paint job).4/15/2024 - Some Progress 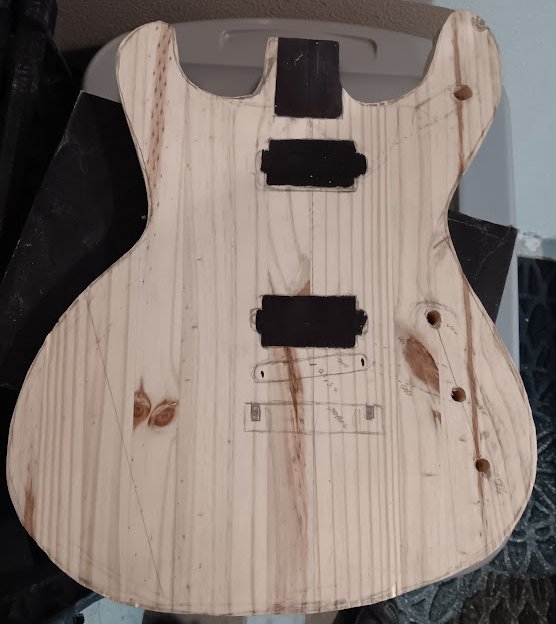 Body is now fully planned out, holes drilled for pickup selector, volume, tone, and output jack. The entire guitar will be rear routed with simple routes. The pickup routes are already laid out too, as well as the neck pocket, though I made that slightly thinner, so it's nice and snug. A Tune-O-Matic has been sourced out of my collection of spare bridges, and I'll be ordering a standard Gibson stoptail. The whole body will be stained black since I have TONS of black stain to use up.
The plan will be for the body to be milled out, then I'll have my wife decoupage it. Once the decoupage work is done, and the modge podge is fully set, I'll be clearcoating it and sanding it up to 4000 grit and polishing it to real-world showroom. For Pickups, I'm thinking one of those $17-20 Saphue sets from Amazon with a 16K Bridge and a 8.4K neck, so it's identical to my other Madrite with the First Act pickups in it, except more adjustable. Depending on the theme, I might use my own knobs that I have sitting around, or use a new set of knobs from somewhere on e-bay. |


 Then the body is cut out using a coarse Jigsaw bit (I really need to get a Bandsaw if I keep doing this in all seriousness, my Tack Life Jigsaw is cutting all sorts of wonky). Once the body is cut out, leaving about 1-2/16" outside the outline for reshaping, it goes to the drum sander for drum-sanding to clean up the shape.
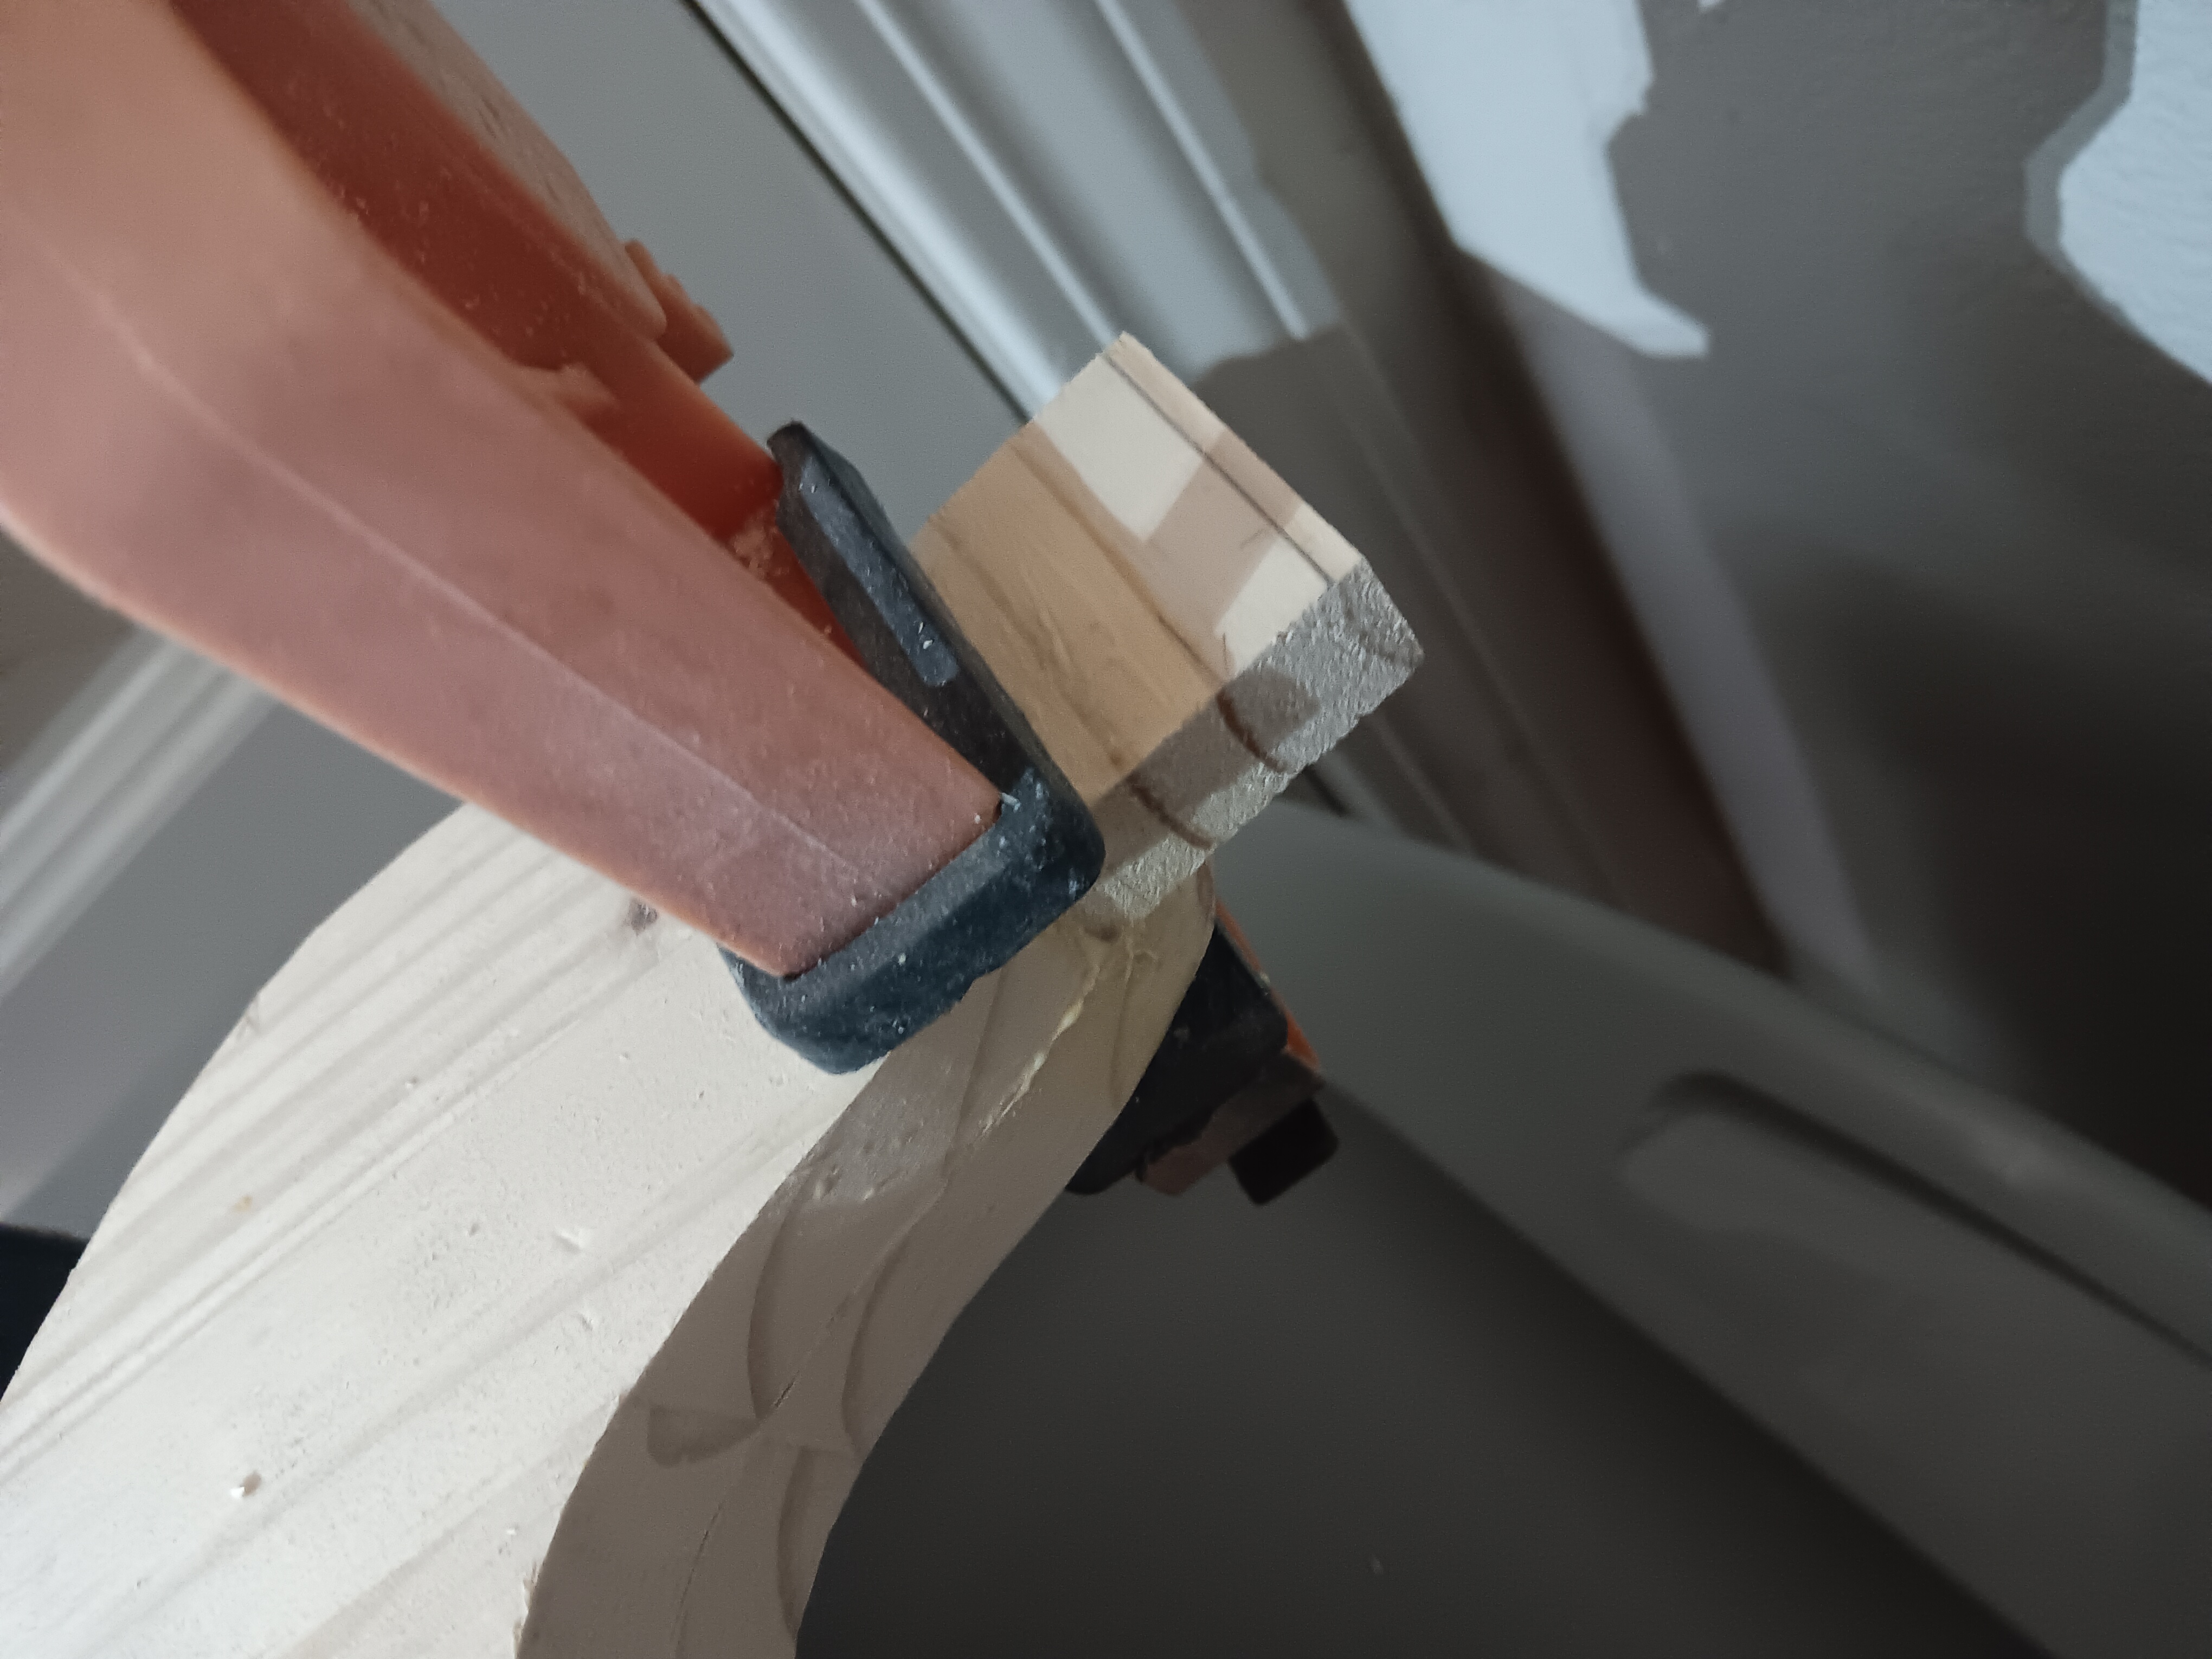 Now, some notes on where to put screws when building a body using this "pancake method" (Gibson/Norlin did this with Les Pauls back in the 1970's so it's a legit luthiery technique). On the original Mad-Rite, since I was less concerned with perserving woodgrain or filling in holes, I just drilled in the upper corners of the body, and I think I also did the pickup routes and neck slot area as well. This time I just did 5 screws on the outer perimeter. While this did (kinda') work, this also left the longest (treble side) body horn free. So I had to re-glue it with some wood glue, and there wasn't enough wood for the tip of the horn, so I took a small chunk of wood, and glued/clamped it to the upper part of the body horn.