
| "RIVER GUITAR" BUILD #1 - PANTHER SS |
|
So if you want to know more about my "reclaimed wood" builds and how I go about doing them - here is where this start. The guitar we are discussing here is the first "Panther" build that's not a EVH clone, or basically a rebranded Squier Jagmaster, Jazzmaster, or Jaguar type thing.
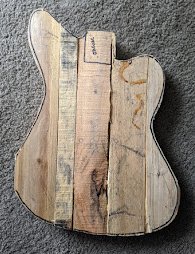
The Build Methods for These "Reclaimed Pallet Plank" builds So when you disassemble a pallet - there are support braces which are pretty close to traditional guitar thickness. These can be cut, put together, and create a single body from multiple boards pretty easily, not much unlike how I got started in high school by gluing scraps together side by side. But the planks that go across the top and bottom - these require removal first, and these are some of the best wood of the lot. While cross braces can be pine or cedar in a lot of cases, the actual planks can be some pretty nice hardwood - like oak, alder, and maple if the pallet was made to support heavy items. I think to dismantle the 3-4 pallets I had, I had to spend about half a Saturday, because these are all nailed together with nails with a "twist" in them. This was 5 years ago, and at the time, I was living in an apartment where our patio and the back of my Explorer were my workshops. In this case, I was sitting in the back of the Explorer, seats folded down, with a prybar, a tin can, and being careful to remove each nail and put it IN the can so I could recycle them (and not get one in anyones tire). Each board was then removed - some had to get destroyed or broken to remove, and some were already split in half or broken/busted. I wore leather gloves to make sure I did not get splinters in my hands, I think I still got one or two during this process.
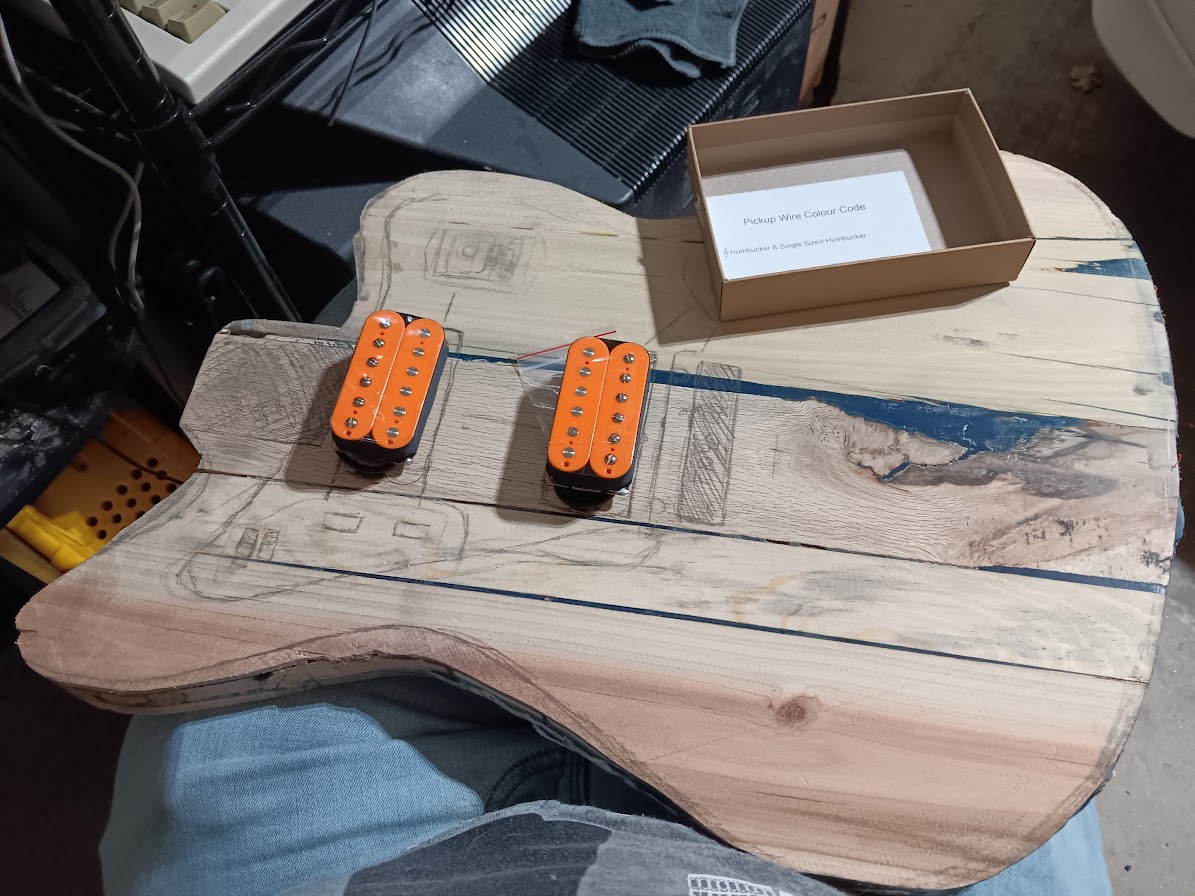
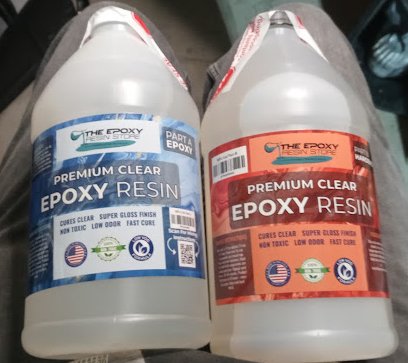 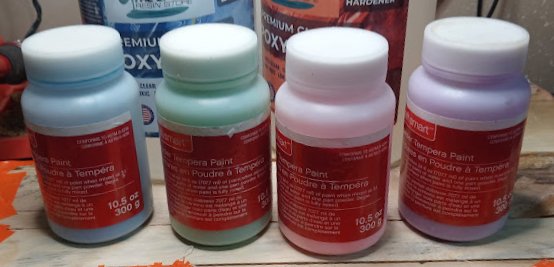 The stuff I'm using here is Epoxy Resin Store epoxy my wife got me off Amazon (great price, especially compared to what they cost for guitar strings and picks :P). The pigments are acrylic water based powder paints that I got at Michael's a few years back. Then starts the epoxy - the epoxy resin I'm using on this guitar, is a 1:1 ratio of hardener, and epoxy. I used cheap dollar store cups for the job - the cheapest ones they had, thin clear ones. I then poured in about a cup of hardener, and then matched it up using the other measuring rings on the cup to get the measuring just right. I work in 1 cup increments. Then I pour in about a tablespoon or more of pigment - powder acrylic paint is what I'm currently using - again, cheap. Cost me $1 at Michael's IIRC for four: Pink, Purple, Blue, and Green. For this guitar I used Blue (which I've used the most) - it's also what I'm going to use to STAIN the wood after I do an initial grain-stain in black so the grain pops. The black stain I use is a medium-sized can of Pro Series Minwax black stain - seriously, that stuff gets a lot of mileage on my guitar projects. After that, the blue stuff is mixed with water in a small container, and then rubbed on using whatever I have handy. The end plan for this guitar - is darker-blue resin with a sort of "denim blue" color for the actual wood. Have not decided on the hardware yet - thinking either chrome or gold - and then the pickguard will be clear lexan. Thats one way my design differs from Fenders drastically - I omitted the routing slots for the wiring - opting for aircraft bits instead. This will allow the pickguard to be removed - if the player desires - kind of like a lot of guys do on their Jazz Basses, or even easily swap to ANOTHER Jaguar Pickguard in a different color if they like. 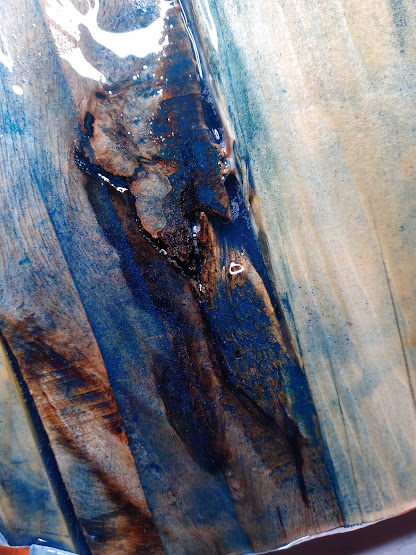  The pouring is done by bending the cup to have a little tip, and then let the gel-like acrylic epoxy "pour" into the gap a little bit. then give it some wait time to "seep" into the guitar then fill some more. This was day one of two days spent filling this guitar with epoxy resin before final planing and body shaping/routing. The dramatic knot is on the left - this is the real "showpiece" of this particular guitar. The showpiece is near the tail end of the guitar body - where a pretty dramatic knot can be seen. The point of this area of the body - is for it to show off that knot - so a traditional Jaguar/Jazzmaster vibrato won't be used. I'm flipping back and fourth between a Licensed Floyd Rose - ro a Fender Mustang vibrato unit - it all depends on HOW the vibrato unit will fit. The Mustang unit might reach down too far - which would mean Floyd Rose. Not a lot of offsets with Floyd Rose whammies on them - but I enjoy taking a dig at Hipsters ;) (it's all meant in good jest). Yes, here at CreepingNet Guitar works - we're taking the "Hipster" away from the "Offset" - and bringing the more traditional Offset Designs into Heavy Metal warfare. I'm thinking for pickups on this, I might get another iSUSTAINER and put that on here in tandem with either a single sized hum at the neck, and a full sized humbucker at the bridge, or a H/S setup like a Jag-Stang - and possibly, the EQ Circuit for an active Jazzmaster system. This will be more feasable as I'll be going with a Kurt Cobain Toggle arrangement for the pickup selector - which will double for the Sustainer's controls. I want to be innovative with the wiring on this one and not just make it all about the body. 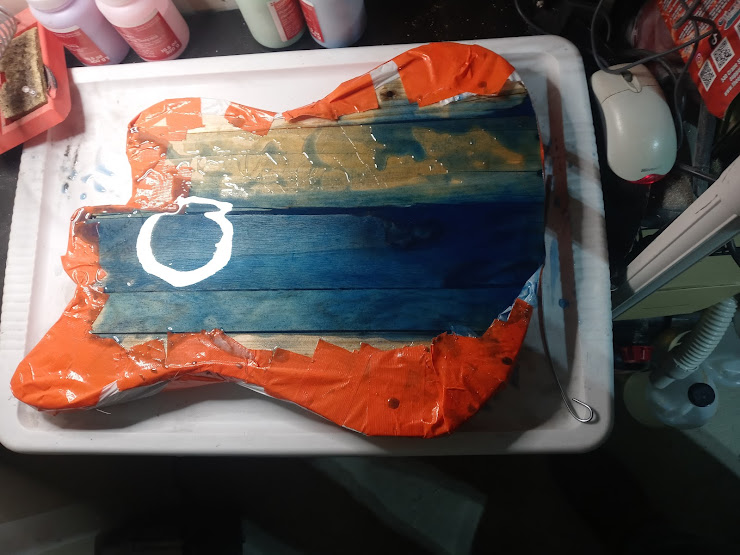 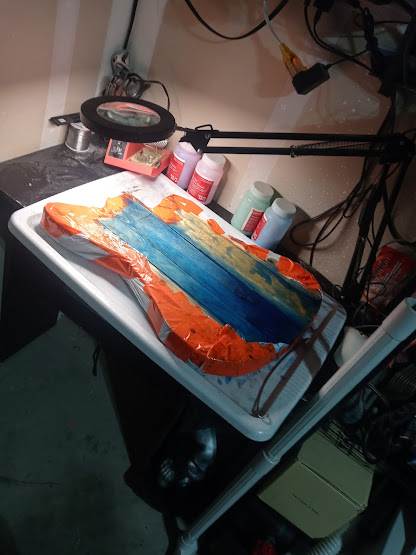 This was day 2 and I had to somewhat flood the top. As it turns out, a downside of the trash-bag and duct-tape method of doing this is it can baloon out on the bottom and cause bulbous spots to be flattened later with a planer. That said, this was the first go around - so after this one, I might be doing the DUCT-TAPE first, and then putting a track bag OVER it - duct taped to the bottom and sides - that way the trash bag is just insurance to make sure my "mold" does not leak, and the duct-tape, ideally, does not leak and causes my mold to be close to the final shape so less wasted Epoxy, and lest post 3/27/2024 - Pickups, Body Refinements (Slow going), and wiring diagram  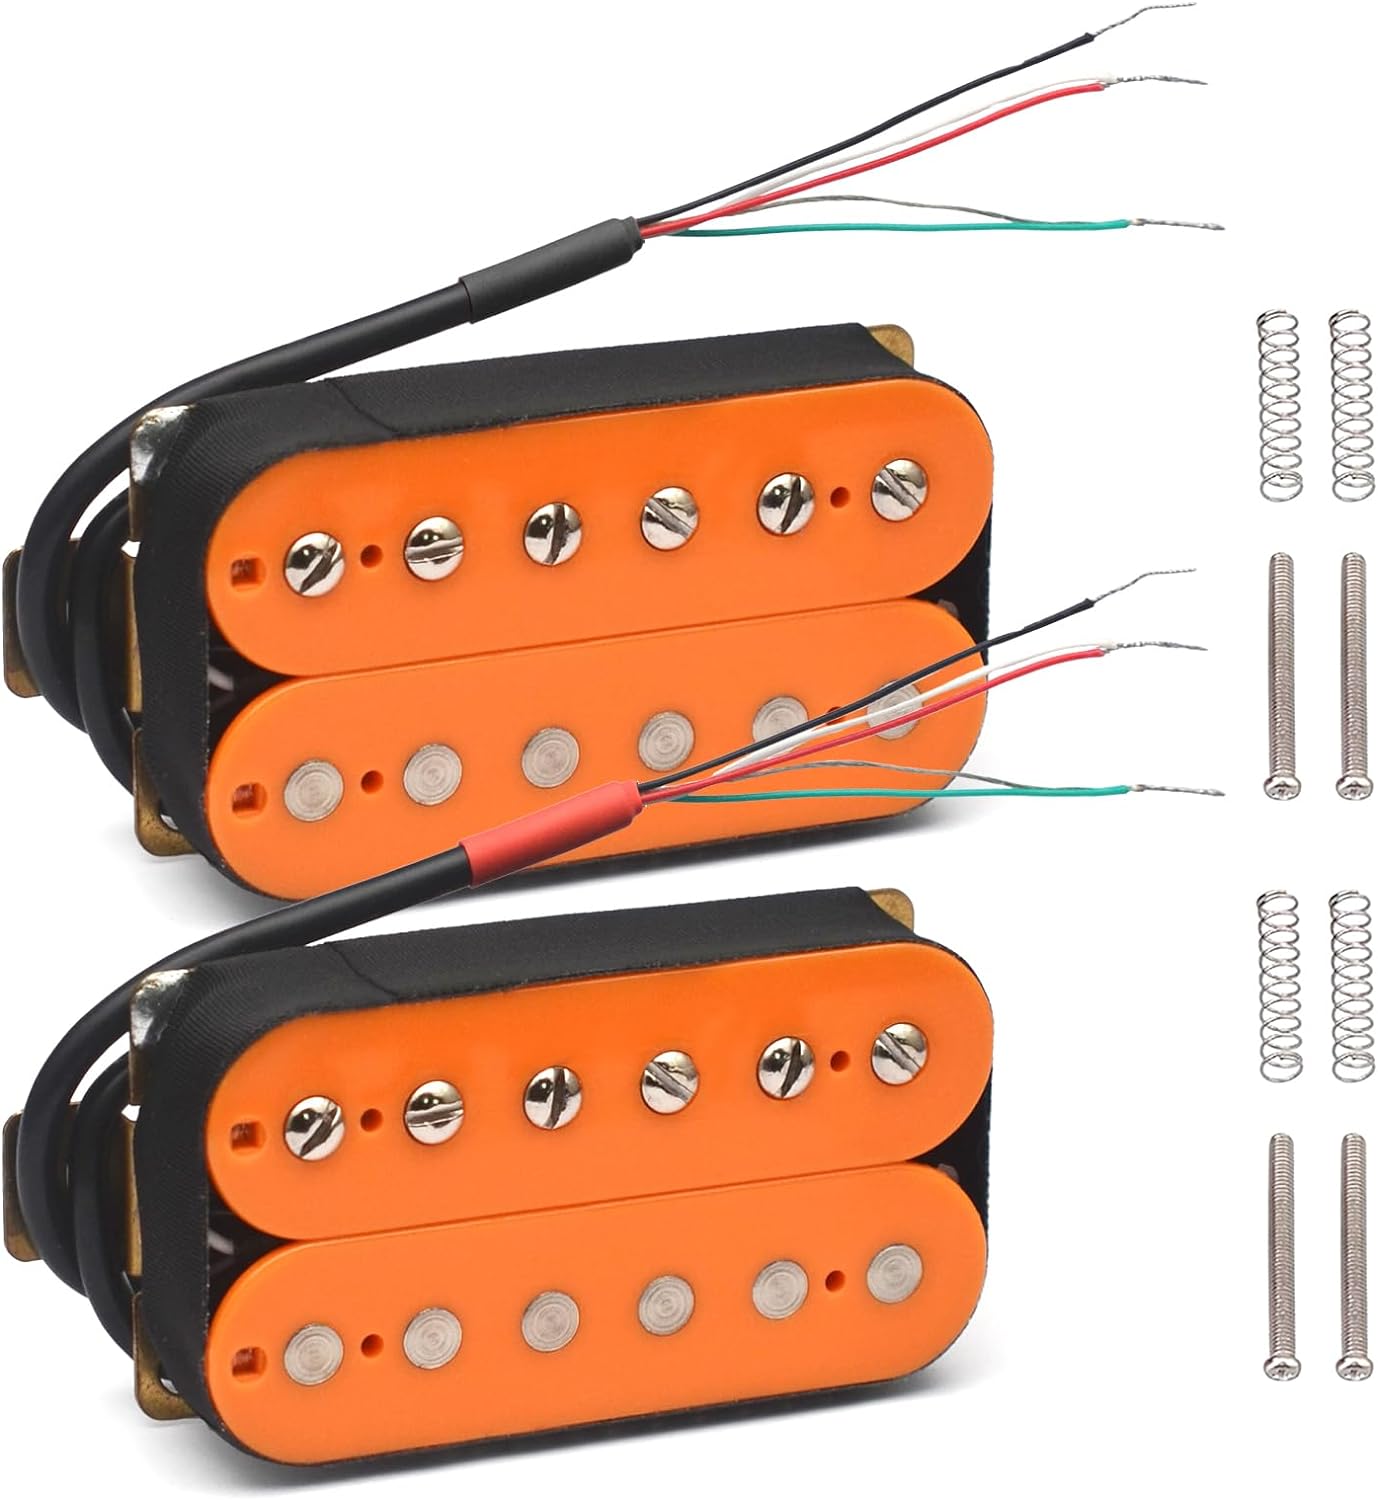 Well...writing that piece on Kurt/Jenner's jaguar on my site has given me a bit of G.A.S. for Kurt's guitar again, and well...since I never copy anyone outright, I have decided this project is going to be a bit more, uh, guided now. So my wife finds these orange $18 Saphue humbuckers on Amazon - a set with a 7.5K neck pickup and a 16.5K Bridge pickup - uh....who had that kind of setup in their guitar? That's right, Cobain/Jenner. What a time we live in to be a guitarist!?!? Quality pickups at prices cheaper than an entire large pizza! Well...writing that piece on Kurt/Jenner's jaguar on my site has given me a bit of G.A.S. for Kurt's guitar again, and well...since I never copy anyone outright, I have decided this project is going to be a bit more, uh, guided now. So my wife finds these orange $18 Saphue humbuckers on Amazon - a set with a 7.5K neck pickup and a 16.5K Bridge pickup - uh....who had that kind of setup in their guitar? That's right, Cobain/Jenner. What a time we live in to be a guitarist!?!? Quality pickups at prices cheaper than an entire large pizza!
Of course, at first I could not figure out WHAT I was going to use a pair of orange Humbuckers for, but when I looked at the specifications, I though "ya' know what, these are Cobain spec, why not put em' in the Acrylic Jaguar". While I'm not a football guy by any stretch of the imagination, Blue and Orange happens to be the color of the Auburn Tigers - and that's where I got my start - friggin Auburn, and I went to Auburn University Montgomery for a short bit as well...so I guess it's fitting. Plus my first (and favorite) denim jacket was a AU denim jacket with unzippable sleeves. 
So let's talk electronics, since I have 4 conductor humbuckers, I know I'm going to want to toss in some Tri-Mode switches on the guitar for each pickup. So there will be MORE switches than shown. It's basically going to be a hot-rodded version of a Cobain Jaguar with a FLoyd Rose on it, but there' sa LOT more going into the guitar than that. Plus, I have the wiring codes for the pickups so...ya know. See the schematic below. We have tri-mode, phase, and then the original Cobain/Jenner-esque wiring. 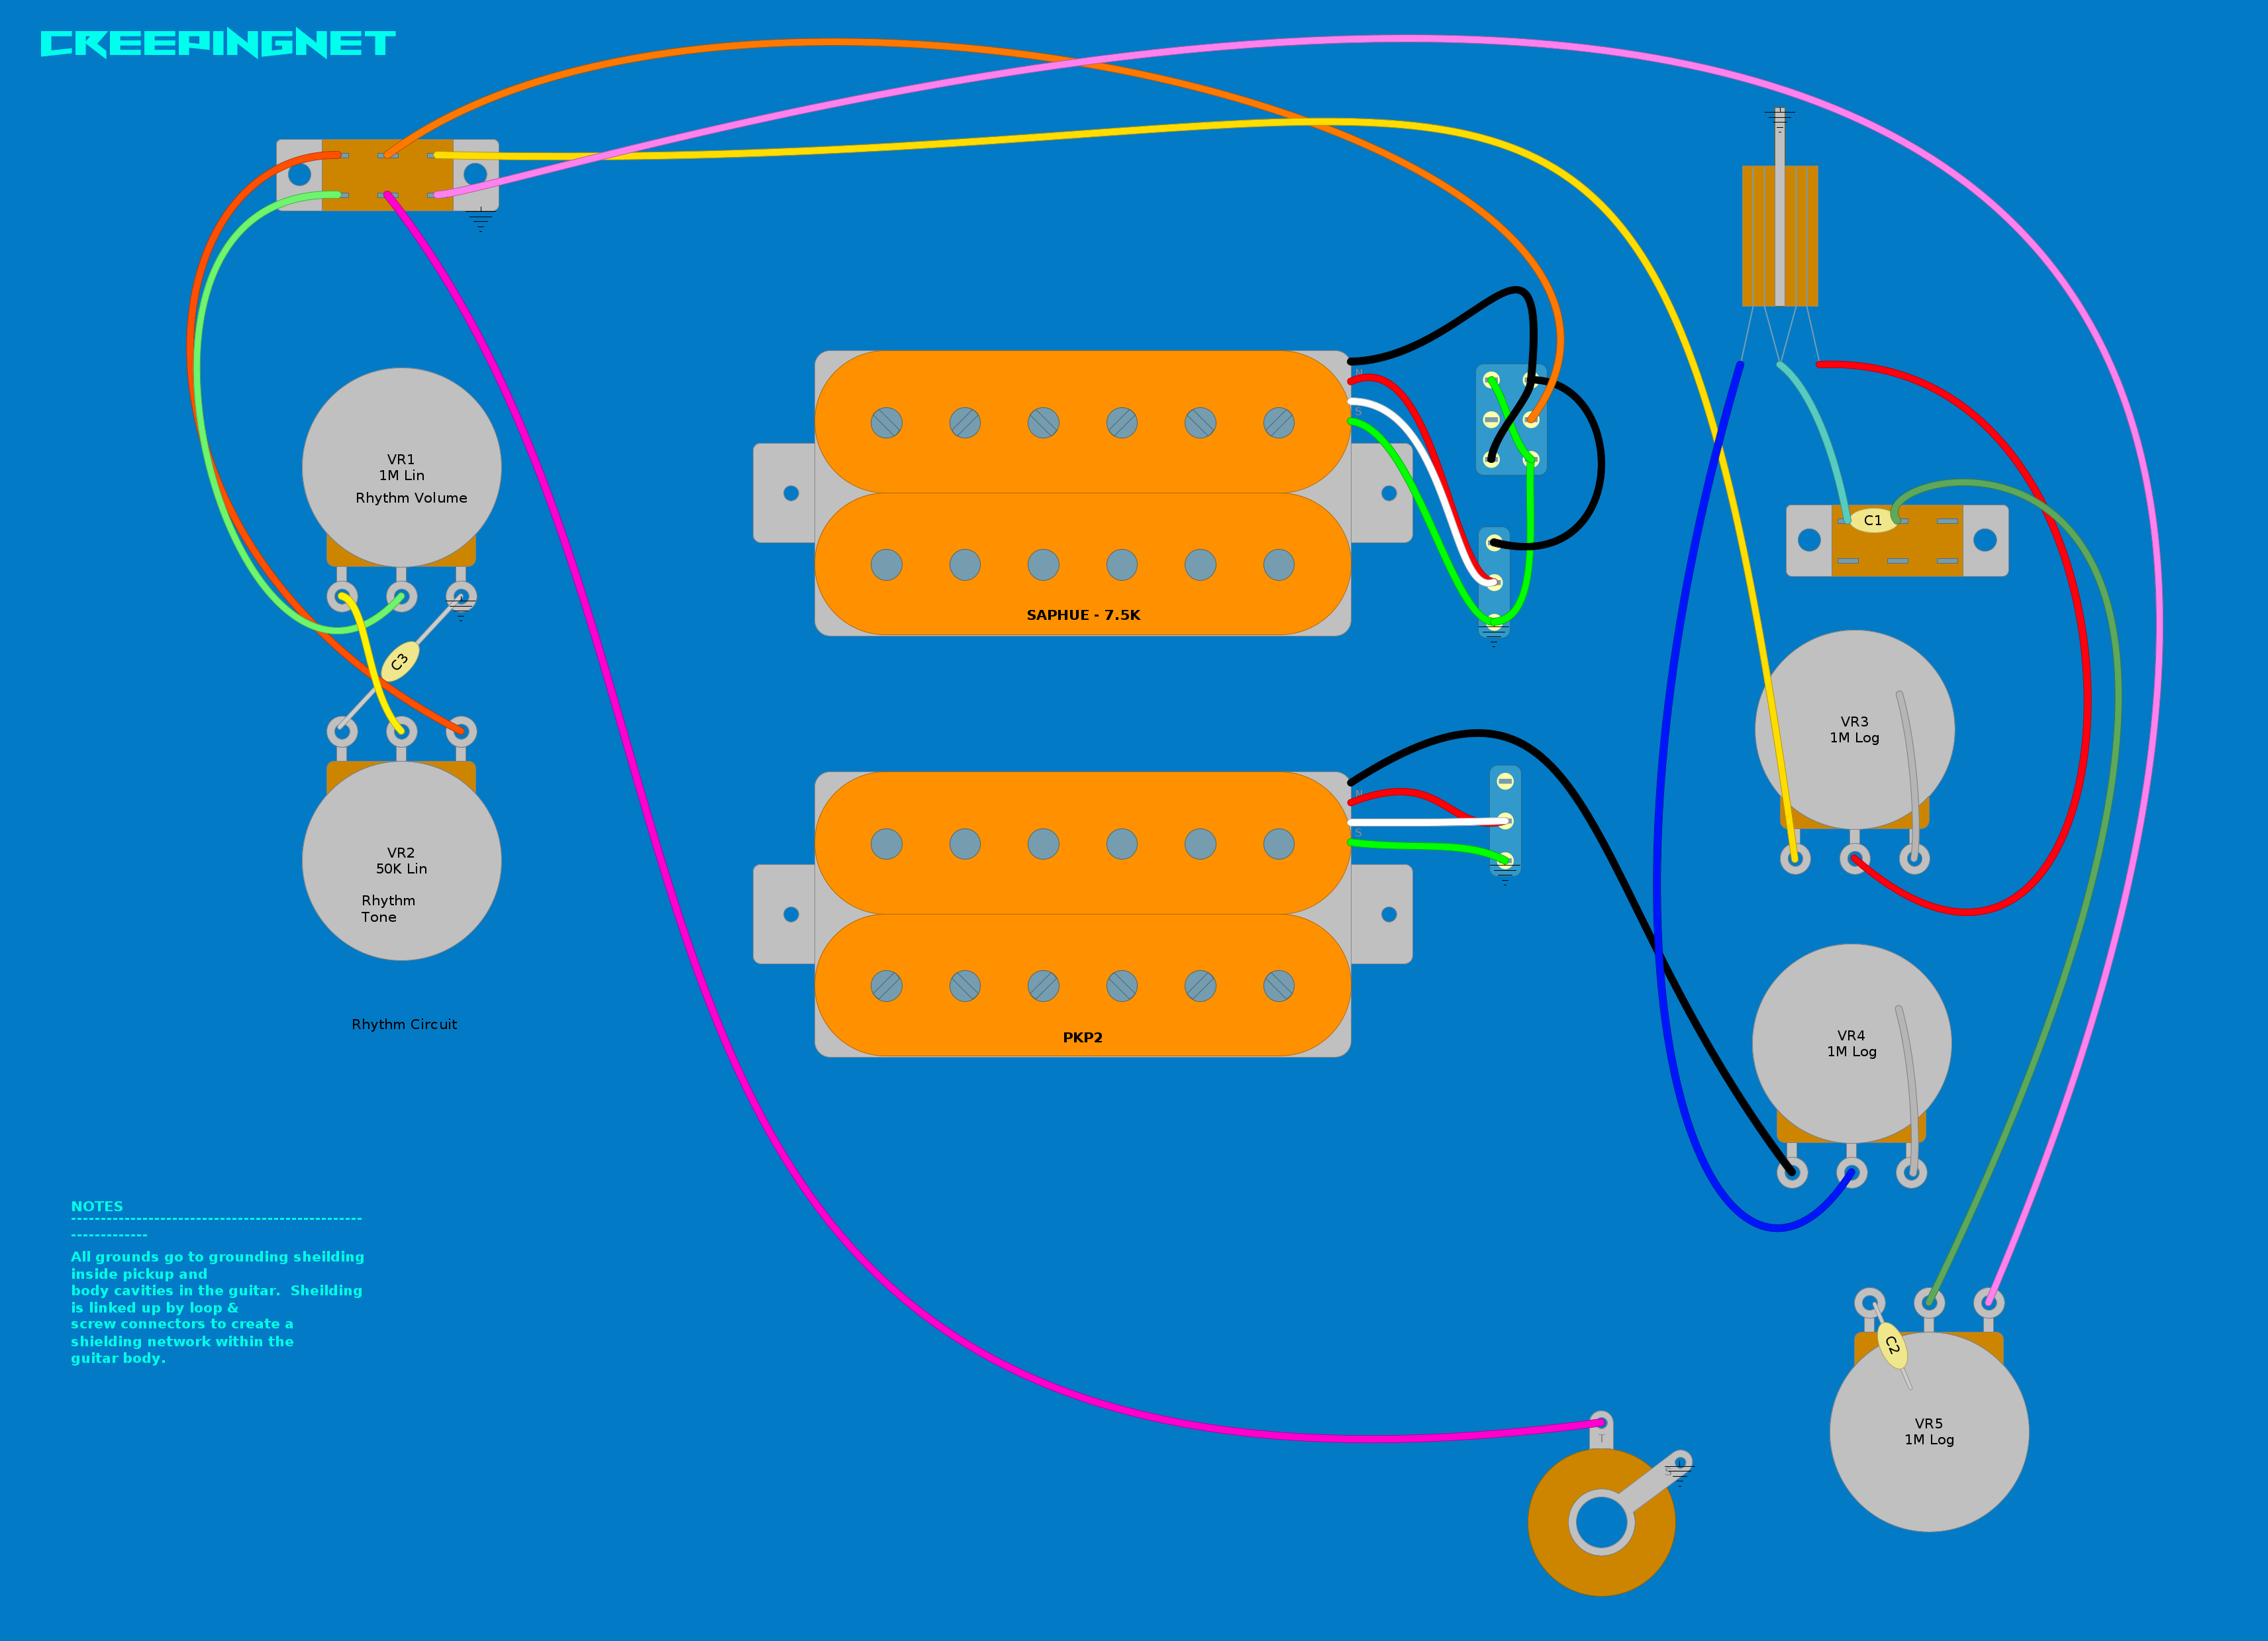
3/29/2024 - Plexiglass Pickguard Antics 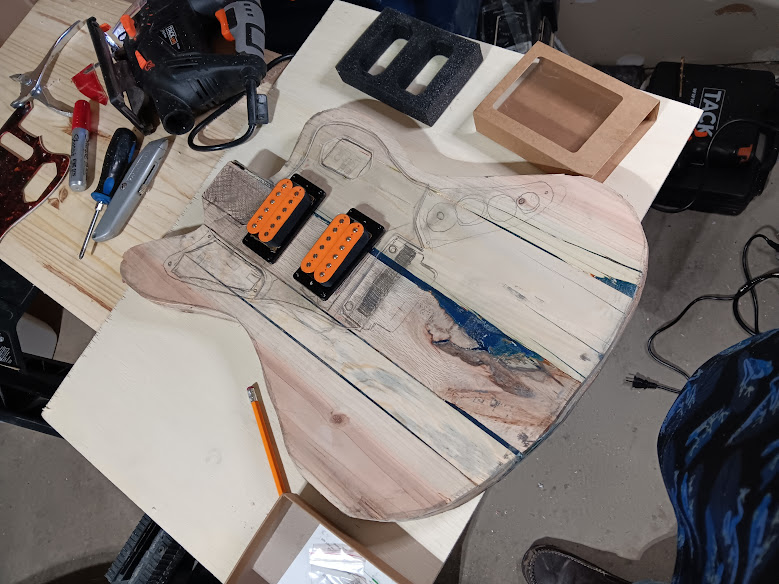 I've been making Plexiglass pickguards probably the longest of any other material you can make a pickguard out of. My first one was for a Harmony H80T I paid $10 for in High School, and cracked the original pickguard, so I grabbed a chunk of plexiglass I found laying near the newly defunct Lee Scott Academy campus on Frederick Road, and brought it home and cut it into one for a Stratocaster. of course, my skills have grown since then. I've been making Plexiglass pickguards probably the longest of any other material you can make a pickguard out of. My first one was for a Harmony H80T I paid $10 for in High School, and cracked the original pickguard, so I grabbed a chunk of plexiglass I found laying near the newly defunct Lee Scott Academy campus on Frederick Road, and brought it home and cut it into one for a Stratocaster. of course, my skills have grown since then.
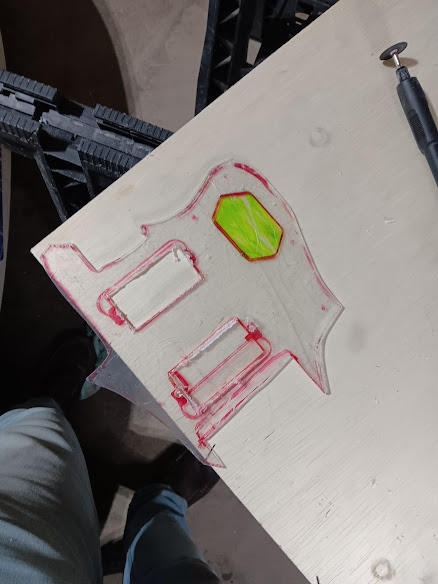
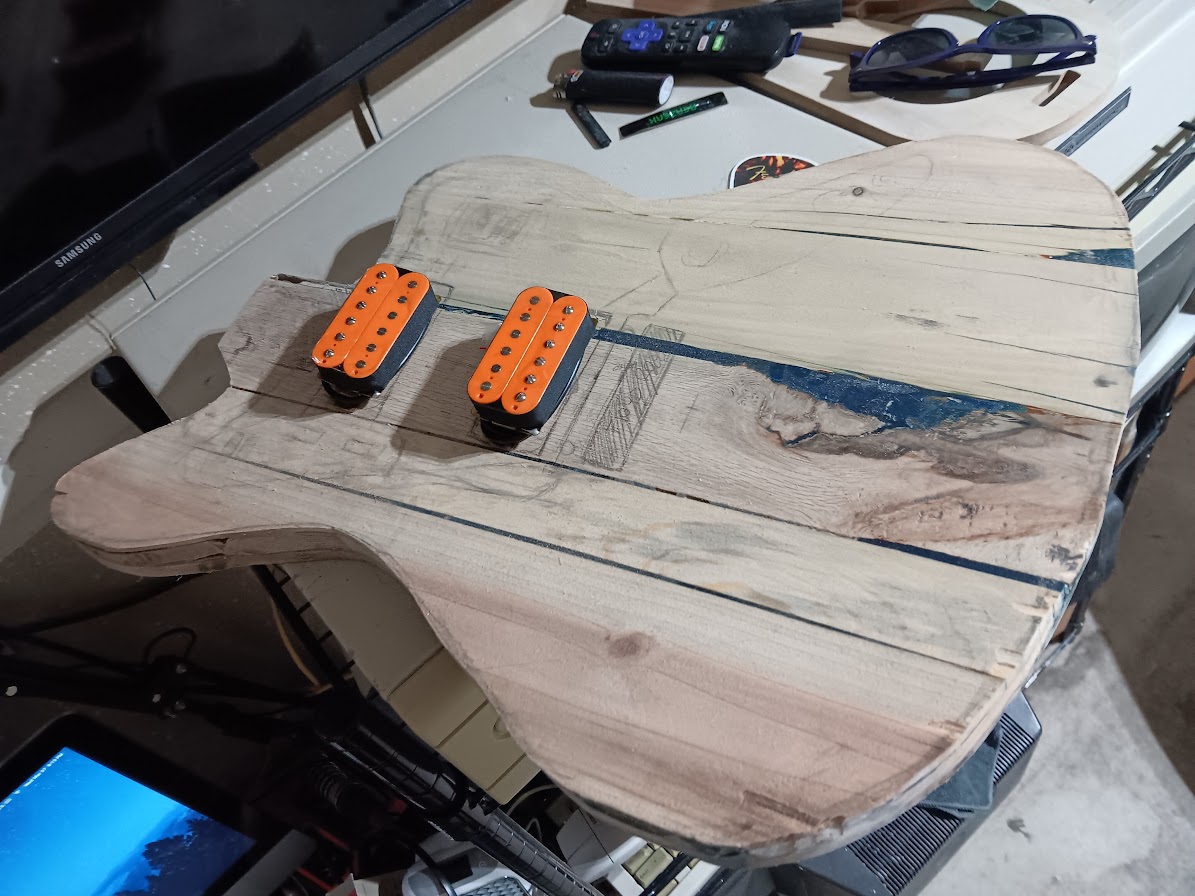
The HARD part of making pickguards out of plexiglass, and the Jaguar REALLY makes this hard with that 6-sided polygonal control panel - part of what makes the Jaguar look cool - is cutting this thing out. See, most guitar pickguards today are made out of ABS or PVC, with maybe a Celluloid top. Not very challenging to work with, as it's very flexible, and not prone to shatter. Plexiglass, as hte name implies, is a bit like glass. It can shatter, expecially the 1/8" thick stuff I use for this kind of application. So I have to do rough-cutting with a very very fine jigsaw blade, and then after that's cut, I have to do all the detail work with my drum sander and a Dremel. So I had to start with long not very curvy cuts with the Jigsaw, then retouch the outline, then cut again, then redo the outline again. Once I felt I was close enough, I'd grind it down to it's final shape using the drum sander. After that, I needed to choose where to place the pickups for their final locations. THIS is where we get more into guitar (re-)design. See, the original Fender Jaguar has a very small bridge with six individually adjustable saddles. There's maybe 2/16" of lead-in at most to the saddles on the original Jaguar, even less on Cobain's with a Tune-O-Matic. On a Floyd Rose though, you have a whole 0.5" or more between the contact point on the saddles, and the start of the tremolo assembly. As such, it has an advantage, and a disadvantage. The advantage is, you can actually INTEGRATE the Floyd Rose into the flow of the pickguard on a Jaguar or Jazzmaster - it literally makes the tailpiece a part of the pickguard, like a early metal pickguard Fender Bullet design. And this would work on a stock Jaguar too even. What doesn't work is that the bridge humbucker needs to be guided off the BOTTOM coil to the bridge pickup to allow enough room. The 24" Scale is literally smack-dab in the middle of that original bridge. So the SADDLES of the Floyd Rose must line up with this, not hte front edge. I'm sure a lot of budding luthiers screw this up. That lead-in is crucial to proper intonation.
One thing I DON'T like about the Floyd Rose locking tremolo, is that when it's put on a thin wall of wood, it can (and often does) collapse into the bridge pickup cavity. My design gives it almost 3/4" of wood to prevent that. My Kramer Focus 3000 and a bandmate's old Washburn had that problem, and I have to wonder if maybe that's why Odyssey guitars had a "Sweetheart Custom" that had a huge metal brass block down there besides just Sustain. It seems to be a common problem with high mileage Floyd Rose equipped "shredder" axes. One benefit of using this on a 24" scale Jaguar-based design, is that the Jaguar already has a LOT of treble and bite, so the pickup type/bridge/pickup location should attenuate some of the "ice pick" and give a little more "chunk" to the sound, especially as I plan to use 1MEG pots in this like an actual Jaguar, and not 500K like I'd usually use on my own lead circuits. I still need to drill the screw holes, but we might make those different anyway. NOw some of you might be wondering....why in the hell would you want a CLEAR pickguard? Well, the reason is to show as much of the woodgrain as possible, and still have a slight outline of a Jaguar pickguard on the guitar. You go no pickguard (and maybe recess the control plates) if you don't want an outline visible, and if you want it slightly more visible, IE like a Grey Smoke pickguard that sort of adds a tinge of grey but still let's the wood patterns through - you back the pickguard with Window Tint - I'm not kidding. And of course, opaque, just forego this plexiglass stuff and go with actual PVC/ABS Plastic pickguard material like I usually do. The next plans I have is to fill in all the gaps with either epoxy, extra wood, or both - to make sure the body ends up the way I want it, and then finish leveling both sides of the body and the edges, cut the contours, rout the cavities, and then start staining it. Once all that is done, hopefully my other "sales" guitars will be put up for sale by that point so I can free up a spot on the rack on the wall in the garage for this one. 4/15/2024 - The Milling Has Begun 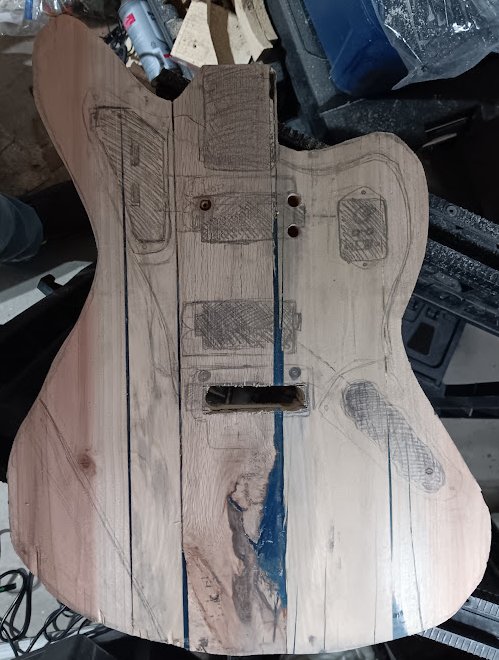
 Floyd Rose through-body routing is already done. I did this using a spade drill bit about 1/2" wide. This will be widened, using a router, to about 1/2" in back. I'll say this, the wood on this guitar + the epoxy is VERY hard on drill bits and I smoked em' a bit drilling out the reliefs for the pickup routes. I'm trying to save on my router a little bit because router bits are bloody expensive. This bodes well for sustain, and the solidarity of the Floyd Rose pivots so I made a good choice in choosing a Floyd Rose for this guitar to showcase the epoxy on the bottom.
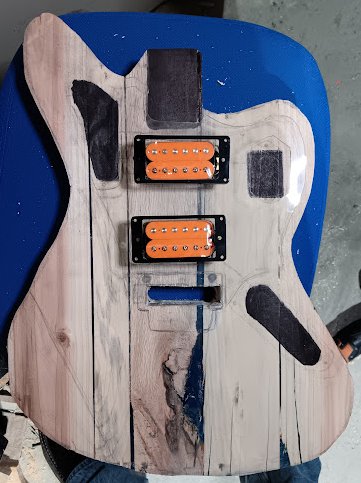
I still need to fill in some gaps on the body sides, and pick up some 80 or even 60 grit drums for body shaping purposes so I can clean up and round-out the shape properly. That's going to require some judicious use of duct tape, some carefully planned resin-pours, and cutting the contours on this I expect will be a pure nightmare. But the result will be stunning, with the blue color, and orange humbuckers. Looks like those orange humbuckers will look really cool on this build. For a Floyd Rose, I might end up using a Floyd Rose Special again (I'm thinking any Floyd Rose Builds from this one forward will be using the Floyd Rose special or Floyd Rose 1000 series). I really like the one on the blue Kramer guitar, and I might want to replicate that on this guitar, complete with the recess (though my version for this will be a bit more, uh, reinforced). I'm tempted to throw gold hardware on it, and the blue might be lighter more "denim" transparent...maybe. We'll see. I may go with dark blue though since that's easier to get done. I may even go black with the hardware. You don't see Jaguars with black hardware very much. 4/21/2024 - Rough-Routing is Done 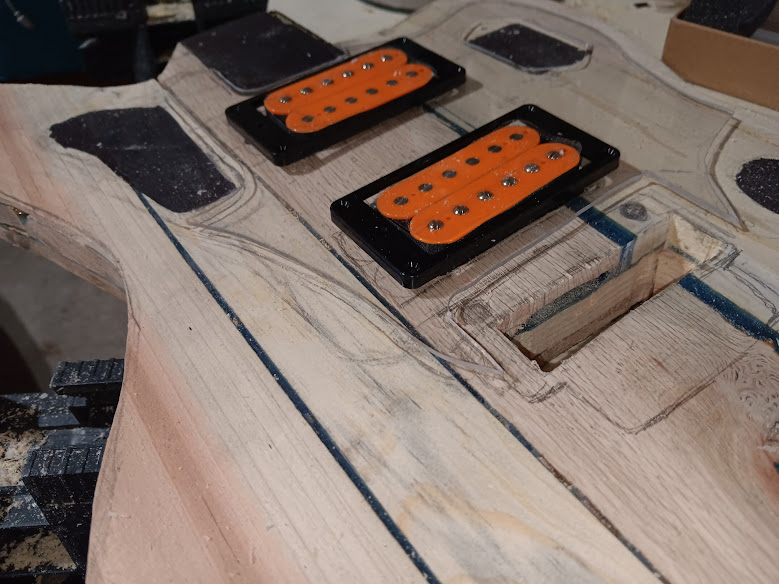
 All of the rough routing is done. I do all of my routing (for now) freehand, without any guide except the parts I Magic Marker out. I usually route within 1mm of the perimeter of what needs routed out so that I can do cleanup routing using chisels and, more recently, a Dremel with a 60/80/120 grit sanding drum on the flex shaft attachment so I can fine tune the routes.
One neat trick I found on this is getting the right depth in some parts of the body was as easy as routing down to it in the shape of the cavity, and then pulling a chunk of wood out, as it woudl hit a layer of the resin, and maybe did not adhere well (none of the wood is flat on the inner layers), and then the chunk would come out, leading to a flat cavity on the bottom, and a perfect shape with minimal effort - nice. I use this same trick modifying plywood bodies, and it works great. Another nice thing is if you do mess up, like I almost did twice routing the body, you can always do the electrical shielding, and then fill the missing chunk with acrylic resin using the electrical shielding as a dam for the resin. That is something I'll be doing for several sections of the body where things did not...well...fill in just right on the inital resin fills. The Floyd Rose cavity came last, and I learned from the Explorer build that I might want to make a few hairs longer than normal since I like using just 2 springs in my guitars like Eddie Van-Halen did. I chose not to do the recess because I"m thinking this guitar is a little too nice for the cheaper Musiclily Licenced Floyd Rose unit, and rather, migth be worth throwing a few more $$ at it and putting an official Floyd Rose Special on it instead. Test fitting the pickups, I think they sit low enough for my application. You might notice I scooted the bridge pickup a little further back from the position on Cobain/Jenner's guitar - this was intentional. First off, the added metal on the Floyd plus the ultra heavy/dense body (thanks to acrylic resin + having a maple center-piece and a lot of oak inside) will make this guitar a little more trebley. Also, I want the wall to the bridge pickup cavity on this to be VERY heavy to withstand the heavy whammy use I intend to put upon this guitar. Next step will be filling in the gaps on the edges, fine-tuning the routes with chisels, and then some 60-80 grit sanding drum to finish the body shaping and contours in preparation for staining and clearcoat. Once all that is done, then I can start ordering a neck, tuners, control plates, electronics, and all that other fun stuff. Hopefully by then, the Vester will be in it's new home, Warlock will be sold, and then I can place a focus on this, the PDX-90, and Madrite II - and get those done in the next batch (The Ataricaster will be taking me much longer.6/16/2024 - Wild Stain Experiments and things are Finally Coming Together 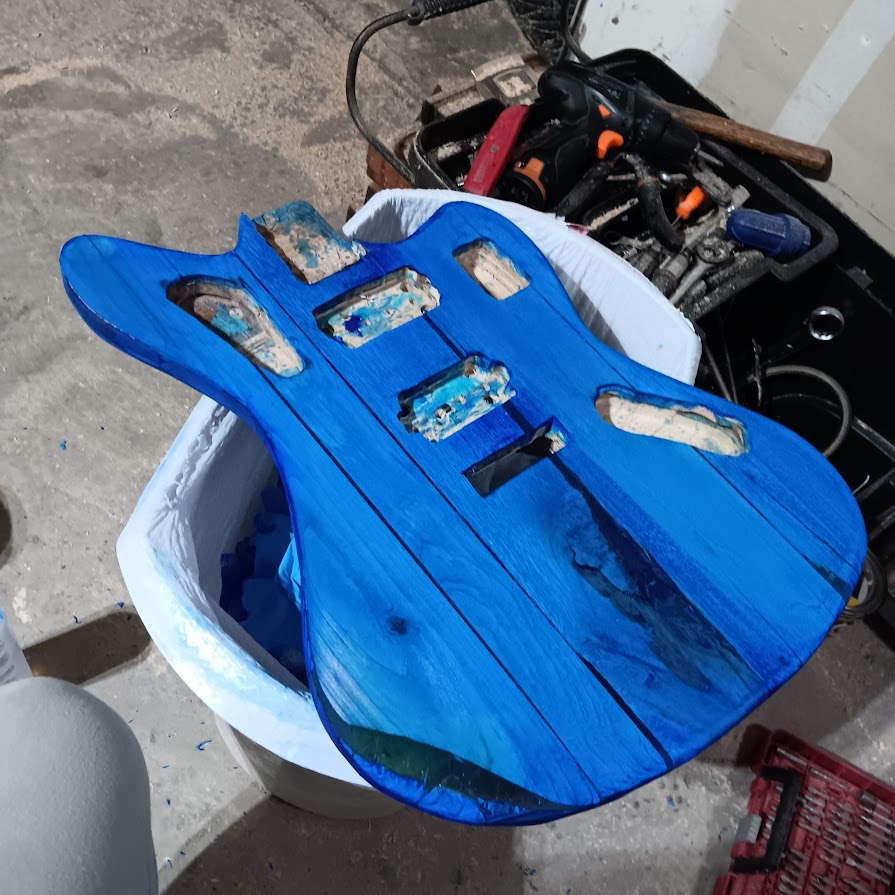 So a lot has happened since my last update. First off, the contours, rear belly contour and all routing + drilling is done. I've been filling in the edges of the body with wood filler and sanding flat. I've been using two types of filler, Minwax, and then a big jar of $15 white stuff that seems to do a better job and acts more like spackle than wood filler - but it says wood filler...so eh. So a lot has happened since my last update. First off, the contours, rear belly contour and all routing + drilling is done. I've been filling in the edges of the body with wood filler and sanding flat. I've been using two types of filler, Minwax, and then a big jar of $15 white stuff that seems to do a better job and acts more like spackle than wood filler - but it says wood filler...so eh.
I finally got around to getting proper sanding drums for the sander in 80 grit, so the edges are all now refined, and then just a day before this update I got a 1/4" roundover bit and let me tell you, the body looks magnifique. Literally within a stones throw of a actual Fender Jaguar. Then came the time to stain. I'm still using up acrylic powder, but the blue I was using was just too bright for the application. The blue I wanted was closer to "Sharpie Blue" as I call it, and well, I have a giant blue sharpie...so I started coloring in the guitar and it was too dark and had that weird red hue Sharpie tends to have....sooo....I got a wild idea to see what happens if you put on some gloves, and soak a piece of paper towel in Acetone, and then wipe and spread out the stain and well.....the above picture is the result - damn near perfect! This morning I started using some Behr clear coat on it, and while I might have to do like, 100 coats to get it right (100 THIN coats) that might be the very thing that gets this guitar body right where I want it to be. I also may have to remake the pickguard using Polycarbonate....because it seems to me the pickguard somehow got stained with something. But overall, the result could not be more perfect. And it looks very much like the picture above that I mocked up using Halo and some parts from Fender.com (and some clever coloring). That said, the Behr goes on very thin so I might have to consider doing a heavy polyurethane finish on it and then sanding it up to 4000 grit to get the effect I'd like. So that's something I might be trying with this guitar. 1/20/2026 - Getting back to it I'll probably add pictures later but I started picking up on this guitar. I took apart the Memphis A2-TR and decided to try out that neck and the leftover Musiclily tremolo I swapped out of the Explorer on this guitar, and it didn't exactly turn out as I liked. So as luck would have it, despite Orange Shitler's Tariffs....I found a place that ships cheap necks locally, and found a blocks + binding neck for this guitar just a city away! Yeah, your Christo-fascist bastards can't stop my guitar building, no how, no way! So now the plan is to use a Floyd Rose Special, as the Musiclily went to a prototype body. I decided to sell the Warlock body off and utilize the parts from that to finish up some of these builds. I'm floating the idea of making my own home-made control plates since I'd like something somewhat insane for the pickup selector plate...sort of like a Cobain plate with two mini-toggles. The A2-TR neck is coming off so I can customize that neck a bit (extend the fretboard to 22 frets, and then I'm thinking of putting it on a fresh Mustang or Jag-Stang style body). |


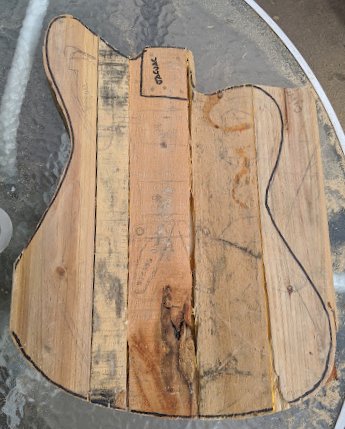 To save on the expensive Epoxy - it's about $66 for the stuff I use on Amazon from Epoxy Warehouse, and that's *CHEAP* for 2 big 2 liter bottles of the stuff - I cut the body BEFORE I do the fill - but I ROUGH the shape out, I don't complete it. This sometimes causes sections to split off - those sections are refilled with wood, and then glued together with a screw to clamp it in - and then those are rough-reshaped before the next part, which is filling with the epoxy.
 But just before epoxy, on some bodies, like the Prototype - I have to think about how it's going to look in the final build, and those bodies I need to plane the material flat enough so that the flood fill looks right, and everything ends up level (and I don't just end up submerging most of the body in epoxy - which looks a little ridiculous).
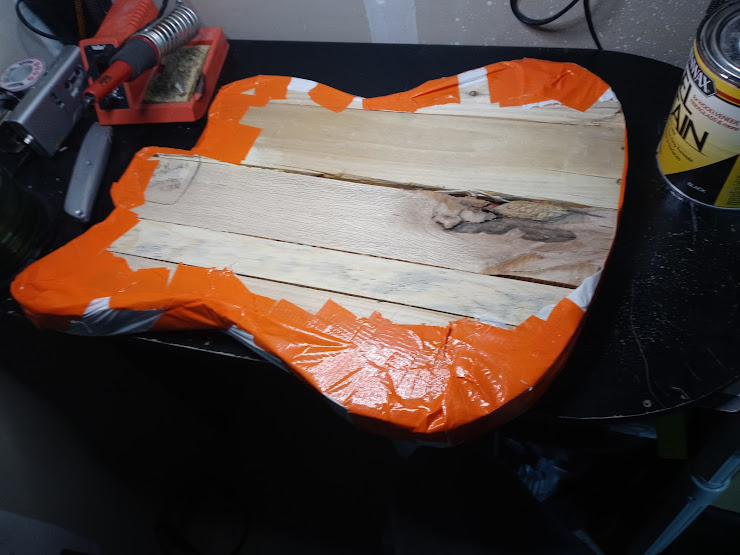 Then after all the pre-planing is done, then it comes time to build a dam - so the epoxy can fill the gaps and cavities in the body. For this first one, I used a cheap garbage bag, duct-taped to the back of the guitar body. I make sure to DAM up EVERY side of the body, with a little overlap at the edge, to make sure if I flood-fill and the body is not perfectly level, it can be re-leveled.
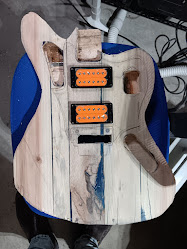
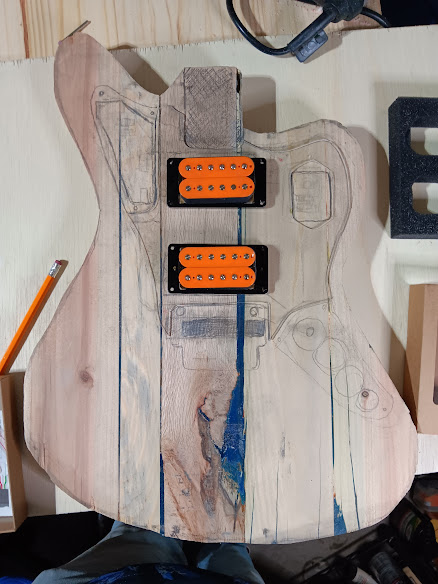
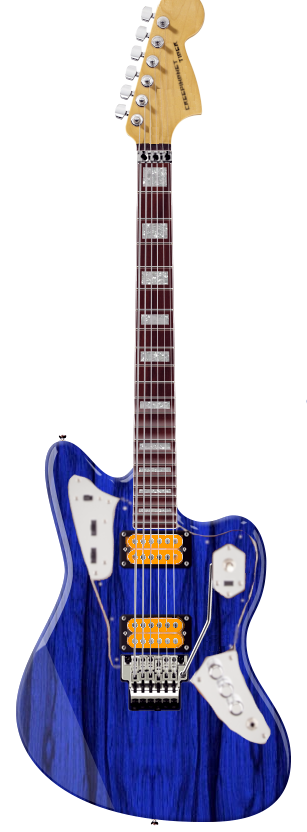 Now here's a little rant, why can't someone come up with a multi-purpose online-guitar builder with a Jaguar in it - like Kisekae - that actually, ya' know, has more options than the Fender sanctioned stuff. There's enough Johnny Marr and Kurt Cobain lookalikes out there that are 100%, why not....ya' know, make something in this style of guitar that stands out, looks different, does something different? Ya' know, inspire some advancements in design on the model, besides the same pile of vintage finishes, vintage pickup swaps, bigby swaps, hipster stuff, ya' know. See, here, we're building a Shredder. So after about 30 minutes mutilating images of a Cobain Jaguar and a mockup from the Halo Custom Guitars site - I came up with what is to the left. It's not complete, it's just to give a general idea what we're going for - a trans-blue stained guitar with weird areas of the body where transparent blue is visible through the body. That's right, Cobain/Jenner inspired wiring, orange pickups, black trim rings, detachable clear pickguard - I might go with gold hardware though, we'll see, and a lot of raw lunacy altogether. ALso, this ain't a Jaguar - it's a Tiger now. So not really a Panther, this one's the Tiger GT.
 One of the hardest bloody things about this acrylic stuff though, is tears through sandpaper like a beast. I have worn out most of the sanding drums on my drum sander on it. I'm thinking I need some more "coarse grit" stuff to help trim it down and refine the shape enough. But I did it. I took my 62' Reissue Jaguar - marked out the markings where the body did not line up, and then took my jigsaw with a really course bit (after burning up and bending a fine tooth bit), and chunked off the edges where they needed to be chunked off. So it's getting closer now. The orange pickups will look really cool on this build. Why did I need to refine the body? Well...the neck pocket was too wide, the treble side wing was a tad deformed and too chunky, same for the bass side and the bass side waist, and the bottom as well, where I also had orange duct-tape glopped into the acrylic on this one (remember, I poured the resin on this using a garbage bag to mask it off - the others used Duct-Tape).
 Now the garage smells of acrylic, maple, oak, and cedar - all at once, lol! I got the shape refined, the neck pocket is PERFECT now, but the upper horn needs a hair more adjustment, and so does the bass side a little bit, the bottom also needs some grinding down. I also see pockets in the body that will need more acrylic fill...so I'll probably start filling them with regular acrylic mix tinted LIGHTLY With blue, and then use JB Weld Epoxy after that to fill in the rest of the gaps. The resin will turn up cool colors once I finish polishing it. You can kind of see why I Chose to use a Floyd Rose here - because I wanted to showcase that GOREGOUS section of knotty wood on the top filled in with Acrylic, and a Mustang Trem or especially regular Jaguar tremolo would have covered that over. What's awesome though, is the FLoyd Rose will get extra reinforcement via the epoxy, so this one will make a GOOD Floyd Rose body for that reason.
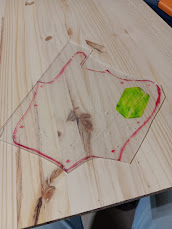
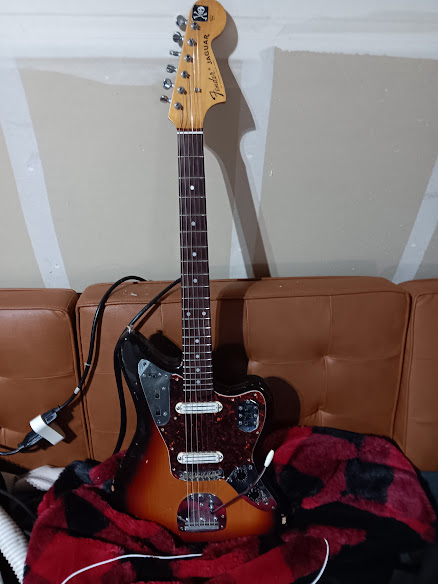 So (right) we needed to find a template, and the only Jaguar I have in my collection with a proper Jaguar pickguard on it at the moment, is "Betti" - the 1998 CIJ Fender Jaguar, of which the body was also used as a guide for this guitar. The nice thing about Fender Jaguars, is Leo Fender DESIGNED them to be worked on, so removing the pickguard was simply just remove all the screws, lightly loosen the strings, pull the bridge (let the strings hold the bridge on), and then pull the pickguard, and trace around it on the protective sheeting on the plexiglass.
 So unlike Cobain's guitar, we have to shift the bridge humbucker from the bridge saddles by about 1/2". Honestly, this makes little of a difference tonally, and if anything, will warm the guitar up a little bit tonally in the bridge position. The other thing is the neck pickup was used to guide the same way but opposite (topmost coil to the neck pickup). This also means when split, the guitar will sound pretty close to a regular O.G. Fender Jaguar. I also made sure to do it in such a way, that the walls of the pickup cavity are thick. This brings me to another design flaw I see on a lot of eighties shred-machine guitars involving a Floyd Rose....