
| FLOYD ROSE WHAMMY Another Data Dump On Guitar Tremolos |
||||||||||||||||||||||||||||
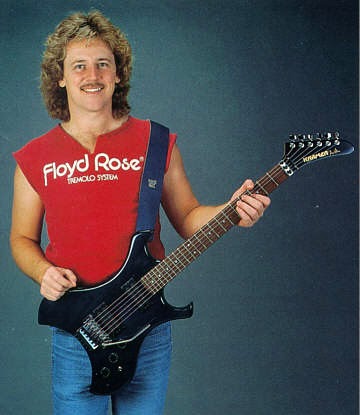 My first electric guitar - a red 1985 Kramer Focus 3000 - has an original German Floyd Rose on it, so I'm familiar with them. My relationship with Floyd Rose tremolo units has been a bit up-and-down, starting off loving it, then hating it, then loving it again, now I think we've hit a mutual, eh, understanding. See, the Floyd Rose is really an advanced piece of hardware, for advanced musicians, looking to use Advanced techniques. Also, I think 90% of my frustrations with it, was the lack of support it got in the 1990's (because of the 1990's discrimination against anything from the 80's.). My first electric guitar - a red 1985 Kramer Focus 3000 - has an original German Floyd Rose on it, so I'm familiar with them. My relationship with Floyd Rose tremolo units has been a bit up-and-down, starting off loving it, then hating it, then loving it again, now I think we've hit a mutual, eh, understanding. See, the Floyd Rose is really an advanced piece of hardware, for advanced musicians, looking to use Advanced techniques. Also, I think 90% of my frustrations with it, was the lack of support it got in the 1990's (because of the 1990's discrimination against anything from the 80's.).
Brief History This is a rough history of Floyd Rose I cobbled off of the internet from reading various articles over the last, er, 30 years or so. Anyway, Floyd D. Rose was playing in a Hendrix cover band in the mid 1970's, and was having a lot of trouble keeping his traditional STratocaster Tremolo in tune. So he took the metalworking skills he learned workign with Jewelry, making small metal assemblies, to create the first "Double Locking Tremolo" system. Basically, the balls are cut off the strings, and then they are clamped at the nut, and the bridge, to prevent the string, along it's scale length, from hanging up on the nut, bridge saddles, or having any other points of friction. If you're read any other pages on tremolos on this website (aka, vibratos, or whammy bars as they are often called (and more properly), you know that I'm an adept tech at these things. The #1 problem with ALL Vibrato units, even the Floyd Rose (albeit in a very different way), si Friction. Friction is the ENEMY. What you have is a device holding a set of strings at 80-250LBS of tension from pulling that bridge toward the headstock, suspended on metal screws, designed to pivot on said screws. On traditional systems, the strings also have to slide through a plastic/bone/brass nut, and then slacken and tighten around the tuning capstans when the bar is used. Also, string trees can introduce their own special kind of hell. The Floyd Rose eliminates this problem by removing the nut, tuners, and the strings on the saddles from the equation by basically clamping them at both ends. THis allows the strings (reminder - IF PROPERLY STRETCHED OUT FIRST) to stay in tune no matter how much of a raving lunatic you act like with the bar. The earliest Floyd ROse units went to - most notably - Edward Van-Halen, Neal Schon (Journey), and Brad Gillis (Night Ranger/Ozzy Osbourne), who to this day, collects early non-fine-tuner Floyds for their quality. Me being a big 80's rock fan, most of my record collection reads like a who's who of 1980's Floyd Rose equipped guitar players: Edward Van-Halen (obviously), Brad Gillis (again, Night Ranger), Neal Schon (Journey), Paul Dean (Loverboy & Solo), Rick Nielsen (Cheap Trick), George Lynch (Dokken/Lynch Mob), Phil Collen (Def Leppard), Robbin Crosby and Warren DiMartini (Ratt), Dave Murray and Adrian Smith (Iron Maiden), Kirk Hammett (Metallica), Elliot Easton (The Cars), Howard Leese & Nancy Wilson (Anne too actually - Heart), Chris Olivia (Savatage), Roland "Pat" Little and Tommy Thompson (HYTS), Dimebag Darrell (Pantera)....if they played heavy guitar stuff in the 1980's, they had a Floyd Rose most likely (and possibly that Floyd was attached to a Kramer guitar as well). As the 1990's started and Grunge Rock took over 80's Metal's thunder for a little while, the Floyd Rose dropped out of favor with Aquanet and neon colors. Even the company themselves tried to make some more traditional products such as the "Rail Tail" tremolo to stay afloat. Competitor Kahler pretty much died off, and everyone reduced their "shredder" guitars down to a bare minimum. The only guys I know of post 1990 using a Floyd Rose to any degree are Dimebag Darrell, Kirk Hammet, and that guy from The Toadies (yeah alt-rock kids....the guy from that band had a "Butt rock Tremolo" on his guitar, get over it). But as the 2000's went on, a slow growing undertow of 80's appreciative players, hard-rock and metal guitarists inspired by bands like Alter Bridge and guys like Herman Li of Dragonforce, as well as a comeback of 80's metal via bands like Steel Panther, put the Floyd Rose back into a period of common acceptance and spawned a new run of products, and many design improvements since then, not to mention much wider parts availiablity, including some new "upragdes" such as titanium parts, and large brass "sustain blocks" (which have an alternate purpose in my setups, hehe...).The Anatomy of a Floyd Rose Locking Tremolo Unit A Basic Floyd Rose setup includes the tremolo assembly itself, 2 "pivot posts" with or without sleeves, 2-5 rear springs (*), and a claw - those last bits like a regular Fender Strat type unit. But where it really stands out, is it has a metal Locking Nut at the headstock with 3 clamps for each pair of strings, and SOMETIMES a bar string guide that pulls the strings down over the nut. I shall now go along explaining each piece, purpose, and function. Tremolo Assembly Anatomy - The most visible part of the Floyd Rose system is the vibrato itself. It is pulled by string tension against 2 pivot posts, which is what the baseplate sits on. THe baseplate is a steel plate with 2 hardened "knife edges" that sit against the pivot posts, and has 3 allen bolts through the top attaching a comb-like spring for the fine tuners (if equipped), another little metal plate, and then the "inertia block" - a large, metal block, either cast or milled out of solid brass, pot metal, titanium, or some other metal. The inertia block is often now advertised as a "sustain block", especially the larger brass ones, and they come in lengths of 32mm (thin guitars like Fender Mustangs, Gibson SGs, Firebirds), 37mm (Recessed Trems on standard thickness solidbodies), and 42MM (Flatmount TRemolos ala Eddie Van-Halen or even Les Pauls recessed or flatmount). On top of course are six bridge saddles, they have a "fork" like section at the front that clamps the saddle down with a small hex screw threaded into one of three holes for each string in the baseplate. Each saddle has a second section that contains a little metal block, and a long hex-bolt that pushes the block against the string to clamp it. If the trem has fine tuners, there's also six thumbwheels on top of the back meant to allow fine-tuning after the nut has been locked and the "gross tuning" is done to the guitar. Licensed units can be told apart by the cast pot-metal inertia block (often slotted and cut differently than a regular Floyd Rose trem block), weaker metal on the knife edges (which often "mushrooms out" after heavy use and can't do the whole "Trem flutter" thing when floating that a genuine Floyd Rose can), and the part tolerances can be loose on some examples, such as bridge saddles that don't sit side to side properly, intonation screws that strip, or the spring for the fine tuners does not drop the pitch when the screws are loosened. Some notes on the Inertia Block - A lot of people focus on this part for the "sustain" properties but I myself focus more on the "cricket/chirp" effect popularized by guys like Brad Gillis of Night Ranger so I have the full gamut of Floyd Rose capabilities at my fingertips. Brad uses original, brass, non-fine-tuner Floyds from back before the company really took off, and you can tell those units are of amazing quality. Not sure 100% on what he all does or the difference, but here's what I found regarding getting that sound. I think the inertia blocks have a secondary purpose of which they are named for originally - INERTIA. Basically, you hit the bar, and there's this big metal weight under the bridge that adds inertia to the tremolo - causing it to swing back and fourth rapidly, leading to that crazy warble effect. However, the block is not the only part of it, but it can be a help. The bigger/heavier the block, the more weight there is to pull backward on the strings and make the guitar warble like that. Tremolo Bars - Floyd Rose uses two types of Tremolo bar attachment styles - screw in, and threaded collar. There might be some other variants with a push-in bar, but threaded and collared are the two most common. The original style was threaded, which had a bolt with a teflon washer that went through the baseplate, and had a semi-crunch nut sort of nut on the bottom that locked the internally threaded hollow bolt to the baseplate - into which the bar screws. 80's players who had this design likely had input into the later design. If you've ever watched Van-Halen or Ratt playing live, you might notice their tremolo bars swing around while they play loosely, which for some players with a tight fast style (a big thing in the 80's) makes it hard to be very accurate or quick with the bar (ever noticed how Brad Gillis or Paul Dean have their bars stabilized), it also does one other bad thing - it DEADENS the ability for the tremolo to do the whole 80's shredder "trem flutter"/"Cricket"/"chirp" thing because to have that functionality requires you to have the bar TIGHT so it's not dampening the movement of the rest of the assembly. An attempt to cure this that appeared in the 1990's was the newer "Collarerd" style bar attachment scheme. Basically, the bar now sits in a threaded bolt that is held into the hole on the baseplate via press-fit friction, and a small allen screw the same size as the locking nut screws that allows for adjustable tension of the bar as well as retains the bar's attachment. This is now the most popular method and it keeps the bar tighter. Some import bars however, get the tolerances wrong, and it has the same effect as a loose screw in bar. The Pivot Posts - These are two hardened steel posts the hardened steel baseplate sits it's two knife edges against, set about 43mm apart. The earliest posts were just VERY coarse thread wood screws that screwed directly into the wooden body and had a "flathead" screwdriver slot on the top. Later on, these gave way to a metal threaded bushing/sleeve that is press-fit into the body of the guitar. It's been said this was to prevent the problem seen on some guitars (Kramer Focus 3000s being one of them), where the pivot posts caved into the bridge pickup cavity. More recently, there's an option for a metal brace to press-fit into the original holes for the vibrato unit to pivot on to prevent this behavior even moreso (I built my own out of aluminum stock and pressed in a pair of modern Floyd Rose Special pivots). The best design I've used so far are the newest Floyd Special posts which are quite affordable, and seem to work even with licensed trems pretty well. I have a set in my old red Kramer, it warbles like a newer Floyd Special, even though I've been hammering on that thing for 30 years. The newer posts use hex-head adjustments. Licensed units usually have coarser threads, some are good (such as those on my Jagmaster which came from a Guitar Center Floyd Rose II kit), some are okay (like those on my Explorer's Musiclily Floyd II kit), and some are crap (like those that come with those no-nae knockoff questionably "LIcensed" chinese units, they are kind of thin). The reason the Floyd Rose pivots were the best, is because of the angle by which they pivot, and how it's cut and polished smooth. One thing of note with Floyds is to try and keep any adjustment with the bridge under tention of these pivot posts to a minimum! It's a great way to wear out the pivot posts and knife edges on the baseplate and cause the trem either not to return to zero when floating, or at least cause it to be incapable of warbling like I mentioned before (Which I like to do). The springs and claw in the back are setup to counteract the tension of the strings. If you want a more traditional setup 2-3 springs are the usual, but I tend to go with just 2 springs when I can get away with it with a lot of tension. This makes for a looser feel and more flutter. However, reducing the springs means the other strings will bend flat when doing bends. I don't do double step bends much on a Floyd Rose so it's not an issue for me (I use my offsets for that), but for some people, it drives people crazy. It's these kinds of problems that lead to the invention of the "Evertune" bridge (which isn't a vibrato but uses a similiar mechanism to keep strings in tune relative to each other during string bends). Locking Nut - The locking nut is attached to the neck on a "shelf" behind the line to the first fret. It attaches either via 2 threaded hex bolts through the back of the neck (most 80's guitar setups), or screws to the top with two small wood screws. Each string is clamped at the nut in pairs - with E/A sharing the first two, D/G sharing the middle two, and B/E sharing the higher of the two. The clamps stop sthe strings from moving through the nut, eliminating a space of friction entirely. One of the least understood elements though, is the "bar string guide" placed behind the nut. The purpose of this piece is to pull the strings down against the locking nut base fully as they go toward the tuners. Without this, when you clamp the locking nut, strings will go sharp, causing tuning problems. However, it is not needed on ALL Guitars. A Lot of Gibson-oriented ideas Floyd Rose uses are aimed at leveraging the headstock tilt rather than requiring screwing an extra piece of metal into the headstock. Now, let's get to the practical stuff...stringing up a Floyd Rose guitar....Restringing and Setting up a Floyd Rose - the full shebang First, you need to know what kind of Floyd Setup you have. If you have a "Decked" setup (the tremolo sits against the body, or something under it, say a drilled out 1971 quarter perhaps ;), you don't really need anything. IF you have a "floating" setup (the bridge sits on two posts and the bar goes up and down), you need to find some way to prop the back of the tremolo up. Likely something soft, rubber coated, or otherwise non-damaging (unless, like me, your guitar has some gnarly gouges and damage, then be my guest, I've used everything from 9 volt batteries to a diagonally placed Screwdriver to hold the darned thing up on my legit reliced old Kramer at this point). Once the bridge is propped up, you need to remove the three blocks on the locking nut. This makes restringing easier, trust me. Now, we move to loosening the strings, I usually do it just enough to uncoil them from the tuners, then I unclamp them at the saddle using the saddle clamp screws and a allen wrench (same one I used for the nut locks). I usually do one at a time to keep from having to deal with a messy nightmare. By now, if you're use to more traditional trem systems, you've noticed the strings don't have ball ends on them. Thats because they are cut off, this spurs a great debate among techs and guitarists - how in the actual heck DO I install my strings? Because there are two schools of thought on this....
Personally, I do either/both. But the thing you have to understand about method two is it can put some mild wear on the strings, and you run the risk of kinking the strings when running them to the body end. So it's very important when using that method to keep the holes in the machine heads INLINE with the string path, so that the string is not rubbing on he tuners, putting burrs on the hole (the wound strings), and so that the strings themselves are not rubbing against the edges of the tuner holes either. The benefit of this is you can leave the excess string on with less poking risk, and it's faster in general to get a guitar strung up fast. I believe Edward Van-Halen's guitar tech did it this way. I have a book called "The Guitar Handbook" and it's very clear that Ed still has the ball end of his High E string on the 5150 in the photo in there. If it worked for Eddie, it works for me. Clamping in the strings is simply doing a 90 degree angle with about 1/4" of string bent, and then clamping the string ends into the bridge saddles. On older Fine Tuner Floyds, like original german ones like my Kramer has, it's a good idea to maybe set the fine tuners all the way DOWN, so that the saddle blocks don't fall out of the bottom of the saddle and end up clamped with limited movement for fine tuning. This also applies to some import bridges as well. Once the strings are installed, you might want to tighten them up just enough to seat them and get A pitch (but not full pitch), but still be loose enough to pull the tremolo back away from the pivot posts if you want to save wear and tear on them. Do all your usual setup measurements (if you do it that way), or if you're like me, you'll tune the guitar up, test, tune back loose until you can pull the bridge back, then lower/raise, tune-up, and retest. Another thing is if this is a new installation and you had no choice of WHAT FLoyd Rose to buy, you might end up with the strings higher on the outside of the neck. The standard Floyd Rose fretboard radius is 10", though some come in 12" (Gibson) or 14" (modern shred guitars). To set the saddle height if say - you are putting a Floyd on an older Fender neck...say maye you put a Floyd on an already cut up Duo-Sonic, and want to match the original neck radius of 7.16", you can buy little 8mm shims that will raise the saddles up to the height you need them to be to conform to the neck radius. I ahd to do this to my Jagmaster because it was a 12 or 14" Floyd and the neck is a 10" radius. Wound up with a very fast guitar and stupid low action XD that way. Once all that is set, then I tune up to pitch, adjust the claw if needed (until the bridge is FLAT - 90 degrees perpendicular to the pivot posts - ie. level, if floating), and then begins intonation setting (if needed). This is done by loosening the hex bolts on the bridge plate slightly, tuning the string down, and rolling it back. Remember Flat=Forward, Sharp=Back - use a quality tuner to do this. If you get it right, that thing is gonna' sing. After that's done, I retune after putting all the fine tuners at halfway so that when I need to adjust them, I have some room to go up or down in pitch. Usually I do a once-around afterward. Then comes string stretching, I usually do this before reinstalling the nut clamps. Honestly, I try to get it to stay in tune without the nut locked, since if it does that, it's really going ot stay in tune with the nut clamped. After that, I clamp the nut. Then I do some minor fine tuning with the fine tuners, and I'm done. Floyd Rose Lifehack(s) One exploit of the system I've used, when I Was really poor, and could not afford new strings on the regular, was to wrap a BUNCH of string around the peghead (don't do this with other bridges), and then set it up so that if the string broke near the saddle, I could let out a little more string and reclamp. I did this with my old red Kramer for a really long time. Rather than keeping spare strings, I just used most, if not ALL of the string I bought. Sure, they were dead as hell, but dead strings is better than no strings in my case. Floyd Rose Versions (and my thoughts on them)
|


