1990 MITSUBISHI/MGA CS-2722R REPAIR & RESSURECTION |
 WARNING: I AM NOT IN ANY WAY, NOR DO I MAKE ANY CLAIM TO BE, A TELEVISION REPAIR EXPERT. I AM A ENTRY LEVEL, MAYBE INTERMEDIATE AT BEST, ELECTRONICS TINKERER WITH VERY VERY MINOR TELEVISION REPAIR EXPERIENCE. WORKING ON CRT TELEVISIONS CAN BE EXTREMELY DANGEROUS IF YOU DO NOT KNOW WHAT YOU ARE DOING. THIS INCLUDES HIGH VOLTAGES STORED WITHIN THE PICTURE TUBE (WHICH ACTS AS A CAPACITOR) IN EXCESS OF 40,000 VOLTS (though often low current), AND AN IMPLOSION RISK IF THE PICTURE TUBE IS BROKEN - SOMETHING AKIN TO STEPPING ON A LANDMINE OR A SHRAPNEL BOMB. THIS IS MORE OF A DIARY/JOURNAL THAN AN ACTUAL "HOW TO".
Now, with that mandatory disclaimer out of the way.... This is my sole CRT Gaming set as of 2023, and I've done quite a bit to it since I got it in July 2020 from a guy named Gene in the north valleys of Reno. I have decided to document everything that has been done to the set since I got it. Getting the Set - The set was put in a Craigslist Advertisement as "2 Retro Gaming TV's Free for Pick Up". The other set was a Maganavox which I used until someone knocked it over and destroyed the RF output section in 2022 - ripping it off the circuit board, as a result. This set was the "nicer" of the two but it had been sitting out in the elements for god only knows how long. When I got it, it had stickers and sticker residue on it, a missing control panel cover, a fractured power cord, and it would not power on once I patched the power cord back together. Something to really remember is this poor thing had sat next to a giant pair of Bass Guitar or PA cabinets outside for awhile.....so you know what to expect later on.


Initial Inspection - Since it would not turn on, I figured that the problem was likely just a fuse. Now, that could mean it'd probably catch on fire if said fuse was replaced or some other catastrophic event, but highly unlikely. But opening it up, my god, I figured it'd be a miracle if this thing even worked at all. It looked like a flood survivor set, mud, sand, dirt, cobwebs, caked everywhere. But if Shango66's YouTube channel had anything to say about it, that honestly don't mean jack shit. That guy's snagging TVs from the Nevada desert all the friggin time compared to me, and some of them actually do come out working. So there was some home - very little - but some hope.
Fuse is Good
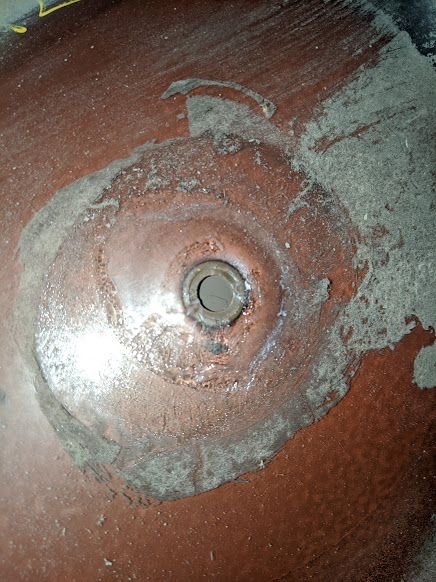
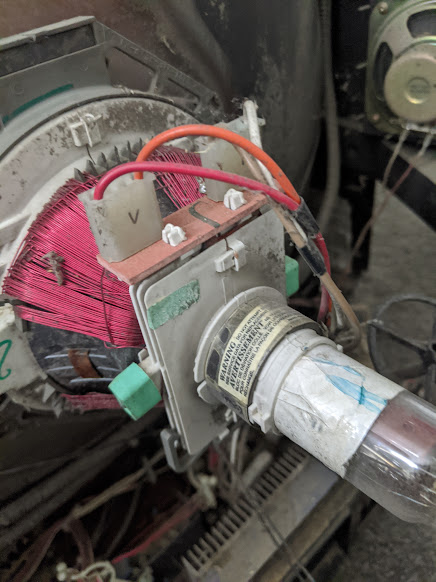

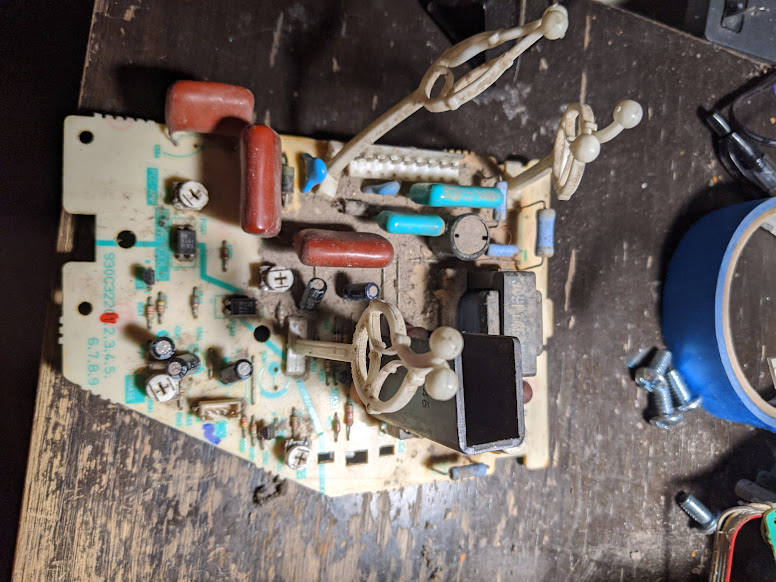
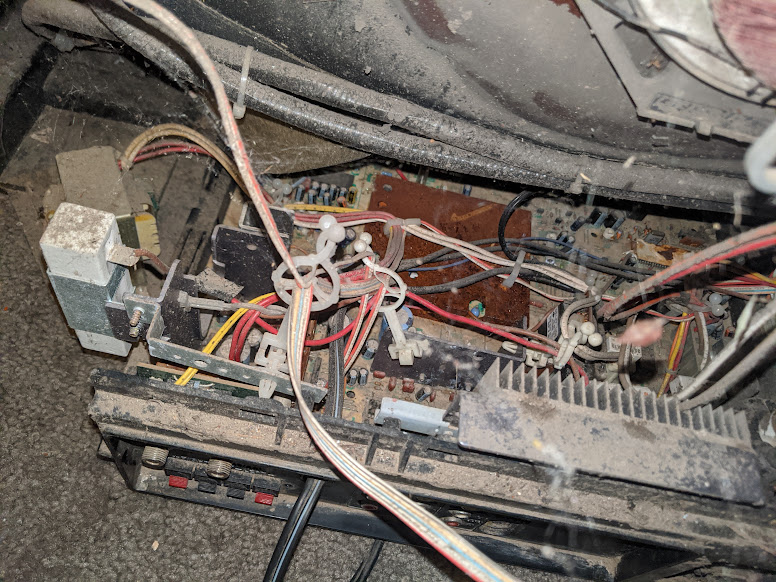
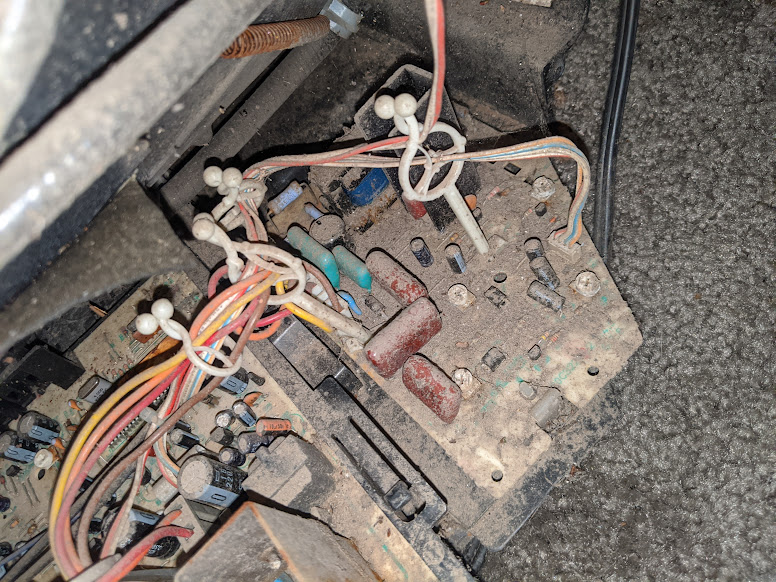
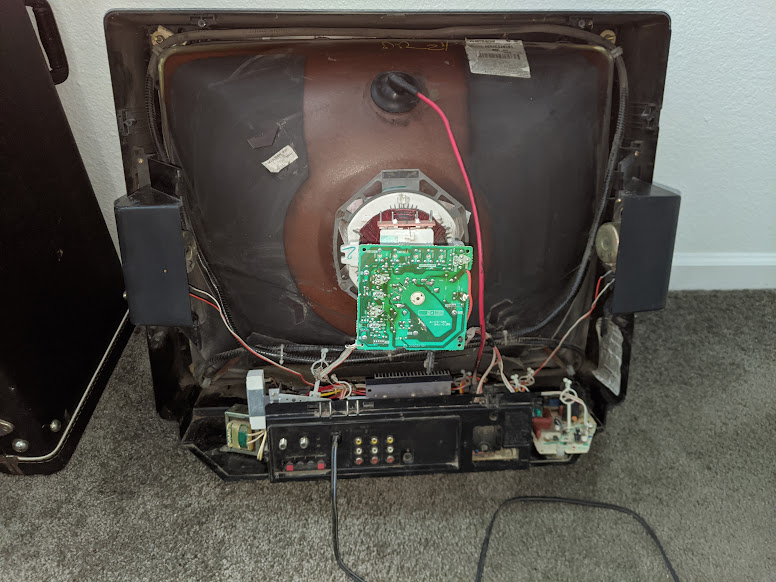
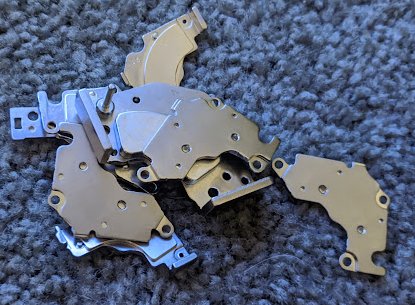
Second Dissassembly - I took everything apart. The first part of course being picture 1 - the Anode Cap. THIS is the scariest thing to deal with on these old TVs - that bloody Anode Cap. I did not have a proper discharge tool, so I made a "redneck discharge tool" using 2 Hibatichi skewers taped together with duct-tape with the tapers acting to "lock" them in plaace, then wrapping the end in aluminum foil tape with an aligator clip and a wire. I connected that aligator clip to the ground plane of the TV per what most service manuals - since I can't find a bloody TMB chassis manual anywhere, and then tapped that anode underneath, and of course, no sparks. So I tried at least 5 times to discharge, just to make sure there was nothing in there that could bite me. After that, put on some gloves, angled the anode cap, removed it, and we are in the clear now. Next was disconnecting all the other random shit, including 2 molex connectors going to the neck of the tube (!?! - picture 3), the Degaussing ring that goes around the tube back, the power cord (it has it's own molex connector, great, I can replace it at some point), the speakers to the audio board, a ground wire, and a few other things, plus taking wires out of all these plastic guide rings, and I had it out per picture 2 and 4. Picture 5 is the audio board, I set it aside so I could resolder the loose capacitor on the back of it - some big film cap that had completley cracked solder joints. All the photos above are my reference photos from that disaassembly session. I also removed the neck board, which was surprisingly really clean.
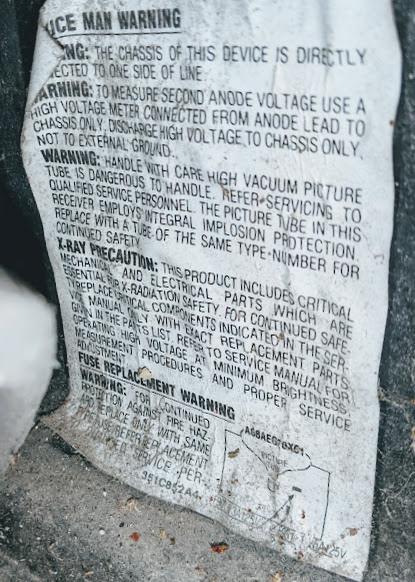

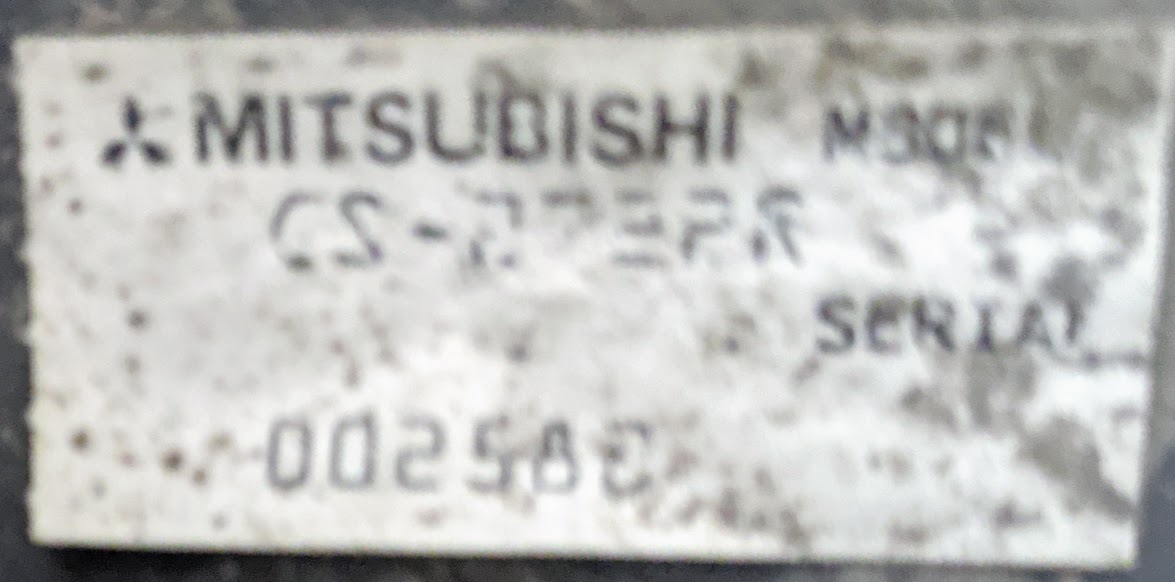
Labels and Stickers - I'm not 100% sure this is a 2720R, IIRC, I used photos on google to find a picture of the exact TV and that's what I went by. However, the model/sticker on the picture tube says what looks like "CS2732R" - a model number I could not find anyway, so maybe it's just the model of the picture tube. The original model/serial sticker seemed lost long ago. Service Label - One important piece of information is this indeed a "live chassis" set, so the "ground" side must always be live. This is also an important clue after we turn it on, since it does some pretty funky stuff, lol. Tube Label - Tube type is A68AEG20X01 - which is a 27" picture tube, by Mitsubishi. I don't think it's a "Diamond Scan" but it sure is a crisp little bugger.

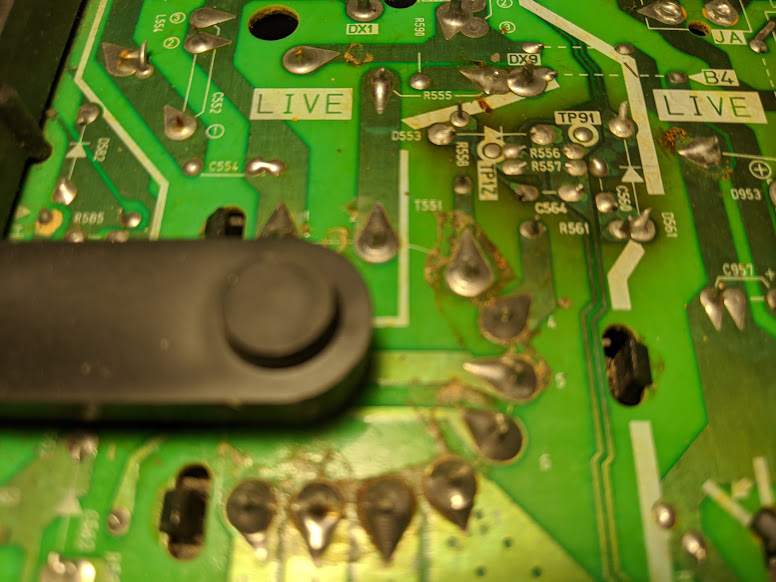
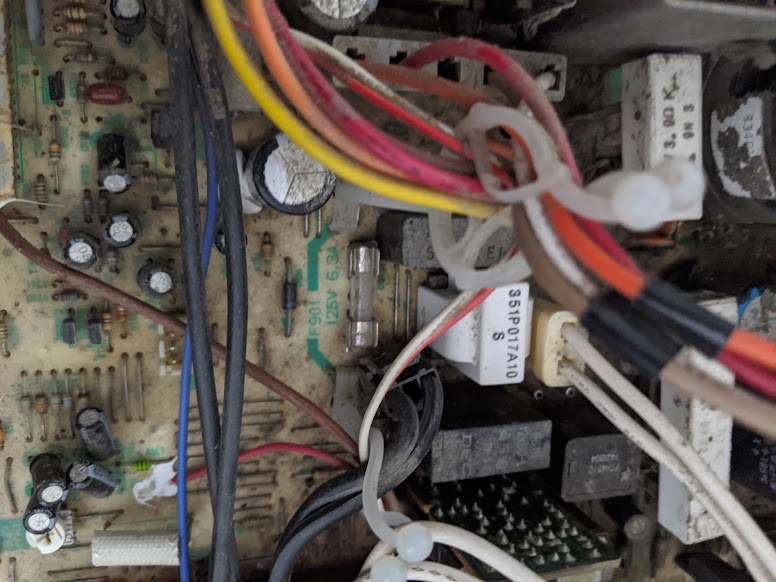
What Actually Fixed This Thing - How this TV ended up repaired was this part of the crazy journey. Basically put, the TV had a lot of cold solder joints, cracked solder joints, and solder joints where there was almost nothing, if anything left, holding the component on the set. Most particularly notable though was a 4-pin relay a bit above the second "LIVE" Label from the left on the bottom quadrant of the board. When I saw this, there were not one, but TWO cracked solder joints - so I hit it with the soldering iron. I then checked around the flyback, knowing high voltages run through this thing and it must have taken some wear and tear. So I soldered all the lugs back in with fresh solder. I also went around and touched up some other points on the board to make sure that things would be connected all across the board. Basically, if it looked cracked, missing, or like it was so corroded no electricity would pass through, and I caught it with my eye, then I'd touch it up or resolder it completley. Result were some really nice, clean, shiny new solder joints in the TV.
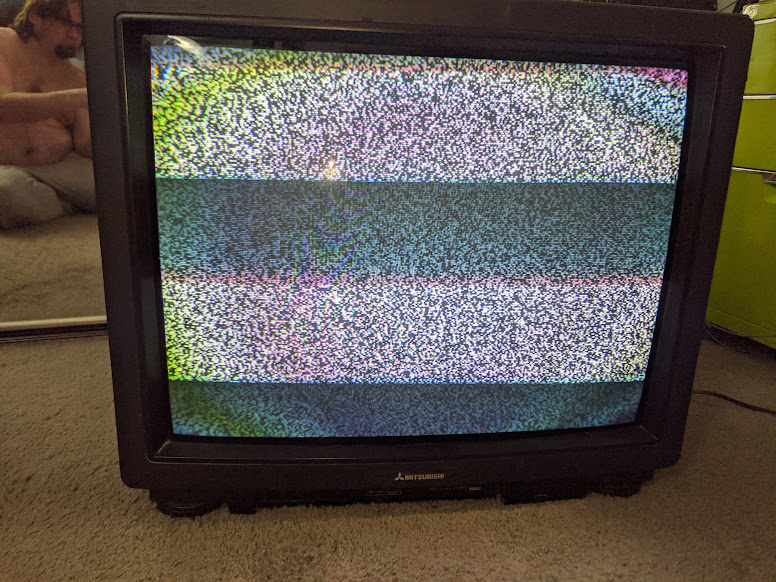
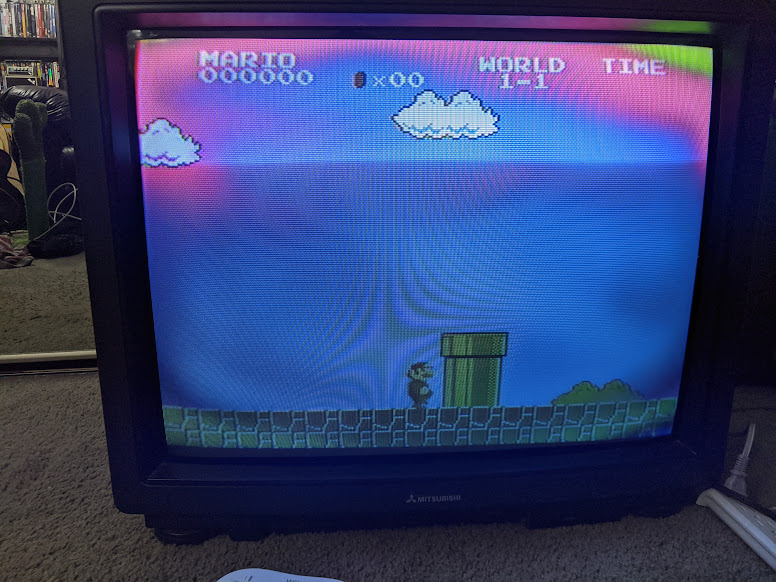

Hornets, and The Trials and Tribulations of Manual degaussing - So the TV was turned on the very first time after reassembly after the above, I hit power, and I could hear it coming up, and see it coming up, a nice, bright, crisp raster! It literally looked low hours already, but of course, there was all sorts of weird discoloration all over the screen. This seemed a bit odd to me because obviously there's a Degaussing coil going around the back of hte picture tube. You'd think that'd be enough to correct it, but it seems not to be the case. I did reconnect it, so I know it's there, but I don't think it's working very well. Running the NES through it really showed just how f***ed up this thing was. I think I spent a collective of about 3 hours of my life trying, and having some pretty decent-ish success, degaussing the screen manually with a pile of disused Hard Disk magnets I just happened to have laying around. It got a little better, but it did not change the other thing bugging the heck out of me, a constant buzzing noise that gets worse as the screen gets brighter. Basically put, put on Pac-Man, no noise, put on Mario, some noise, put on the Wii main screen....BZZZZZZZZZZZZZZZZZZZZZZZZZZZZZZZZZZZZZZZZZZZZZZZZ! As you can see in the third picture of Dragon Warrior IV, it looks great. That's because of what I did months later when I had a wild hair. I tried in vain to avoid buying a degaussing wand! So instead, I took one of the big Celestion GK-85S Speakers out of my guitar cabinet, and used THAT to degauss the screen, and that worked. It wasn't perfect, but I was roughly about 95% of the way there now. Of course, periodically, I'd have to touch it up with those hard disk magnets. Here's a few other oddities, I ran the TV for several months for retro-gaming and youtube watching, and I found a few things a big, uh, strange....
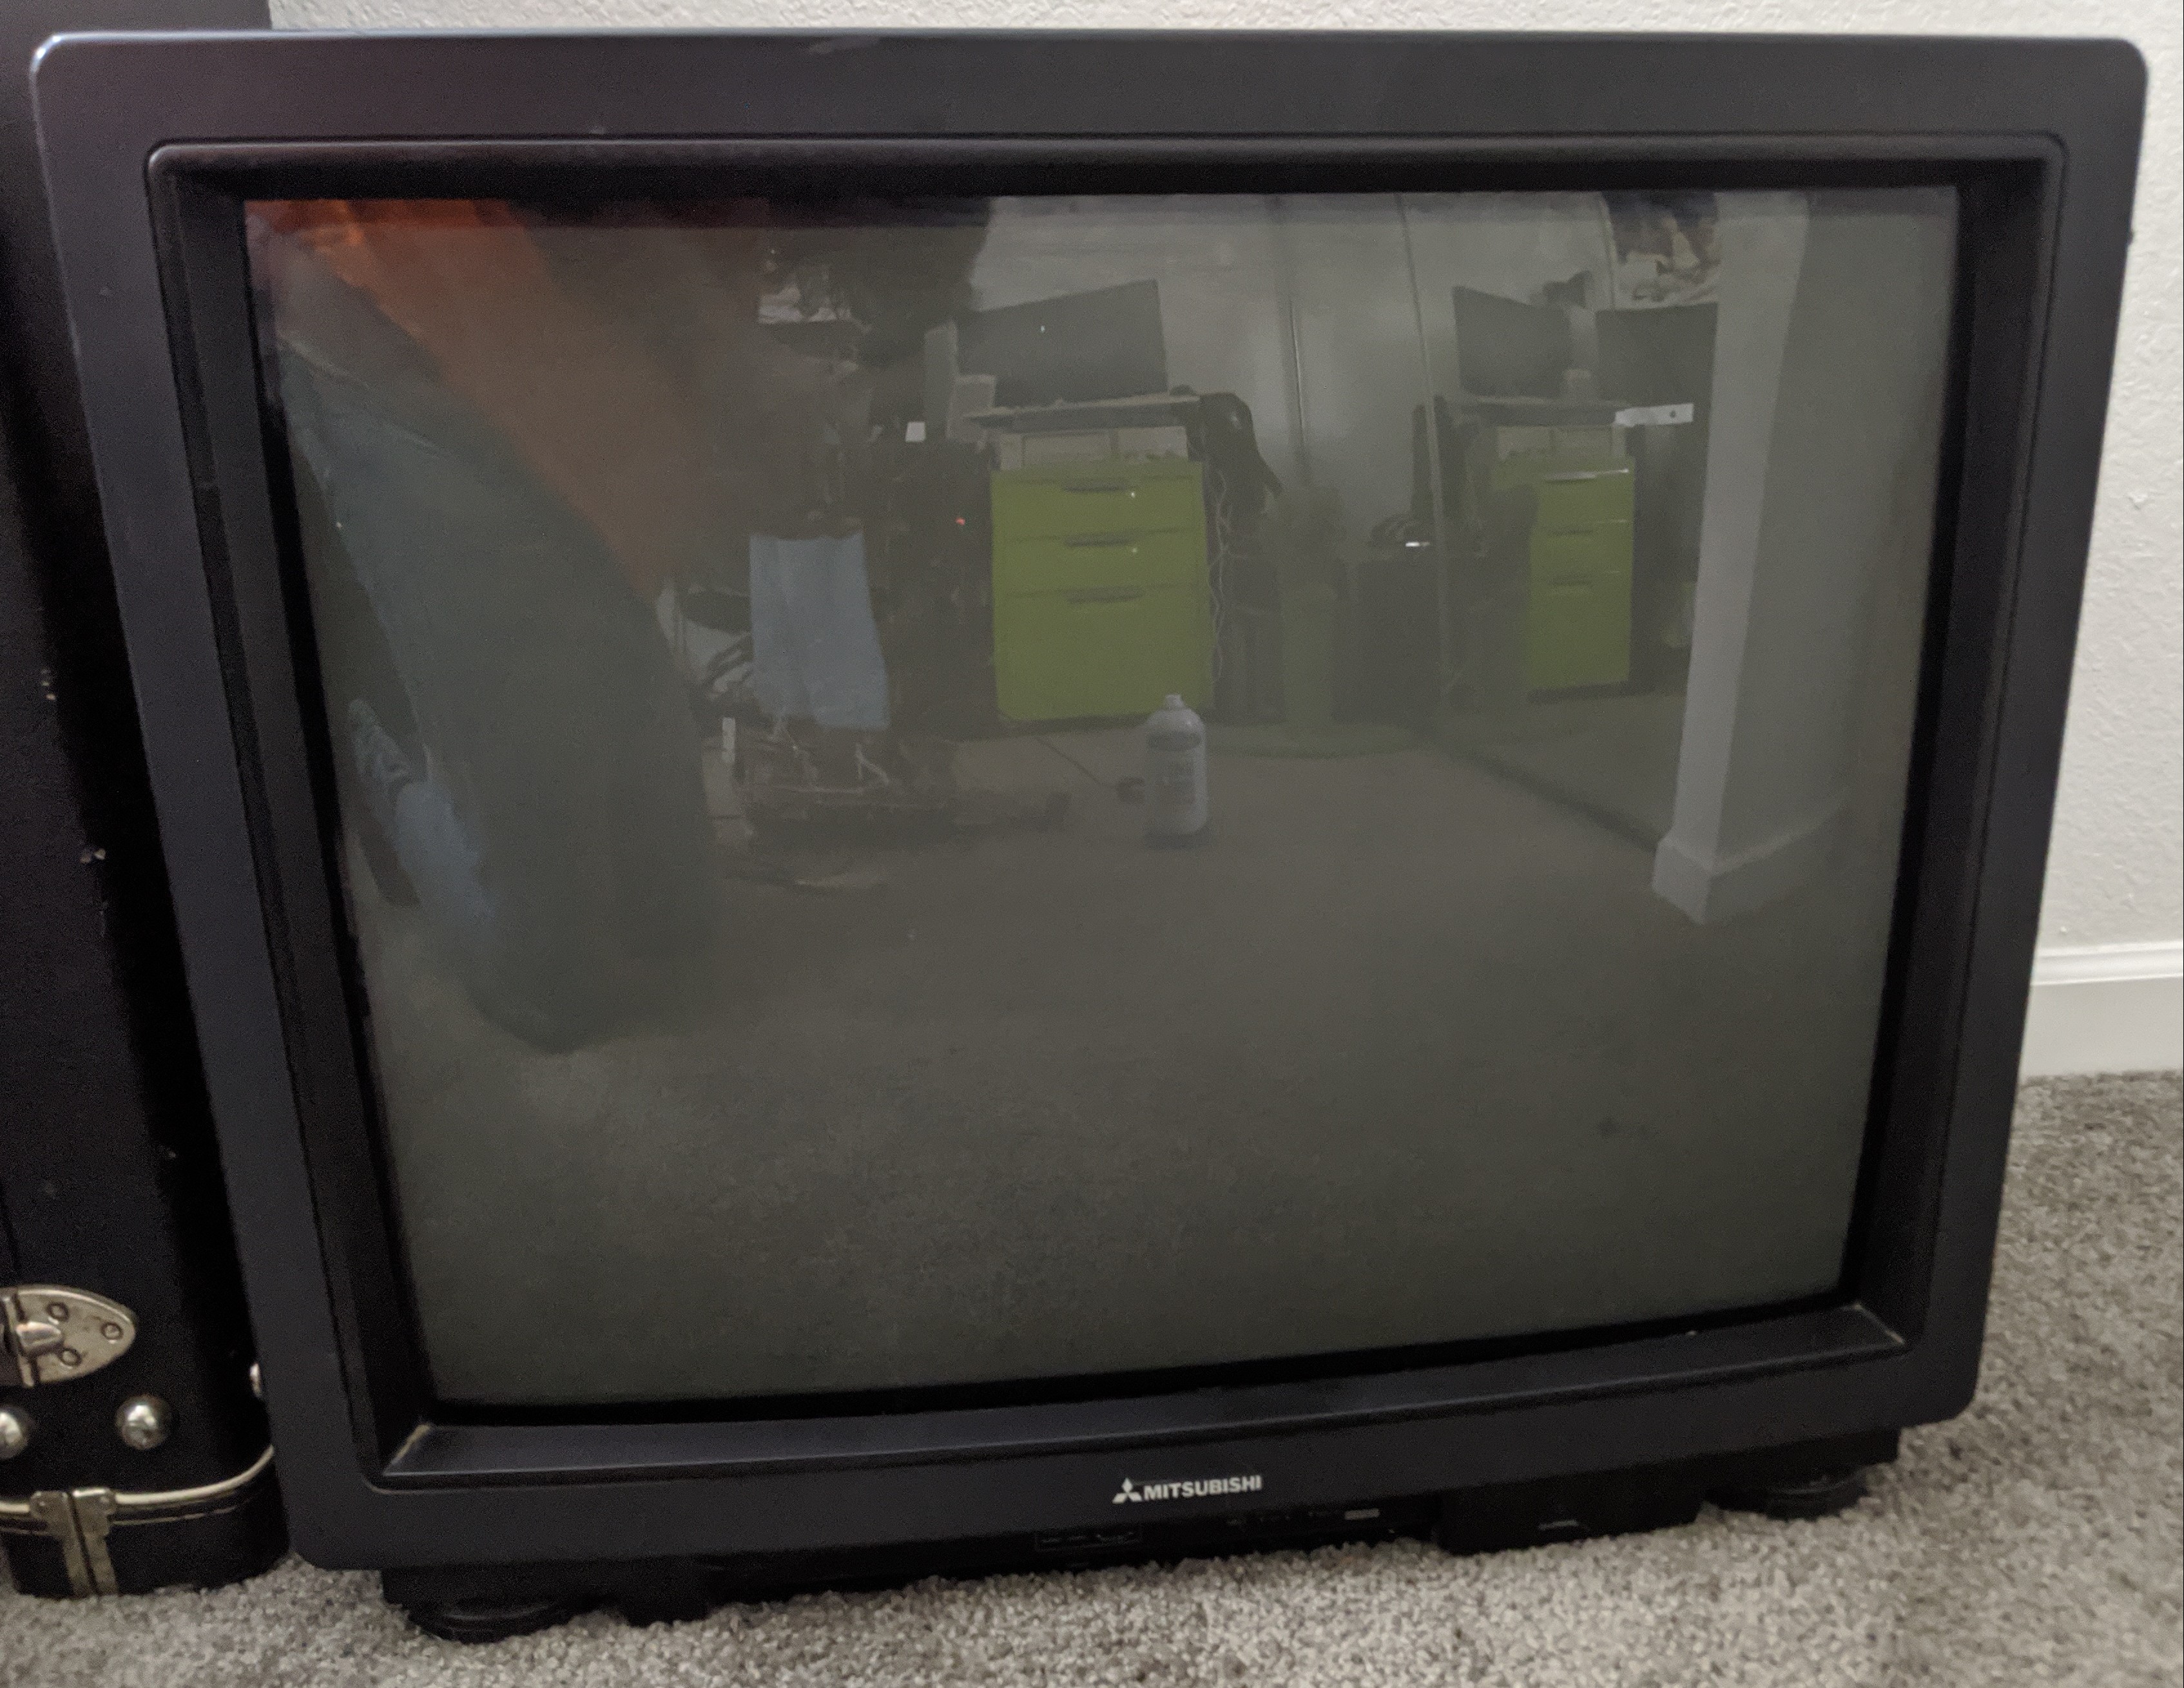
Round 2 - May 2024 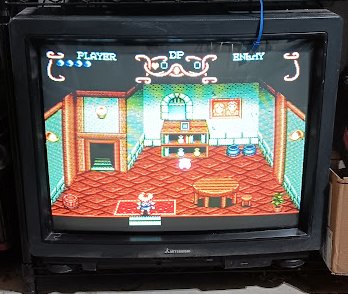 So in late 2023/early 2024, I finally pulled the "bishi" out of storage and started getting to work on it again - this time in my garage. It lives on a big rack with the Compaq and the Tandy 1000A now, so I can record with those three machines later in the year (when they're not weathering piles upon piles of sawdust and crap from my guitar building). As we can see to the left, it's working now, the Degauss is working PERFECTLY on fire-up and no longer do I need to take a friggin Celesion out of my Amplifier to degauss the TV by hand (nor invest in a Degaussing coil). So that's a very nice improvement. To the left is me playing Illusion of Gaia on it on the Wii through a SNES Emulator - looks really nice huh? That said, it did not cure the buzzing (though it's a little better now). I also replaced the power cable with one from some kind of Sony product I used to have going by the looks of it - so now it has a nice, new, un-damaged power cable, with proper polarity, and apparently, that must have taken care of the live chassis nature of the set because I no longer get shocked by rearward connectors.

I replaced the power cable with one off of some old Sony Product I believe. It's really sturdy, shorter than the original, and better made, and better keyed. I have the lines wired up properly too, so it seems that's resolved our "shock" issue in tandem with the soldering below. I used the original Mitsubishi strain relief and it looks 100% factory. Surprisingly, the candle that spilled inside the TV did not hit the circuitboard anywhere - it only got the back plastic, so that's all cleared out. The big Capacitor I'm pointing to is now what we belive to be the culprit of the buzzing, so a recap might be in this TV's future to ease up on the power supply, though it does not buzz as much as it used to after touching up those solder joints in the areas I highlighted below. 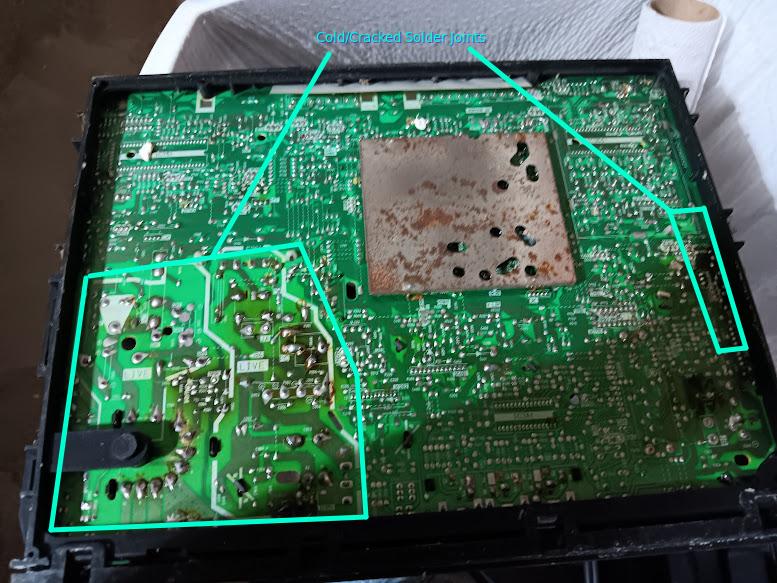
The solder joints in the areas I highlighted above have been touched up. I had some cracked solder joints near the flyback, around the high voltage area where the big cap is (near the center), and along the side where I think some of the input signals go. I might have more to do later on this, but so far, it's made a massive improvement including now power-on Degauss works so now the screen looks bloody amazing! The buzzing has reduced quite a bit, and the video signals are looking a little sharper than they used to - though some geometry adjustment might be needed due ot a stronger signal. I've been playing Illusion of Gaia on it in the garage on the Wii. June 4th 2026 - Getting back at it...plus correction...  I was looking through old photos of the set which is still in my garage and has been asleep for months, and found one of the actual Model tag, and I think I must mention this is not a 2720R, it's a 2722R. Over on the left is a picture after I fixed the Degauss circuit in 2024. However, I've completley "remodeled" my garage and now want to move the TV upstairs to the livingroom possibly, maybe next to our modern TV. However, for me to do this, there are some things I'm going to want to do to it before it takes residence in the livingroom. So here's a list of the tasks... I was looking through old photos of the set which is still in my garage and has been asleep for months, and found one of the actual Model tag, and I think I must mention this is not a 2720R, it's a 2722R. Over on the left is a picture after I fixed the Degauss circuit in 2024. However, I've completley "remodeled" my garage and now want to move the TV upstairs to the livingroom possibly, maybe next to our modern TV. However, for me to do this, there are some things I'm going to want to do to it before it takes residence in the livingroom. So here's a list of the tasks...
After that, the plan is to hook it up in the livingroom next to our modern TV possibly so that I can run my 2600 and NES into it. We will wait on that first. The Buzzing is all that needs fixed now though. I think it properly discharges because it's been 3 years since I've been shocked by anything on it after running it awhile (meaning Caps are properly discharging on power-off), no more tri-color ball when turned off (also sign of properly discharging capacitors), no more flicker, sputter, or weird behavior. I gamed on it for hours upon hours now and the only bothersome thing is the buzz it makes when the screen is bright. Once that's solved, this TV is ready to rock! And with the picture quality of this era of Mitsubishi, that's really nice. It's like a giant PVM, which is something most retro-gamers would want to kill for. |